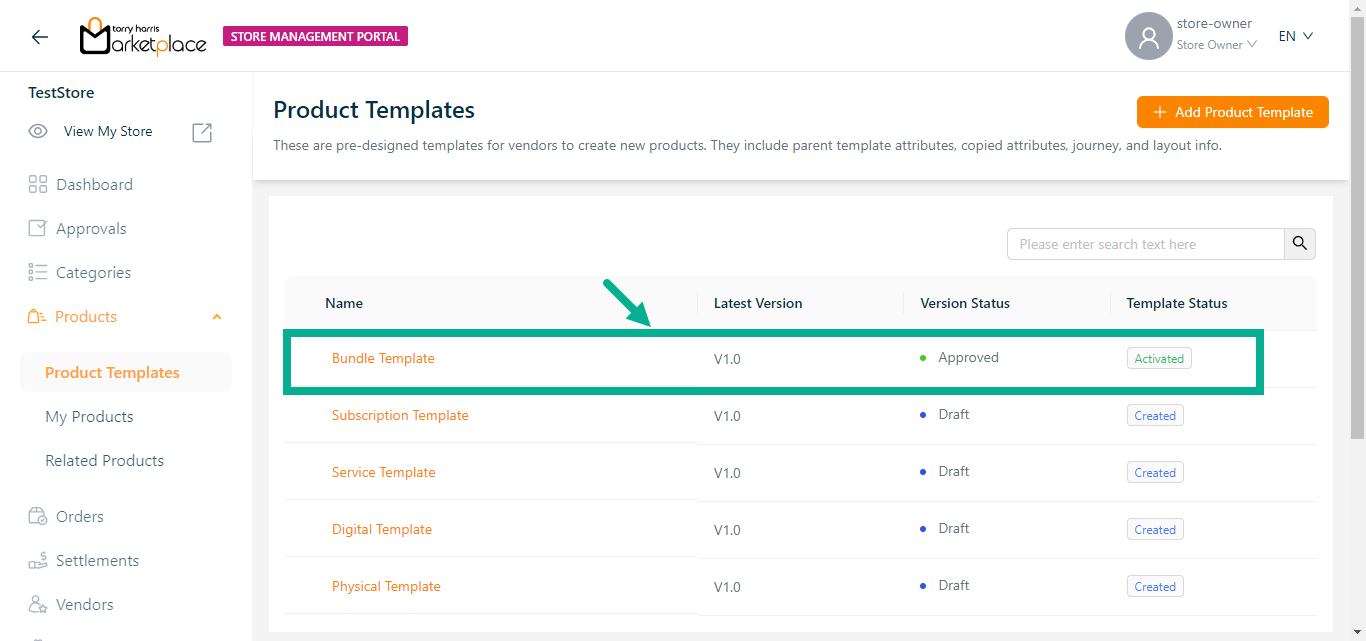
Product Templates
Product templates are outlines for creating products. Product templates describe the fundamental properties of products that can be created.
Before entering the data in the various fields, please review the Field Validation section that is associated with the last sheet.
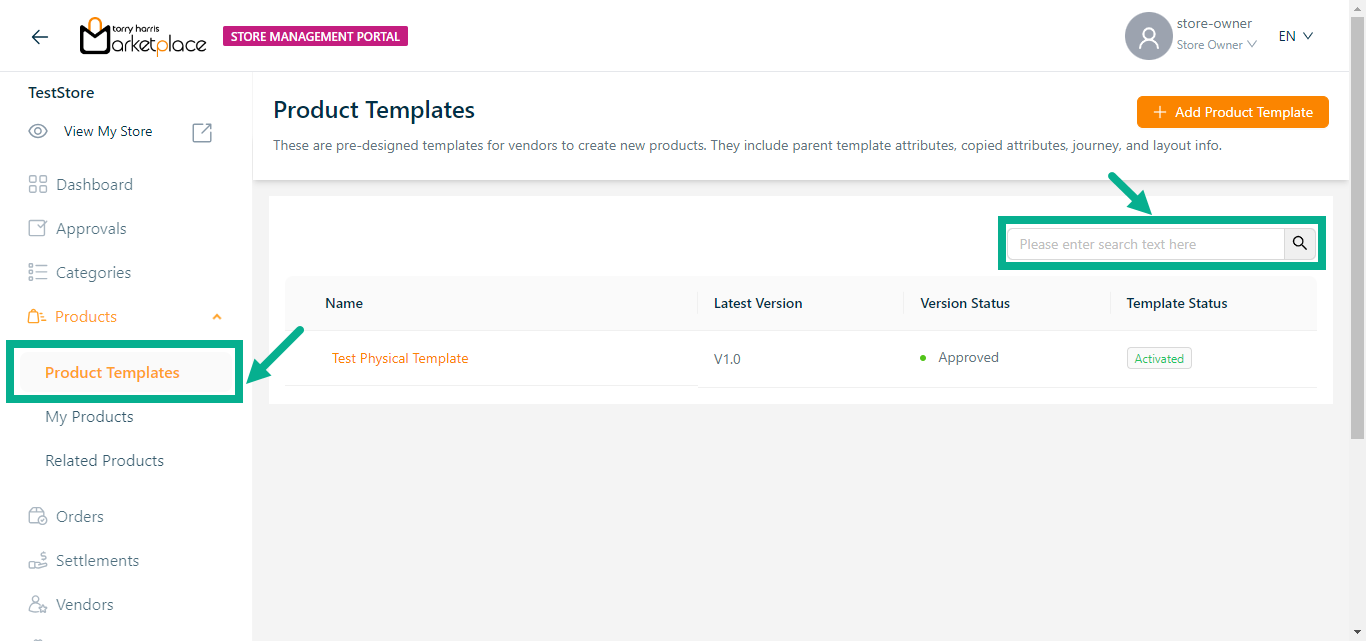
Use the search function to filter certain product templates.
Adding a Product Template
Adding a new Bundle Product Template
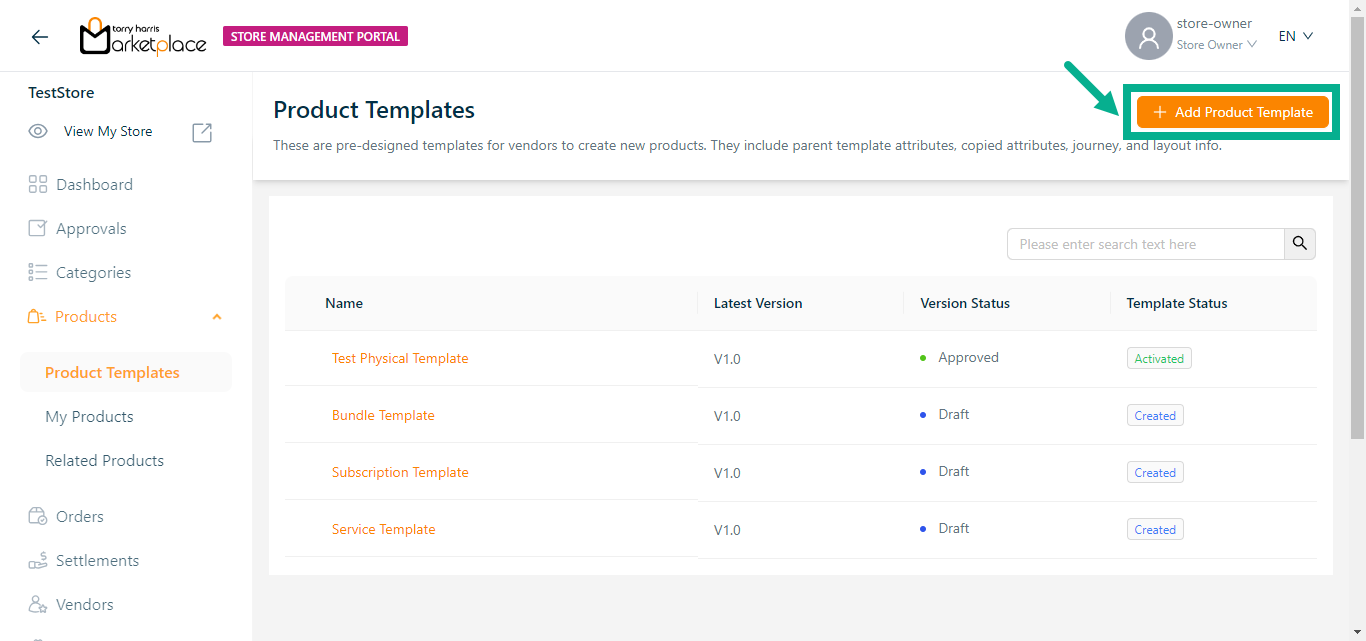
- Click Add Product Template.
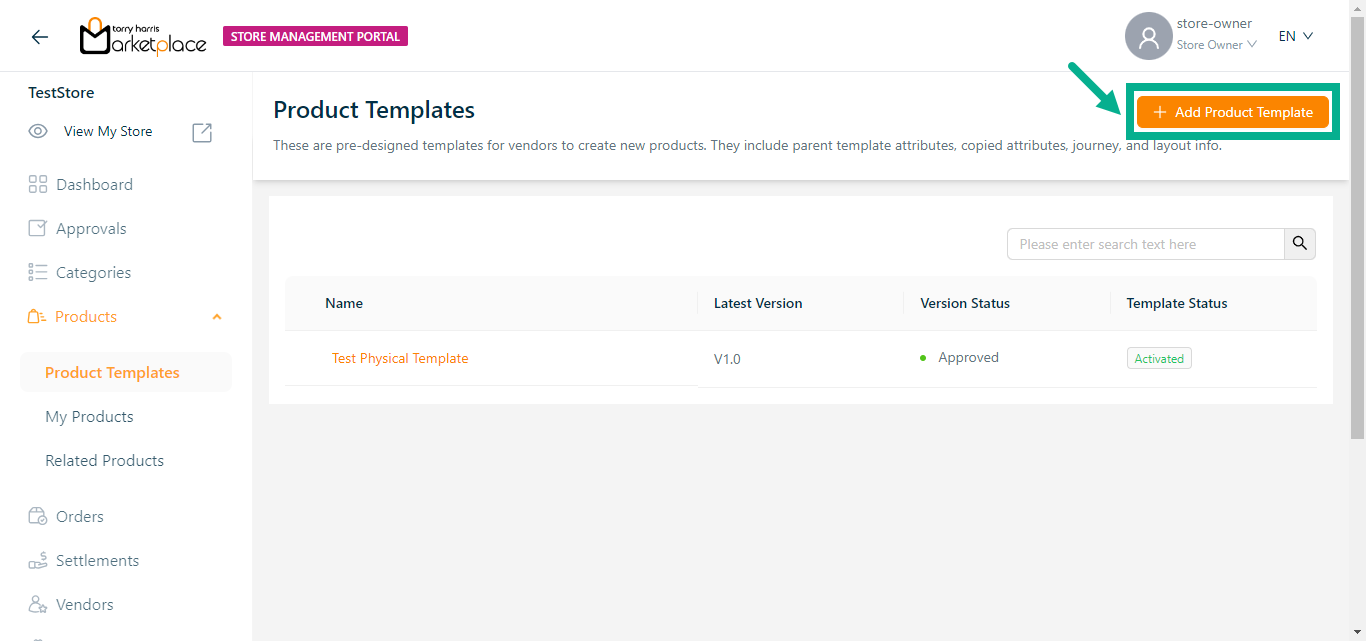
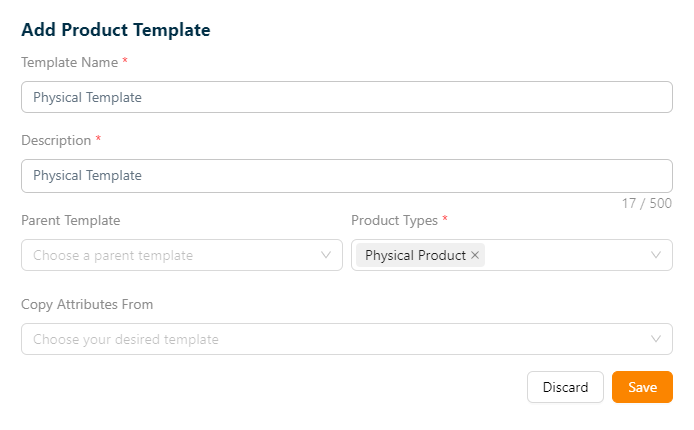
Add Product Template screen appears as shown below.
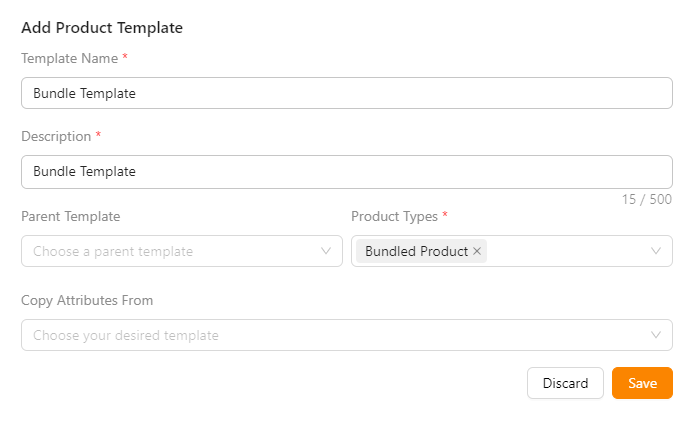
Enter the Template Name and Description.
From the drop-down menu, pick the Parent Template and Copy Attributes From if necessary.
The templates must be approved/active status in order to be shown in the "Parent Template" and "Copy Attributes From" dropdowns.
From the drop-down menu, pick the Product Types as Bundled Product.
Click Save.
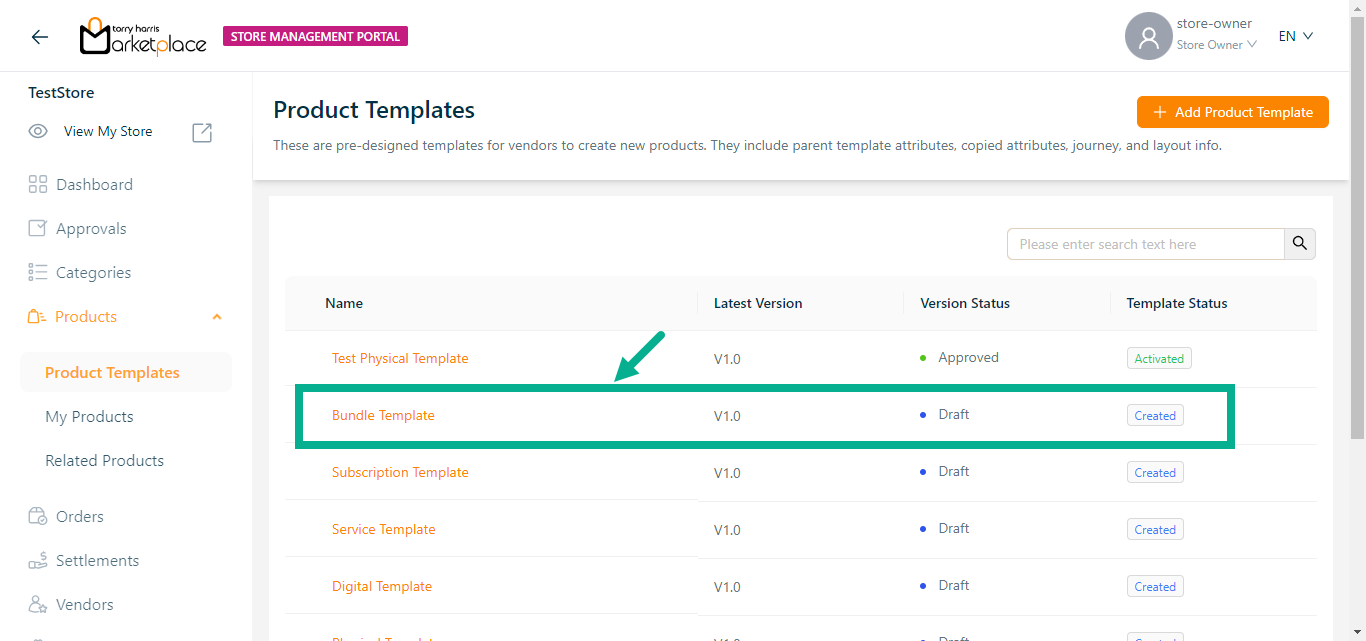
On saving, the confirmation message appears as shown below.

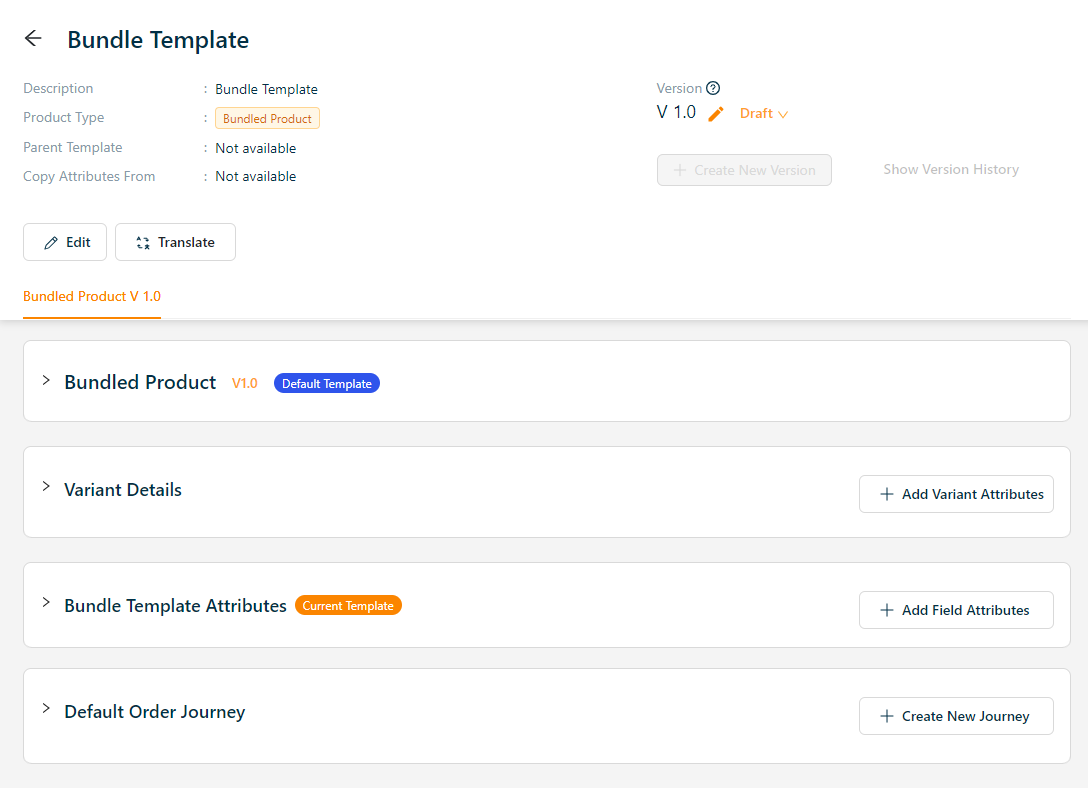
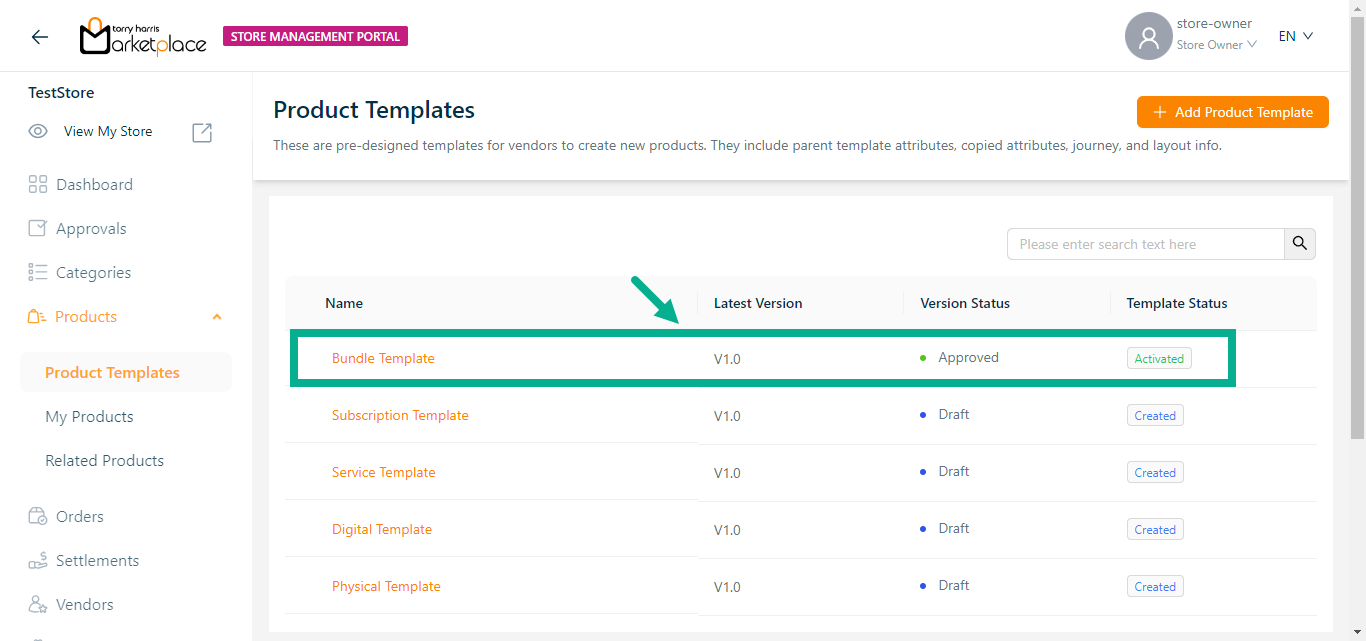
The newly created product template appears as shown below.
Adding a new Subscription Product Template
- Click Add Product Template.

Add Product Template screen appears as shown below.
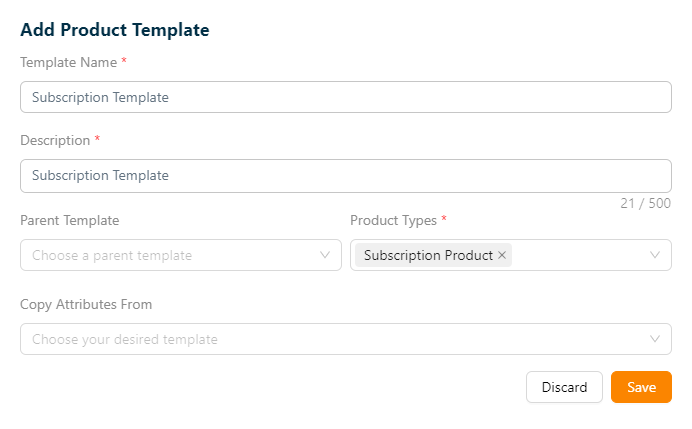
Enter the Template Name and Description.
From the drop-down menu, pick the Parent Template and Copy Attributes From if necessary.
The templates must be approved/active status in order to be shown in the "Parent Template" and "Copy Attributes From" dropdowns.
From the drop-down menu, pick the Product Types as Subscription Product.
Click Save.
On saving, the confirmation message appears as shown below.
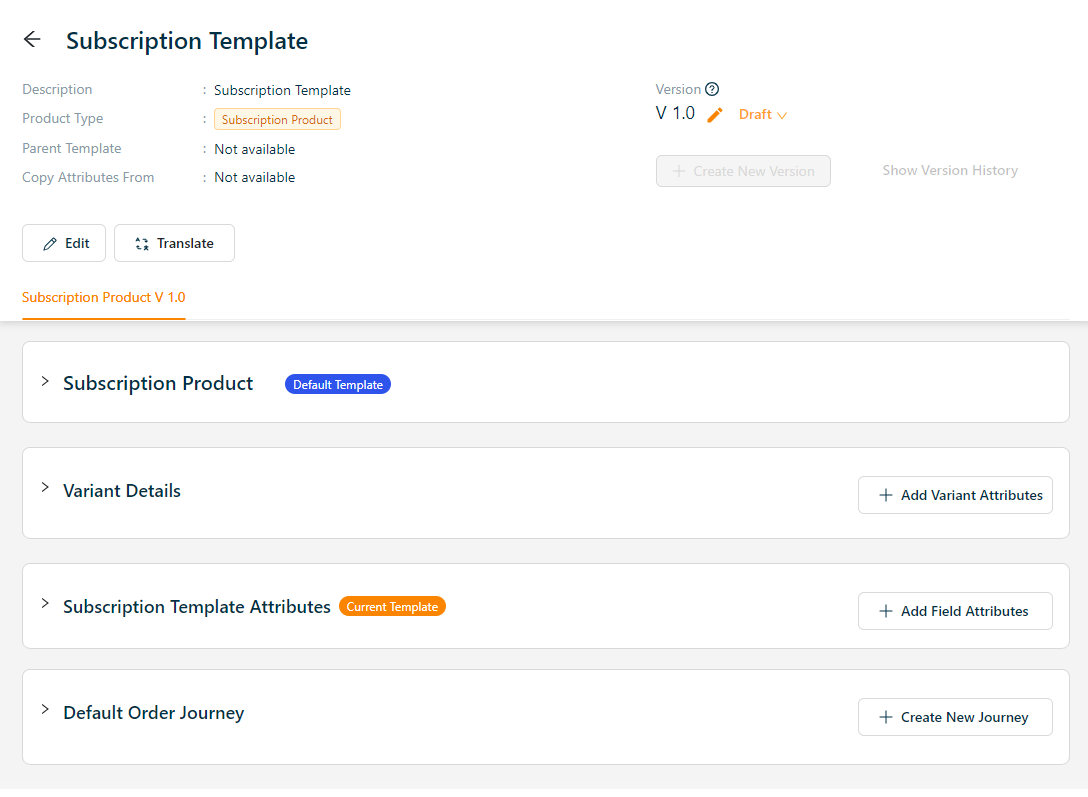
The newly created product template appears as shown below.
Adding a new Service Product Template
- Click Add Product Template.

Add Product Template screen appears as shown below.
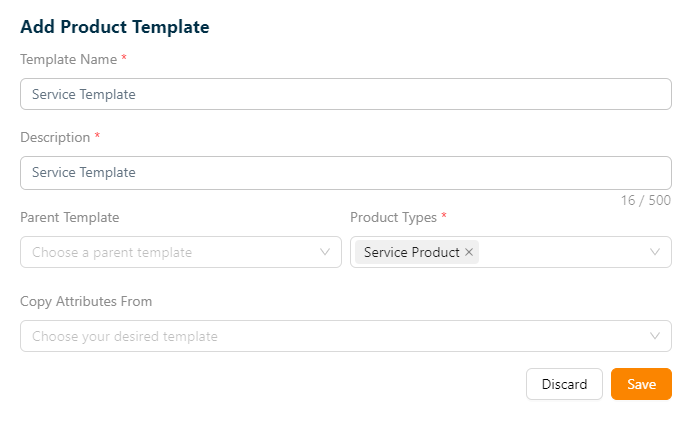
Enter the Template Name and Description.
From the drop-down menu, pick the Parent Template and Copy Attributes From if necessary.
The templates must be approved/active status in order to be shown in the "Parent Template" and "Copy Attributes From" dropdowns.
From the drop-down menu, pick the Product Types as Service Product.
Click Save.
On saving, the confirmation message appears as shown below.
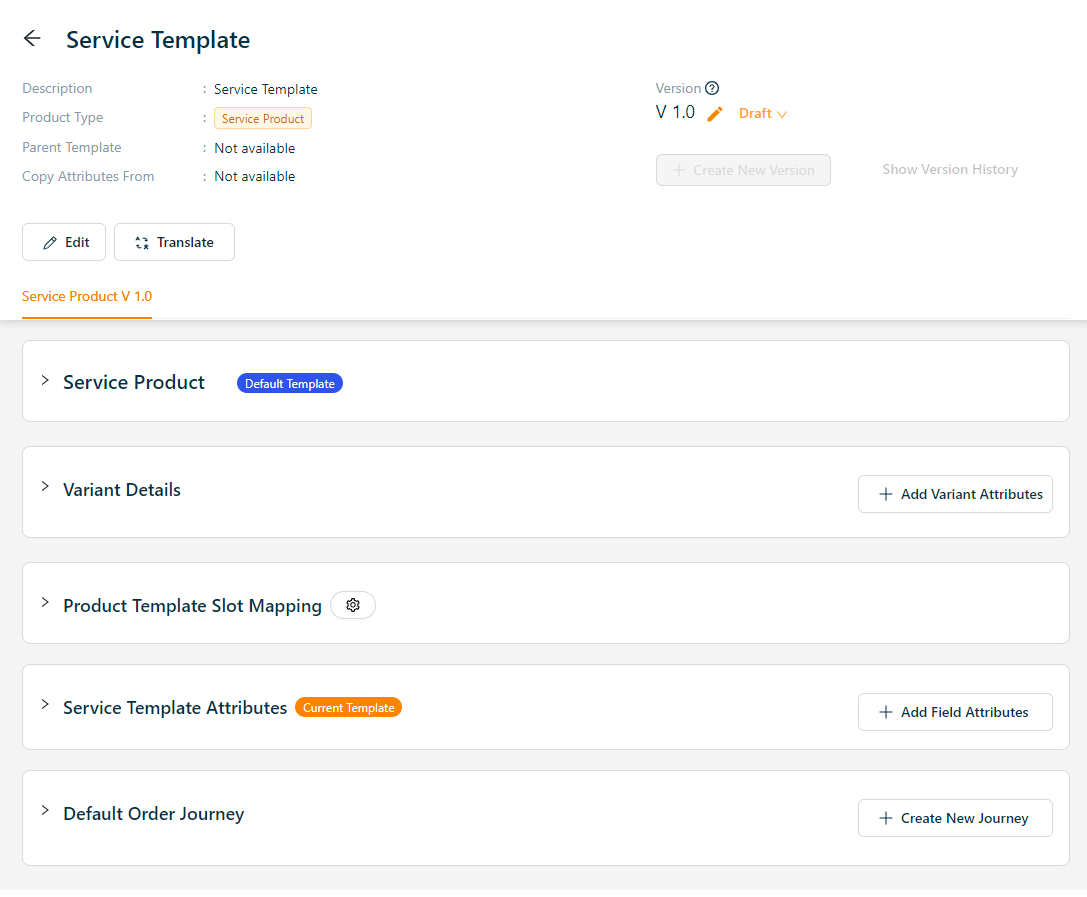
The newly created product template appears as shown below.
Adding a new Digital Product Template
- Click Add Product Template.
Add Product Template screen appears as shown below.

Enter the Template Name and Description.
From the drop-down menu, pick the Parent Template and Copy Attributes From if necessary.
The templates must be approved/active status in order to be shown in the "Parent Template" and "Copy Attributes From" dropdowns.
From the drop-down menu, pick the Product Types as Digital Product.
Click Save.
On saving, the confirmation message appears as shown below.
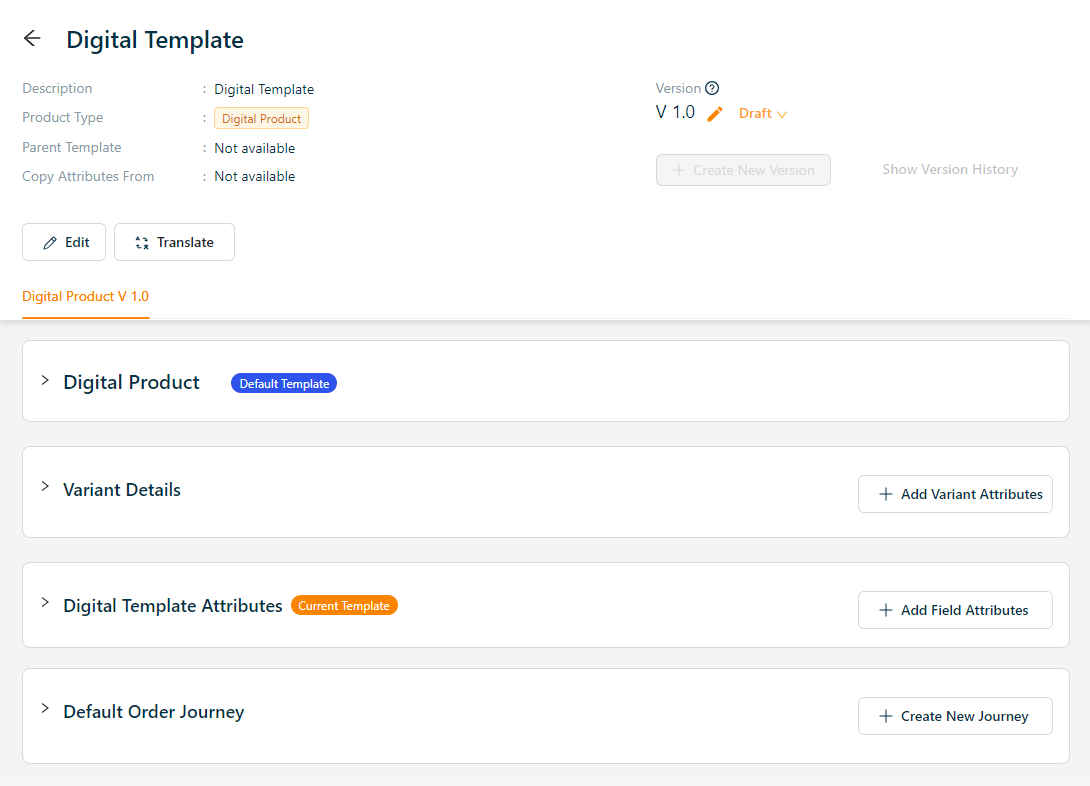
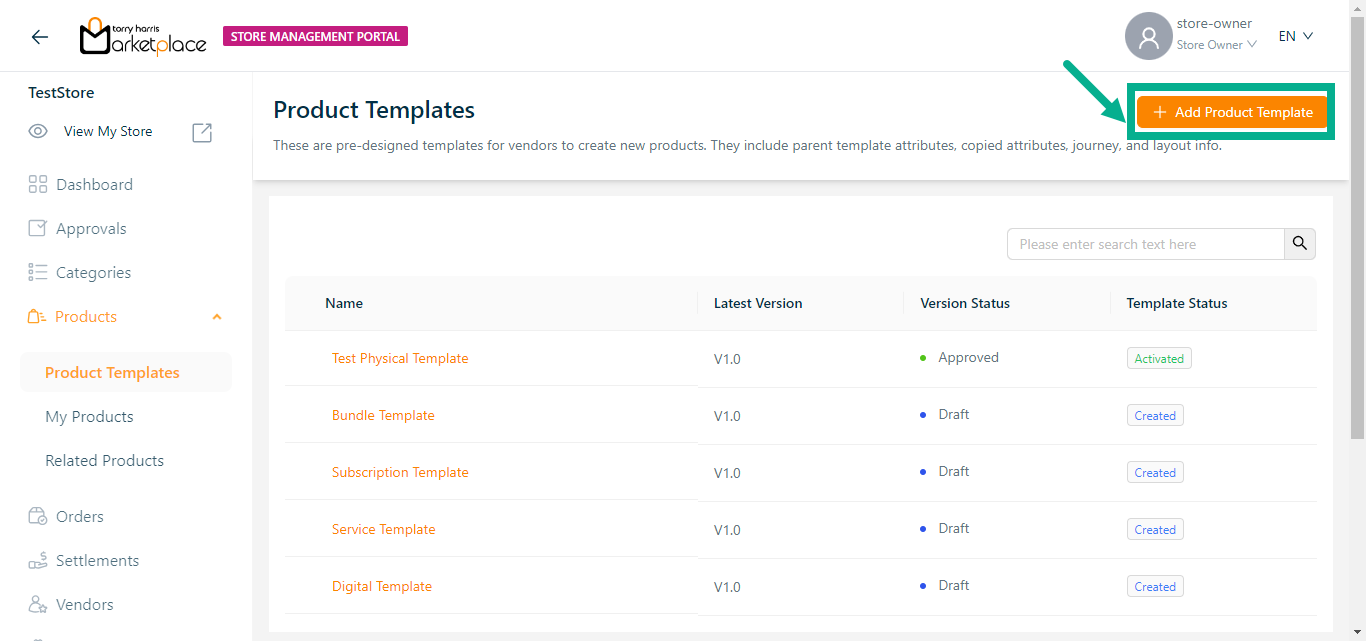
The newly created product template appears as shown below.
Adding a new Physical Product Template
- Click Add Product Template.
Add Product Template screen appears as shown below.
Enter the Template Name and Description.
From the drop-down menu, pick the Parent Template and Copy Attributes From if necessary.
The templates must be approved/active status in order to be shown in the "Parent Template" and "Copy Attributes From" dropdowns.
From the drop-down menu, pick the Product Types.
Click Save.
On saving, the confirmation message appears as shown below.
The newly created product template appears as shown below.
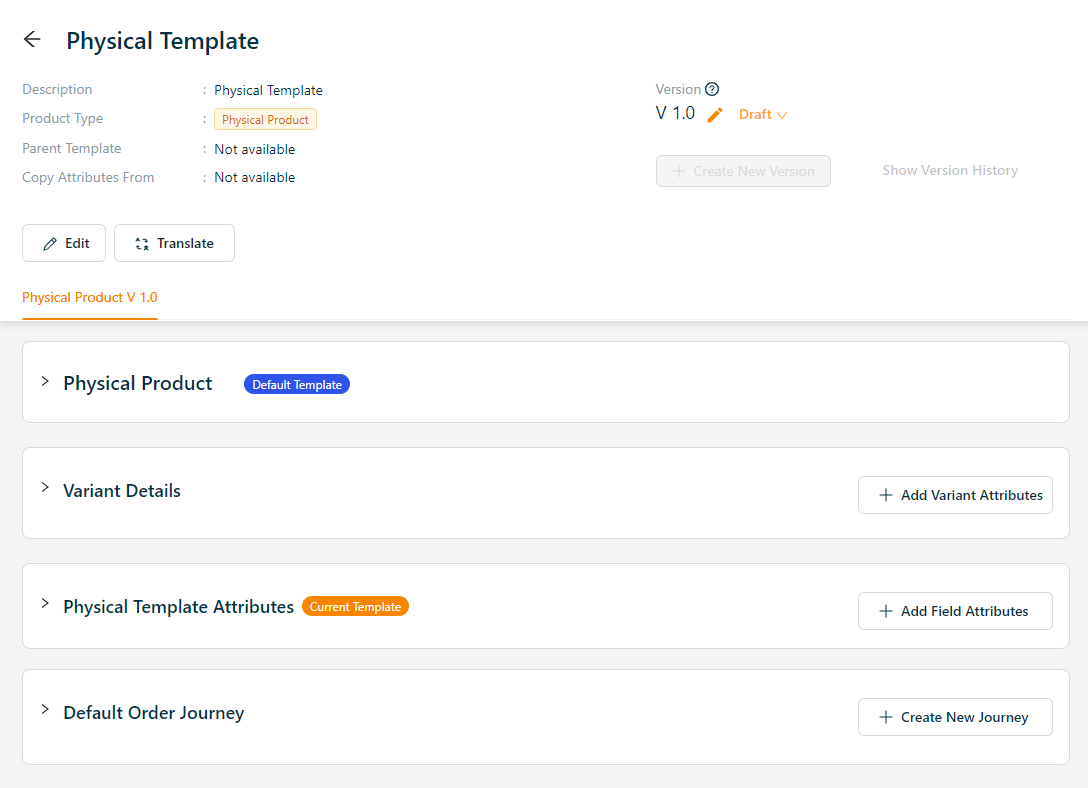
Adding a Variant Attribute to a Product Template
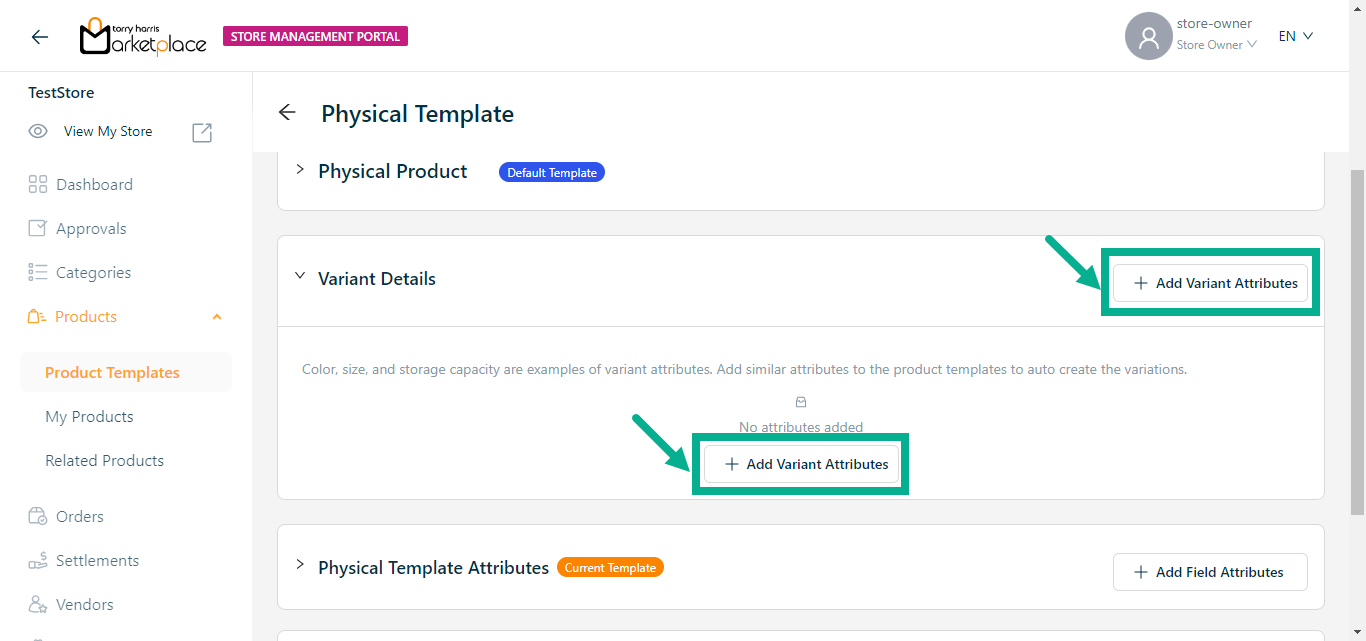
- Click Add Variant Attributes.
The Variant Attributes screen appears as shown below.
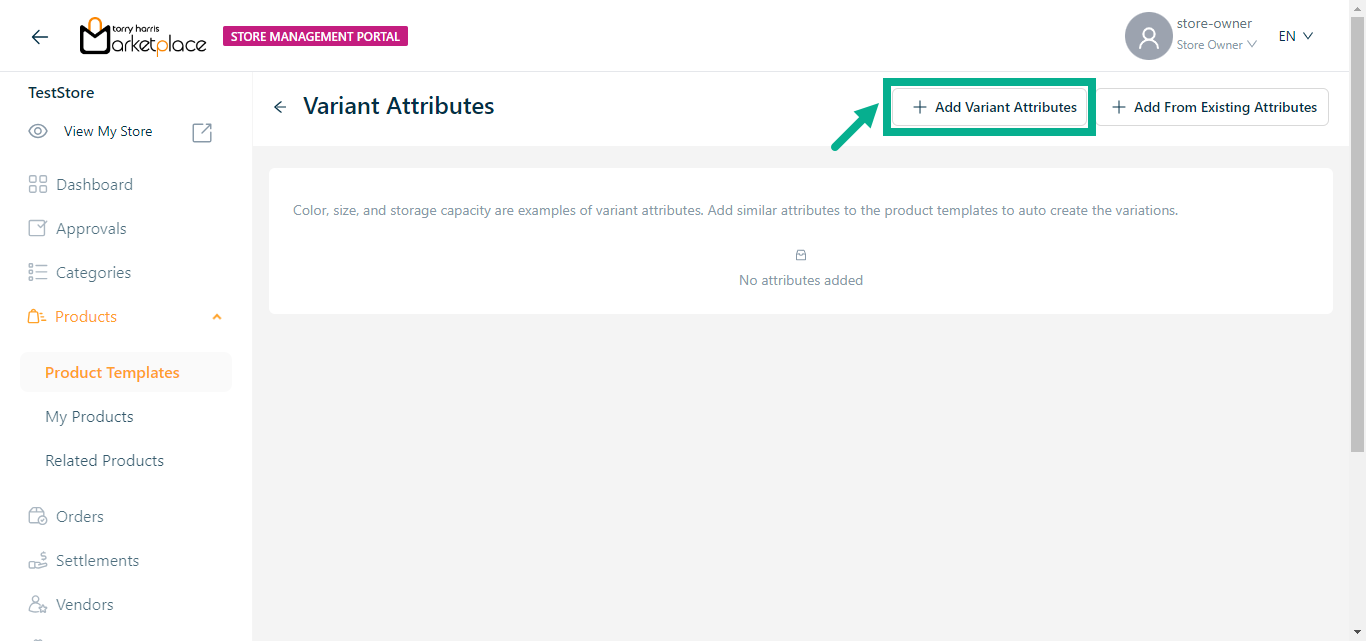
- Click Add Variant Attributes.
Click Add From Existing Attributes to add variant attributes from the existing variant attributes.
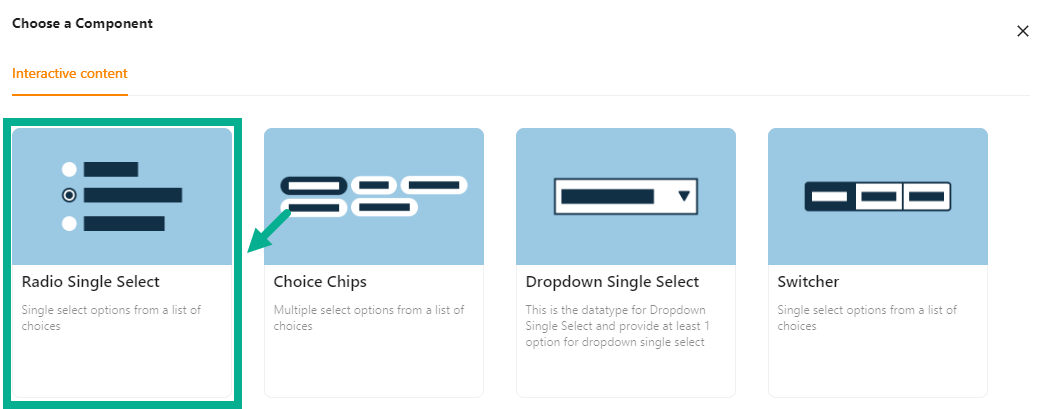
Choose a component screen displays as shown below.
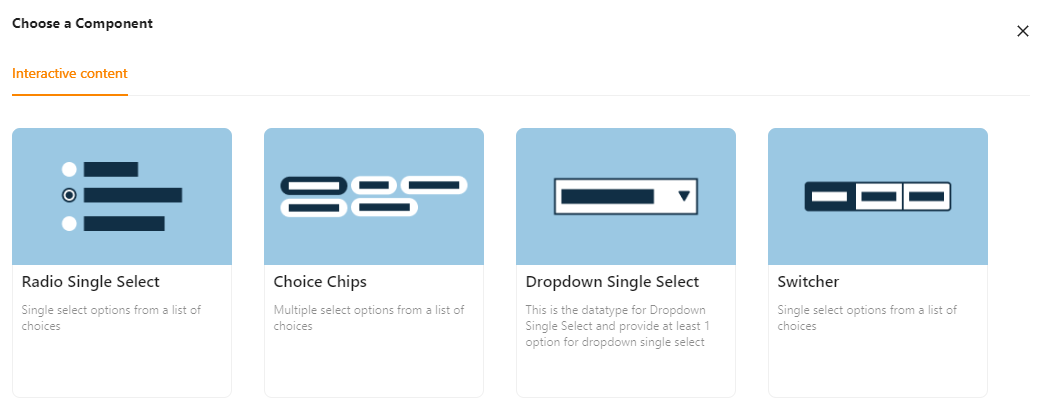
Interactive Content
The various interactive content types available are:
Radio Single Select - Choose one item from a list of alternatives.
Choice Chips - Select several alternatives from a list of possibilities.
Dropdown Single Select - This datatype allows us to pick at least one option for Dropdown-Single select.
Switcher - Single select options from a list of choices.
Example of creating an variant attribute using a Interactive Content (Radio Single Select):
a. Click Radio Single Select.
Add Attribute screen appears as shown below.
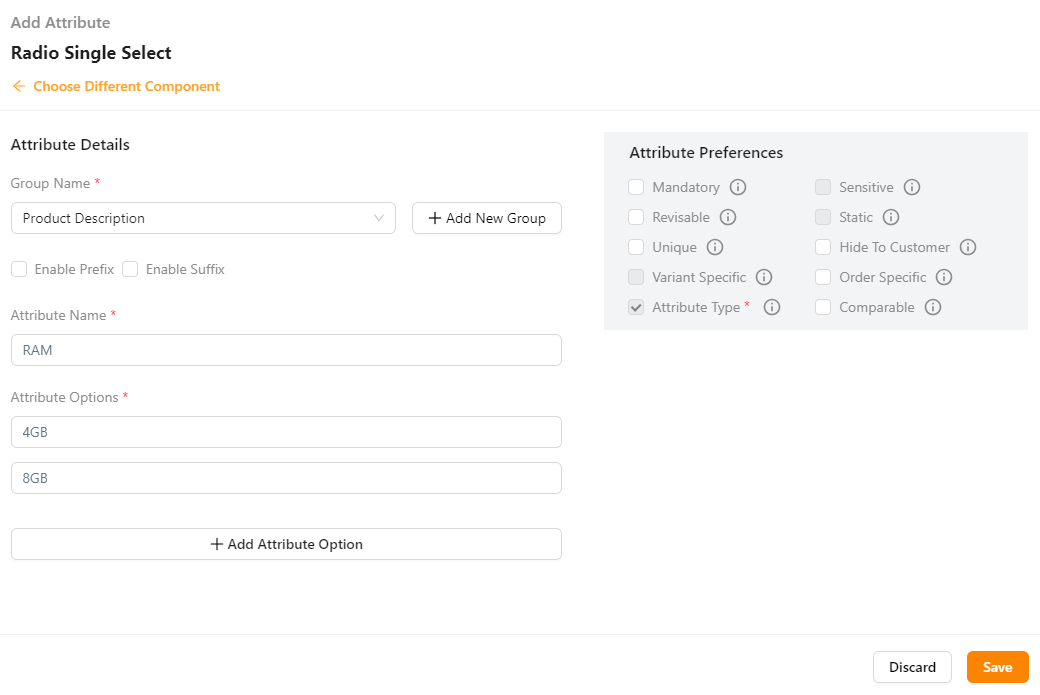
b. From the drop-down list, select the Group Name.
Click the Add New Group (+) icon to add a New group name, if necessary.
c. Enter the Attribute Name.
d. Enter the Attribute Options.
If more rows are required, click Add Attribute Option.
e. Select the Attribute Preference by clicking the corresponding checkboxes.
The various preference options are given below:
- Mandatory - This value is mandatory when a product is published.
- Revisable - If false, the values are allowed to be updated without approval even when the state is published. Eg:Discount by vendor published products.
- Unique - This value should be unique for store level. Eg:Email id on vendor onboarding and Mobile number on custom onboarding.
- Variant Specific - This value should be unique for store level. Eg:Email id on vendor onboarding and Mobile number on custom onboarding.
- Attribute Type - The type of attribute where the value is required to be fed.
- Sensitive - This is a sensitive field to encrypt the storage and display.
- Static - Static value
- Hide To Customer - This value should be hidden from the customer. Eg:Wholesale Margin, Commission Percentage.
- Order Specific - These attributes are specific to order level. Eg:Recharge required the mobile and operator details. Those are the details that the customer will provide when placing the order.
- Comparable - Comparable description
f. Click Save.
The Variant Attributes added is displayed as shown below.

Click the Edit icon to edit the added variation attribute.
Click the Remove button to remove the added variation attribute.
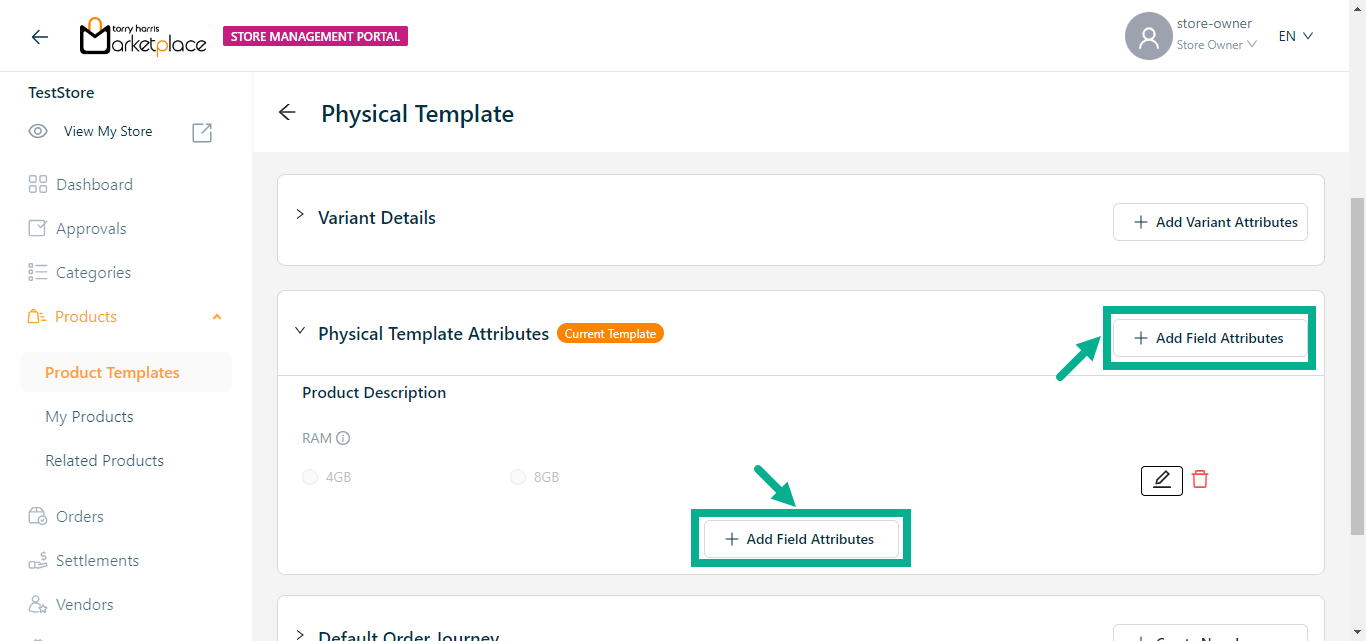
- Click Add Field Attributes.
Choose a Component screen that appears as shown below.
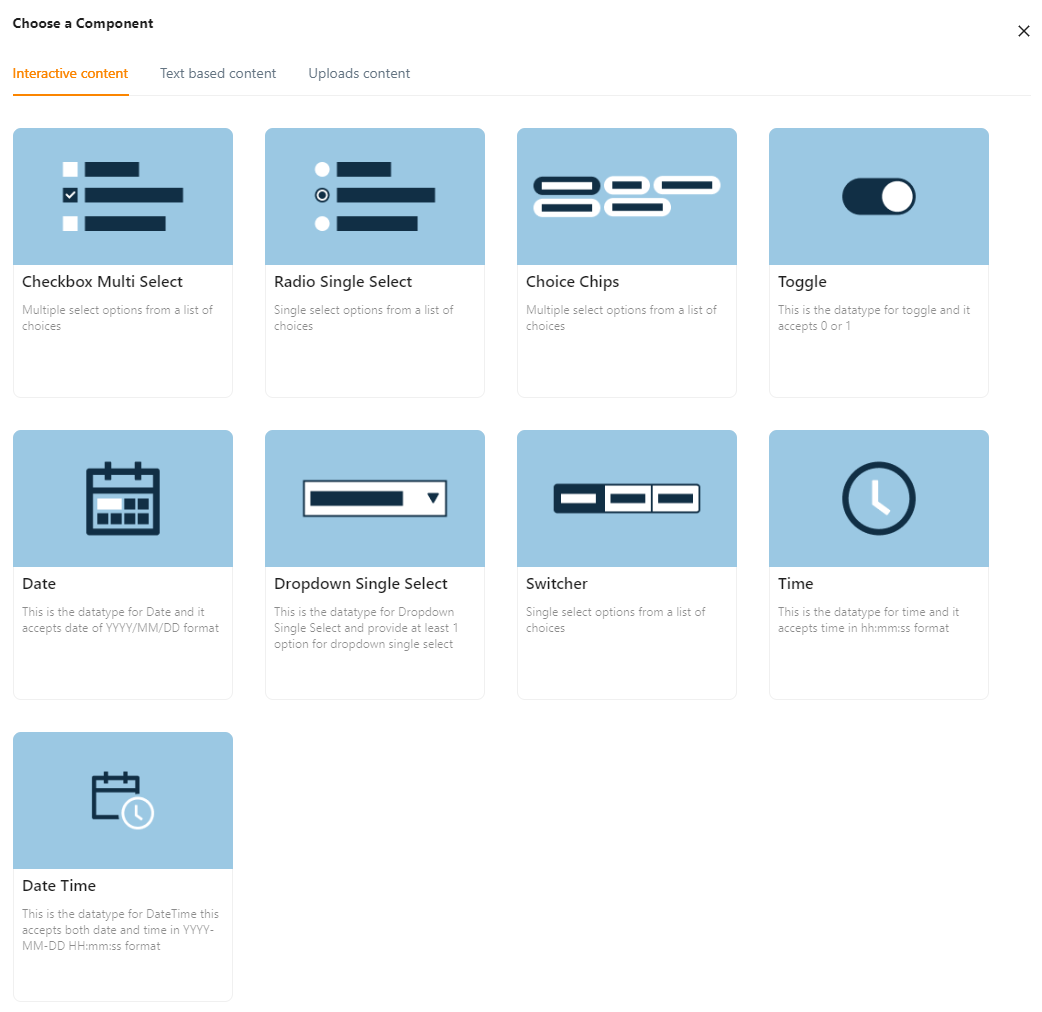
Interactive Content
The various interactive content types available are:
Checkbox Multi Select – Used to select multiple choices from a list of options.
Radio Single Select - Used when a user must make exactly one choice from a list of two or more alternatives.
Choice Chips - Choice chips let you choose one from a variety of possibilities.
Toggle - Toggle buttons enable or disable a selection by allowing left and right movement.
Date - The datatype for the date is created using this.
Dropdown Single Select - It offers at least 1 choice for drop-down-single select.
Switcher - Clicking a switch button enables or disables a specific property.
Time - The datatype for time is created using this.
Date Time - The datatype for time is created using this.
Example of creating an variant attribute using an Interactive Content (Checkbox Multi Select):
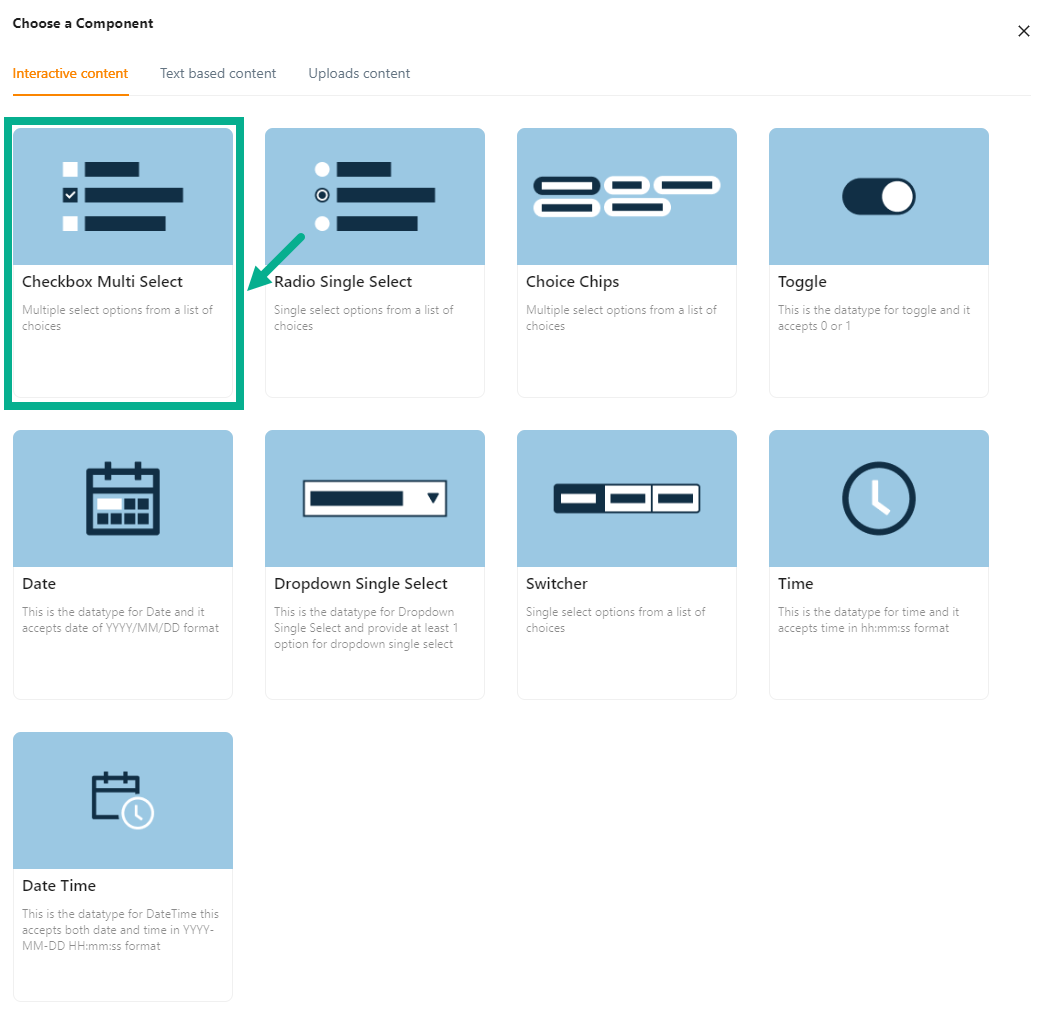
a. Click Checkbox Multi select.
Add Attribute screen appears as shown below.
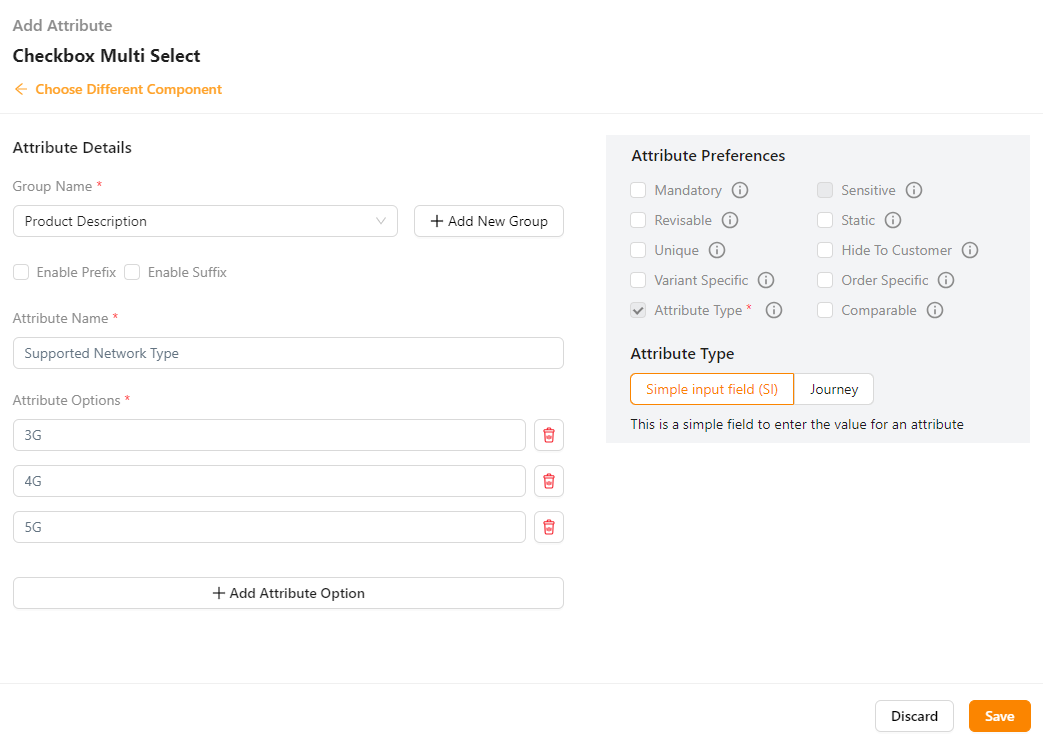
b. From the drop-down list, select the Group Name.
Click the Add New Group icon to add a new group name.
c. Enter the Attribute Name.
d. Enter the Attribute Options.
Click Add Attribute Option to add more rows.
e. Select the Preference values by clicking the corresponding checkboxes.
The various preference options are given below:
- Mandatory - This value is mandatory when a product is published.
- Revisable - If false, the values are allowed to be updated without approval even when the state is published. Eg:Discount by vendor published products.
- Unique - This value should be unique for store level. Eg:Email id on vendor onboarding and Mobile number on custom onboarding.
- Variant Specific - This value should be unique for store level. Eg:Email id on vendor onboarding and Mobile number on custom onboarding.
- Attribute Type - The type of attribute where the value is required to be fed.
- Sensitive - This is a sensitive field to encrypt the storage and display.
- Static - Static value
- Hide To Customer - This value should be hidden from the customer. Eg:Wholesale Margin, Commission Percentage.
- Order Specific - These attributes are specific to order level. Eg:Recharge required the mobile and operator details. Those are the details that the customer will provide when placing the order.
- Comparable - Comparable description
f. Select the Attribute Type as either Simple input field or Journey.
g. Click Save.
Text Based Content
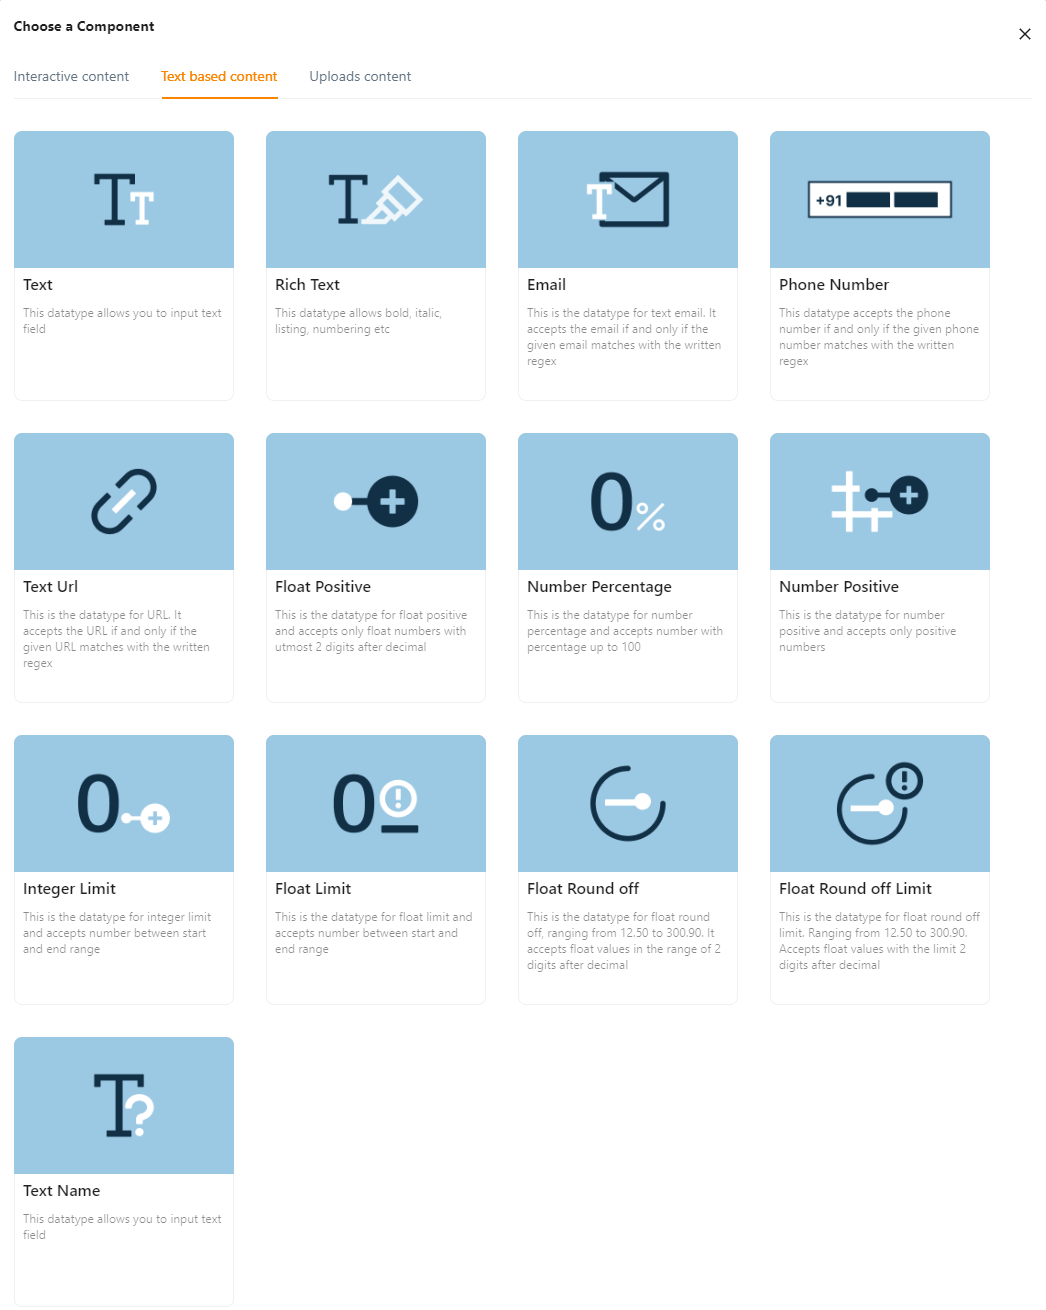
The various Text Based content types available are:
Text - Text field entries are permitted by this datatype.
Rich Text - Bold, Italic, Listing, Numbering, etc. are permitted with this datatype.
Email - This is the datatype for Text-Email, which accepts emails only when they match the written regex.
Phone Number - This datatype only accepts phone numbers that match the provided regex.
Text URL - This datatype only takes the URL if it matches the stated regex when provided.
Float Positive - This datatype only supports positive floating-point values with a maximum of two digits after the decimal.
Number Percentage - This data type allows numbers with percentages up to 100 and is designated for use with percentages.
Number Positive – Number Positive is the datatype, which only takes positive numbers.
Integer Limit - This datatype allows numbers between the start and end of the range.
Float Limit - This datatype, which takes numbers between start and finish ranges, is for float-limit.
Float Round off - This is the float-round off datatype. Accepts floating-point numbers up to two digits after the decimal.
Float Round off Limit - This is the float-round off-limit datatype. Accepts floating-point numbers up to three digits after the decimal.
Text-Name - This datatype enables text field entry.
Example of creating an variant attribute using Text Based Content (Text):
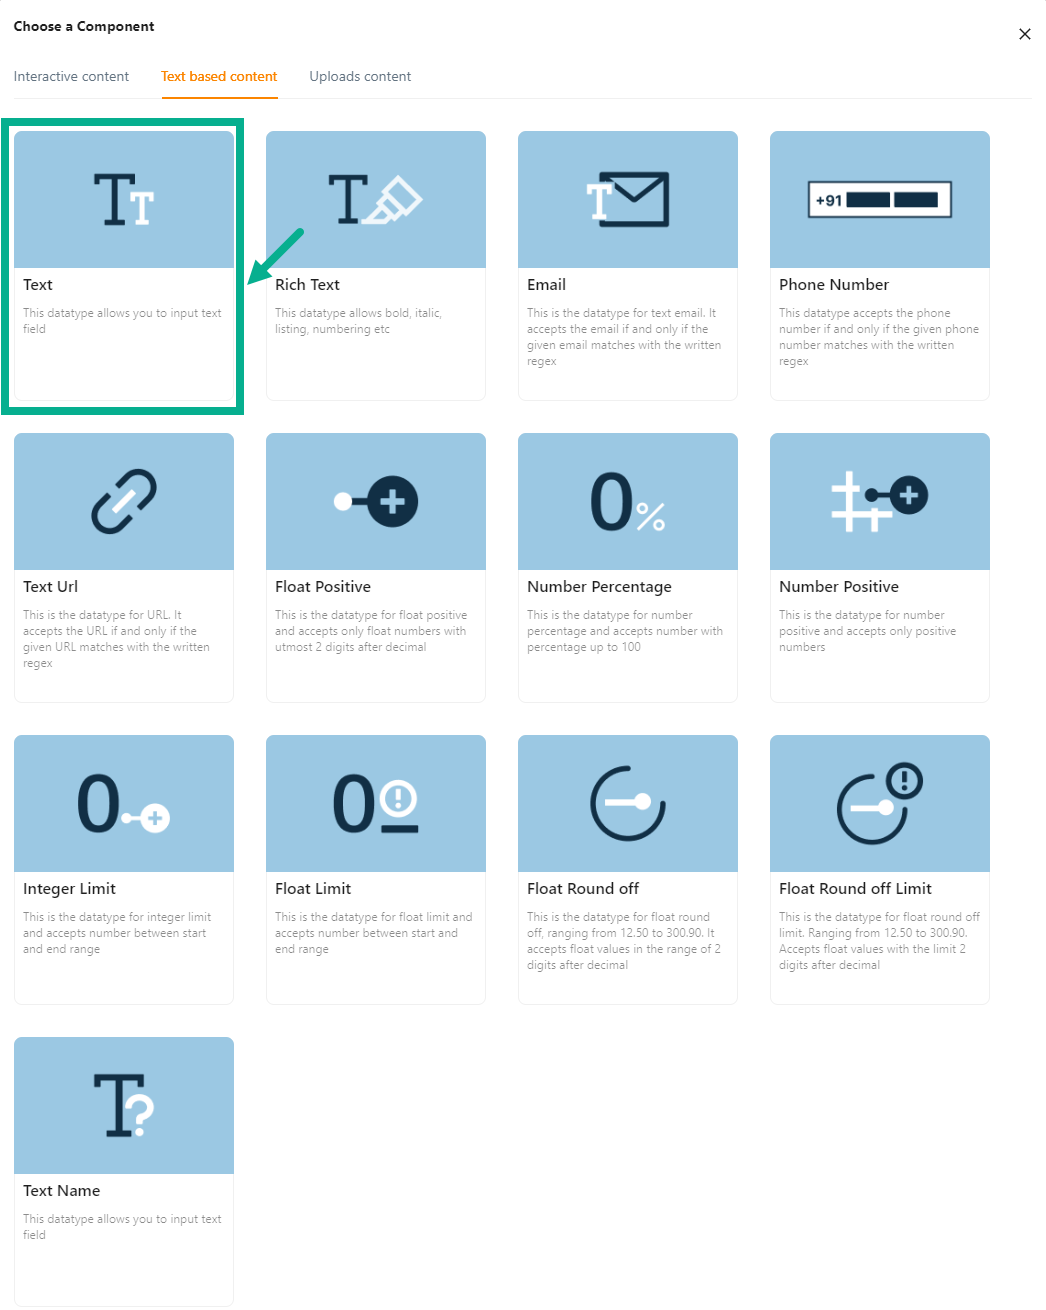
a. Click Text.
Add Attribute screen appears as shown below.
b. From the drop-down list, select the Group Name.
Click the Add New Group icon to add a new group name.
c. Enter the Attribute Name.
Click on the Static preference to add attribute values to the text.
c. Enter the Attribute Values.
d. Select the Preference values by clicking the corresponding checkboxes.
The various preference options are given below:
- Mandatory - This value is mandatory when a product is published.
- Revisable - If false, the values are allowed to be updated without approval even when the state is published. Eg:Discount by vendor published products.
- Unique - This value should be unique for store level. Eg:Email id on vendor onboarding and Mobile number on custom onboarding.
- Variant Specific - This value should be unique for store level. Eg:Email id on vendor onboarding and Mobile number on custom onboarding.
- Attribute Type - The type of attribute where the value is required to be fed.
- Sensitive - This is a sensitive field to encrypt the storage and display.
- Static - Static value
- Hide To Customer - This value should be hidden from the customer. Eg:Wholesale Margin, Commission Percentage.
- Order Specific - These attributes are specific to order level. Eg:Recharge required the mobile and operator details. Those are the details that the customer will provide when placing the order.
- Comparable - Comparable description
e. Select the Attribute Type as either Simple input field or Journey.
f. Click Save.
Uploads Content
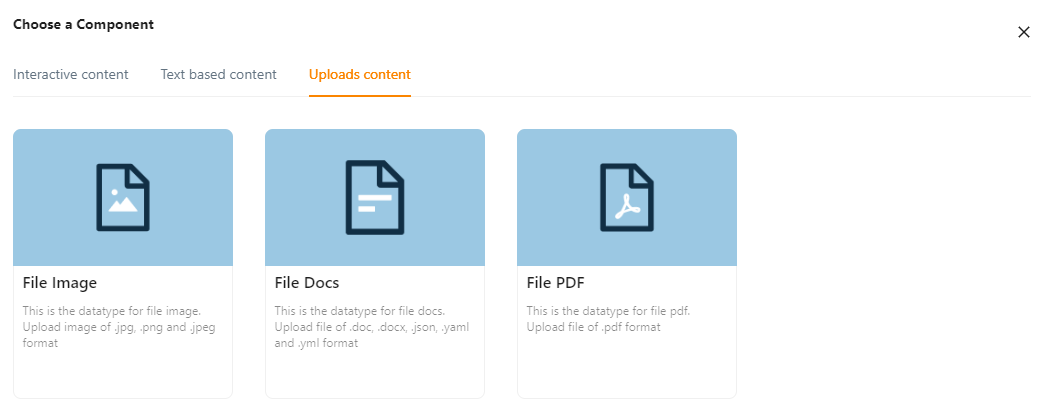
The various Uploads Content types available are:
File Image - This datatype is used for uploading images in the jpg, png, and jpeg formats.
File Docs - This datatype is used for uploading the files in the doc Format.
File PDF - The datatype is used for uploading the files in the pdf Format.
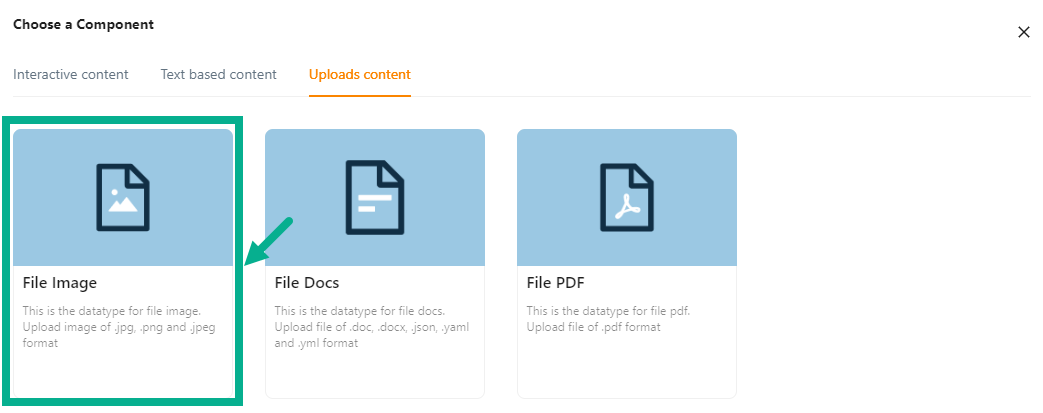
Example of creating an variant attribute using Uploads Content (File Image):
a. Click File Image.
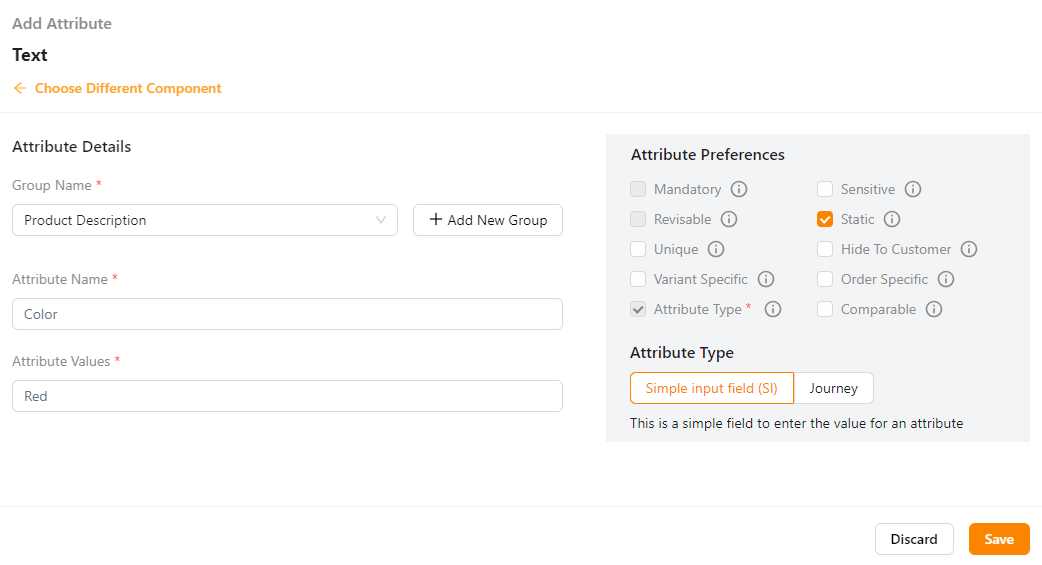
Add Attribute screen appears as shown below.

b. From the drop-down list, select the Group Name.
Click the Add New Group icon to add a new group name.
c. Enter the Attribute Name.
d. Click the Advanced Setting to add Attribute Extension.
Click on the Static performance to add attribute values for File Image.
e. Click Add Image to add an image.
f. Select the Preference values by clicking the corresponding checkboxes.
The various preference options are given below:
- Mandatory - This value is mandatory when a product is published.
- Revisable - If false, the values are allowed to be updated without approval even when the state is published. Eg:Discount by vendor published products.
- Unique - This value should be unique for store level. Eg:Email id on vendor onboarding and Mobile number on custom onboarding.
- Variant Specific - This value should be unique for store level. Eg:Email id on vendor onboarding and Mobile number on custom onboarding.
- Attribute Type - The type of attribute where the value is required to be fed.
- Sensitive - This is a sensitive field to encrypt the storage and display.
- Static - Static value
- Hide To Customer - This value should be hidden from the customer. Eg:Wholesale Margin, Commission Percentage.
- Order Specific - These attributes are specific to order level. Eg:Recharge required the mobile and operator details. Those are the details that the customer will provide when placing the order.
- Comparable - Comparable description
g. Select the Attribute Type as either Simple input field or Journey.
h. Click Save.
Any file content in the attribute can be downloaded to view, and the file downloaded name will always be constant on an entity-specific.
All the created attribute will be displayed in storefront.
Associating a Journey to a Product Template
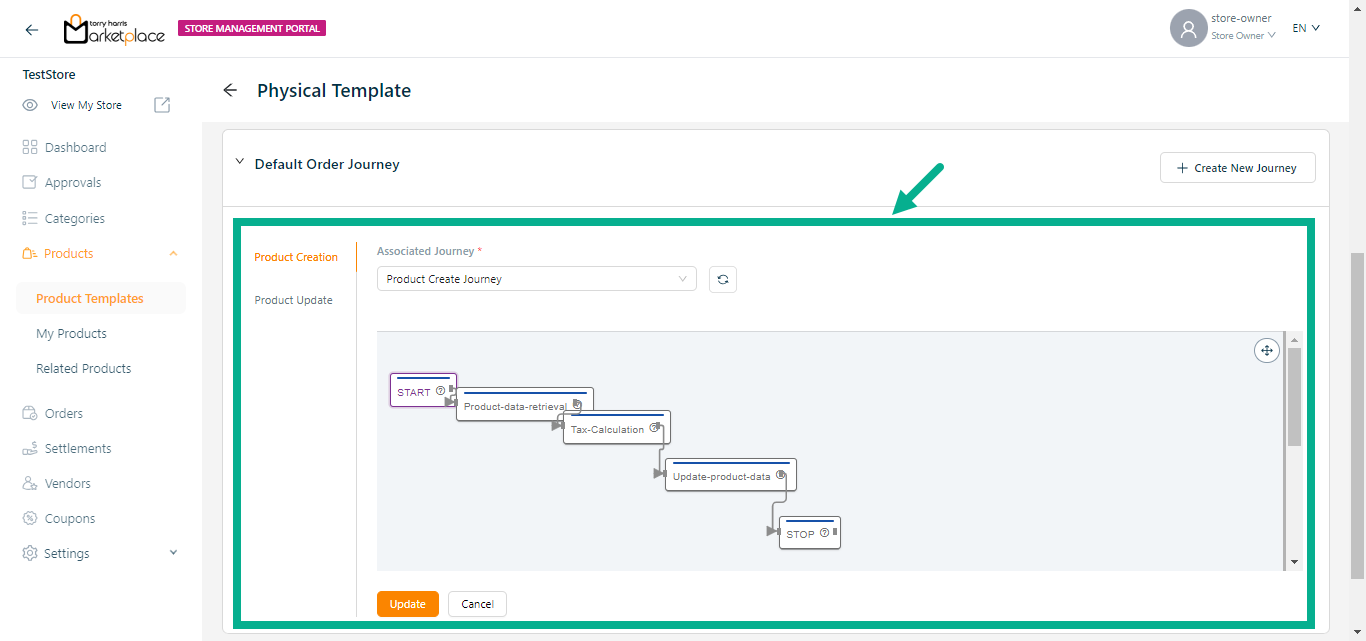
- Pick the Event.
Click the Refresh icon to refresh the Journey.
From the drop-down menu, pick the Associated Journey.
Click Update.
On updating, the confirmation message appears as shown below.
Click Create New Journey to create a new journey, if necessary.
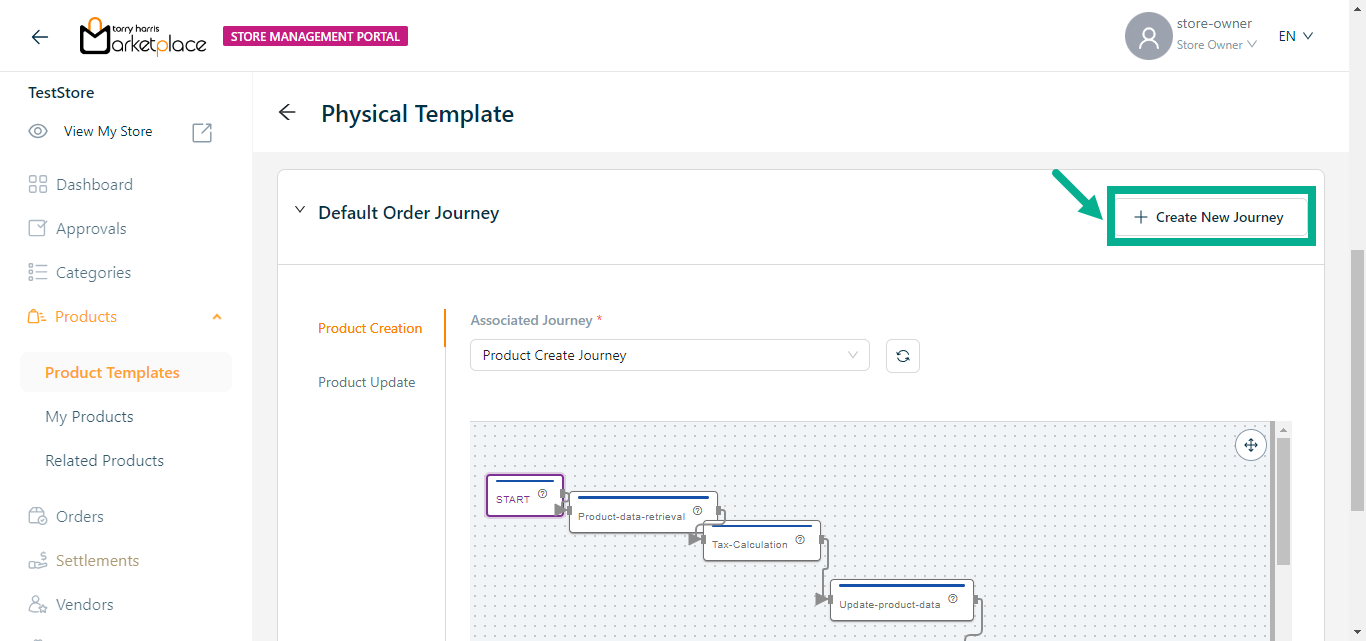
Creating a Node for Journey
- Click Create New Journey.
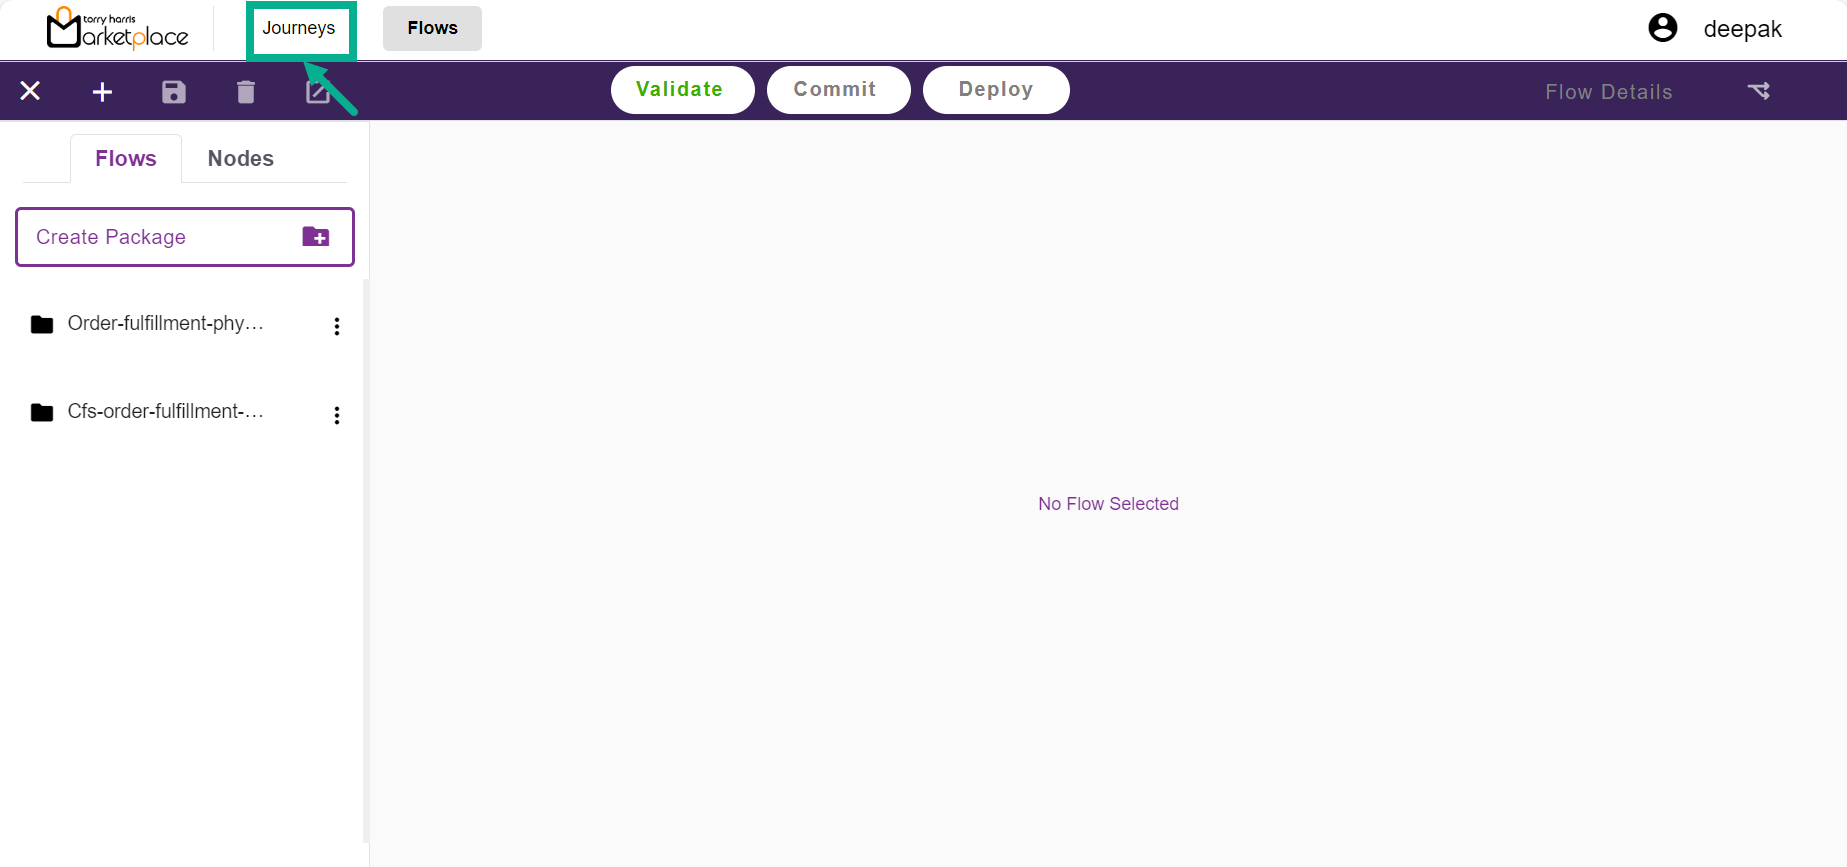
The Journeys Canvas page appears as shown below.
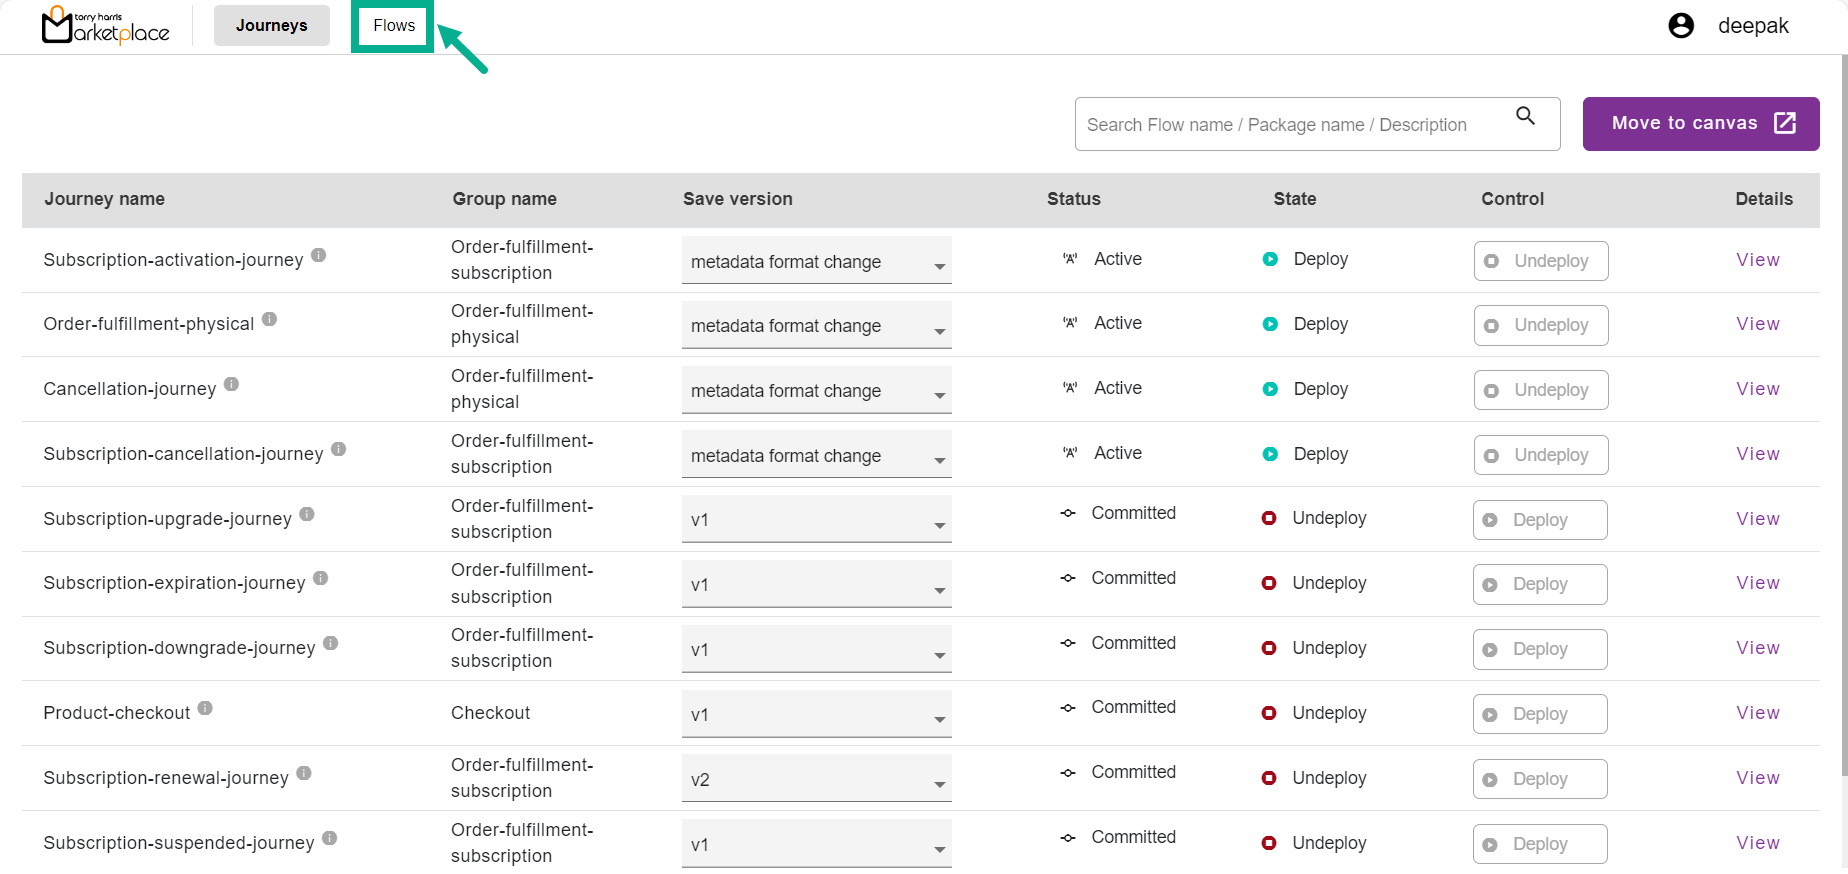
- Click Flows.
The Flows screen displays as shown below.
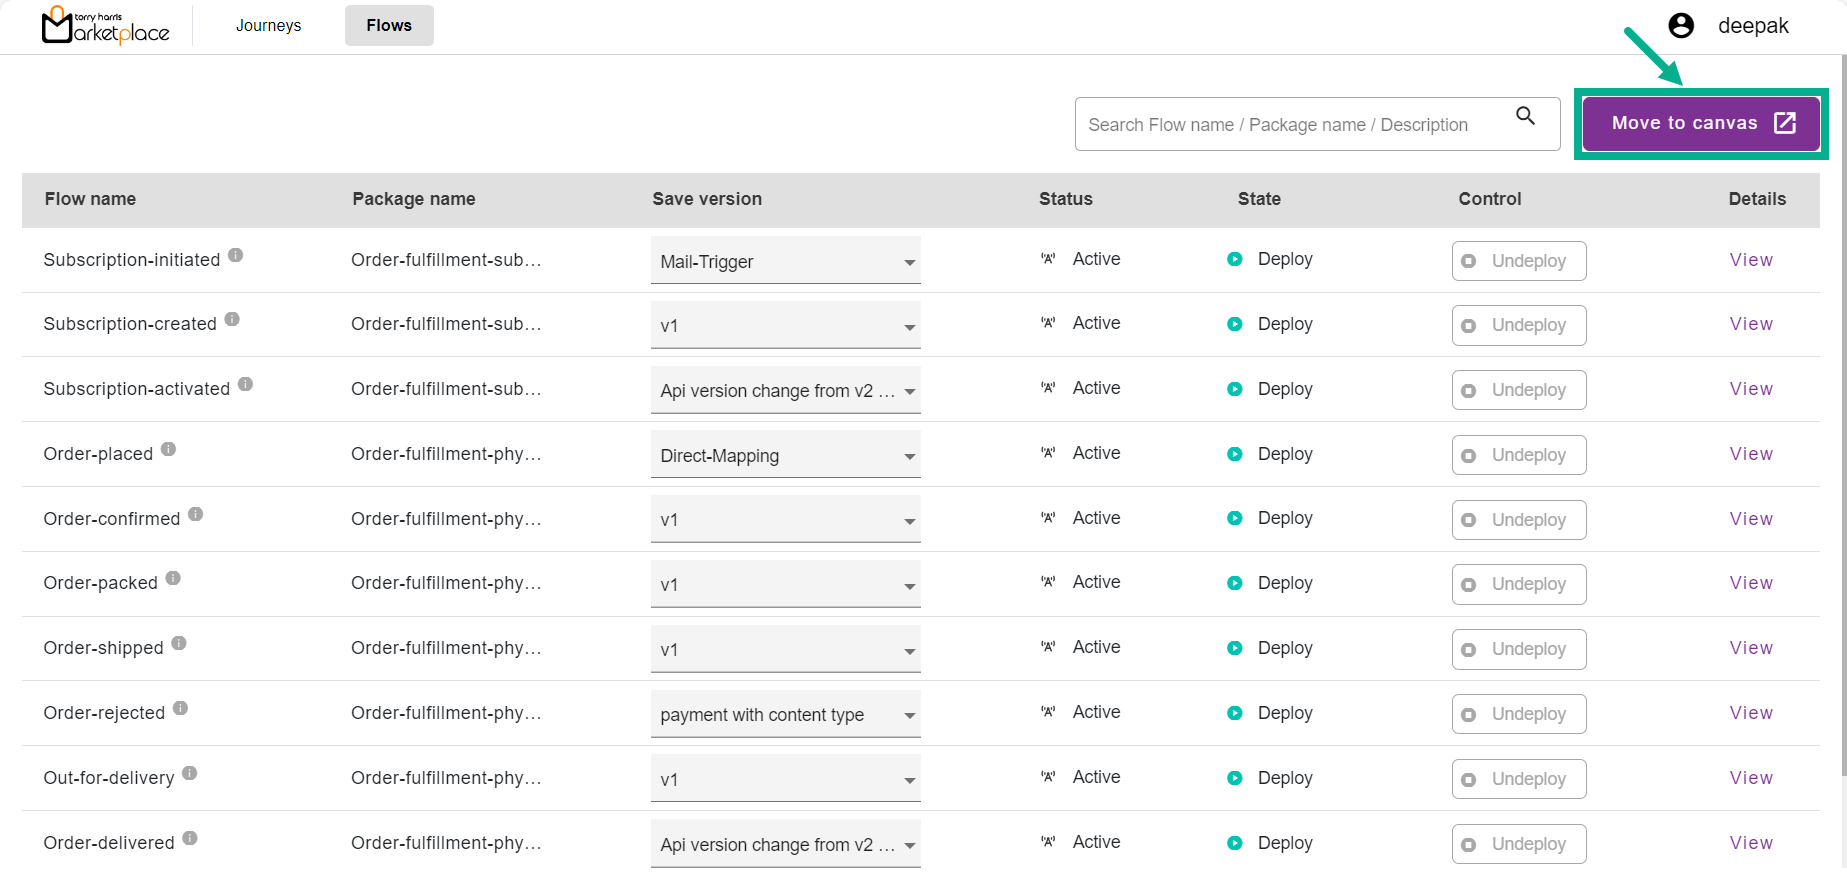
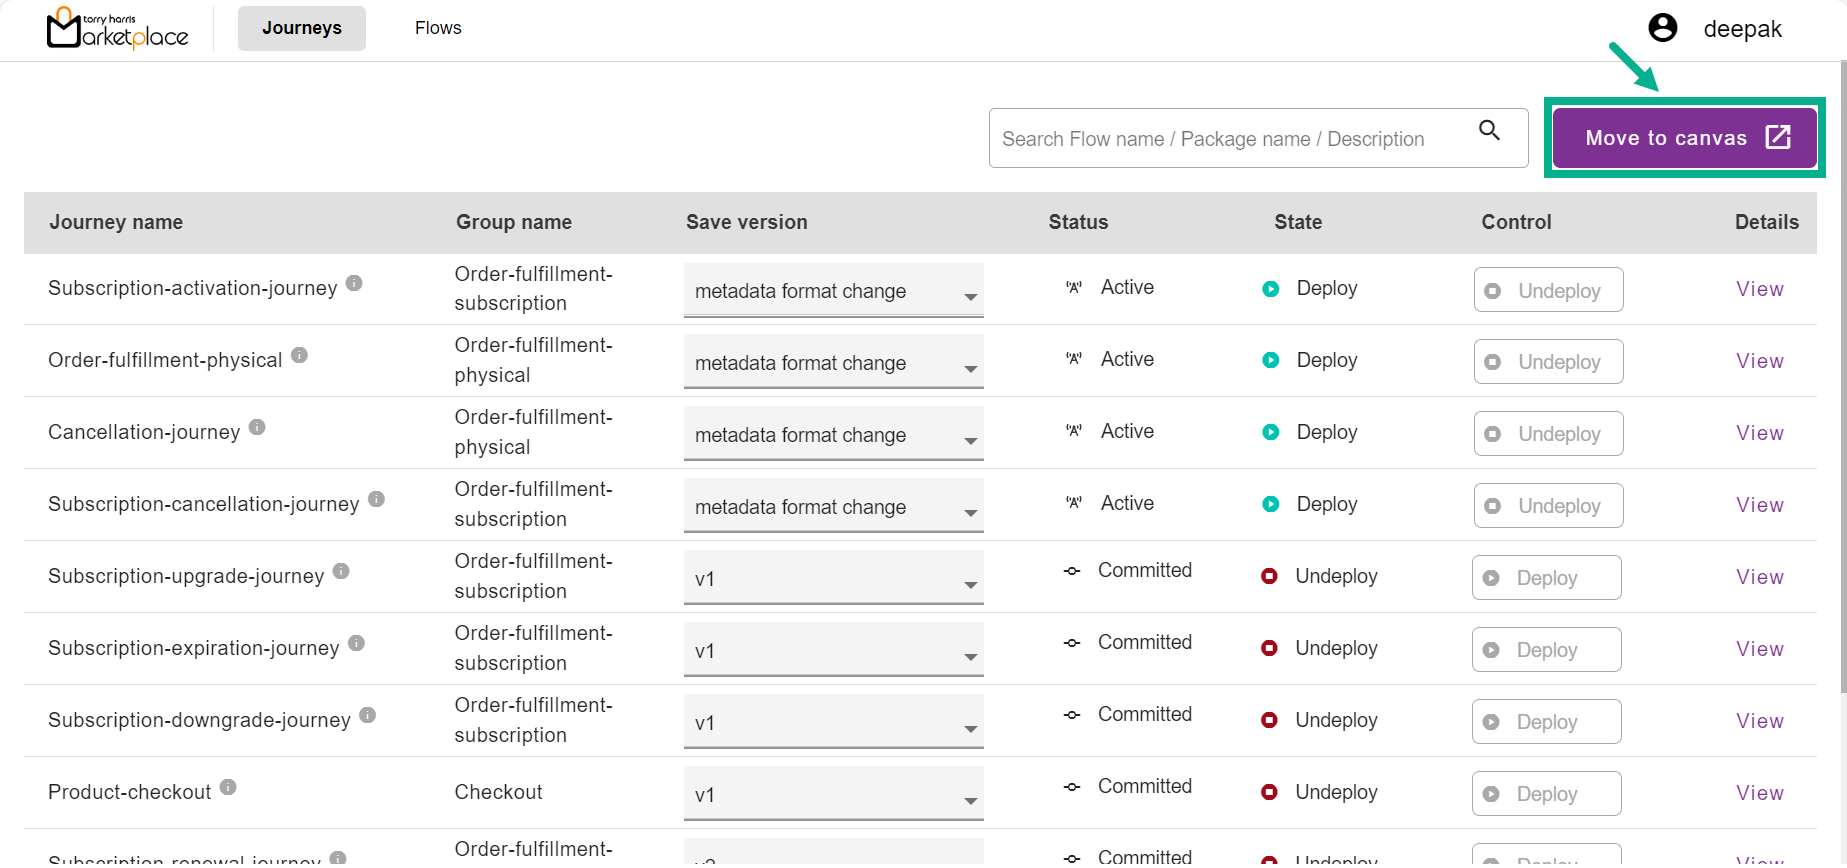
- Click Move to Canvas.
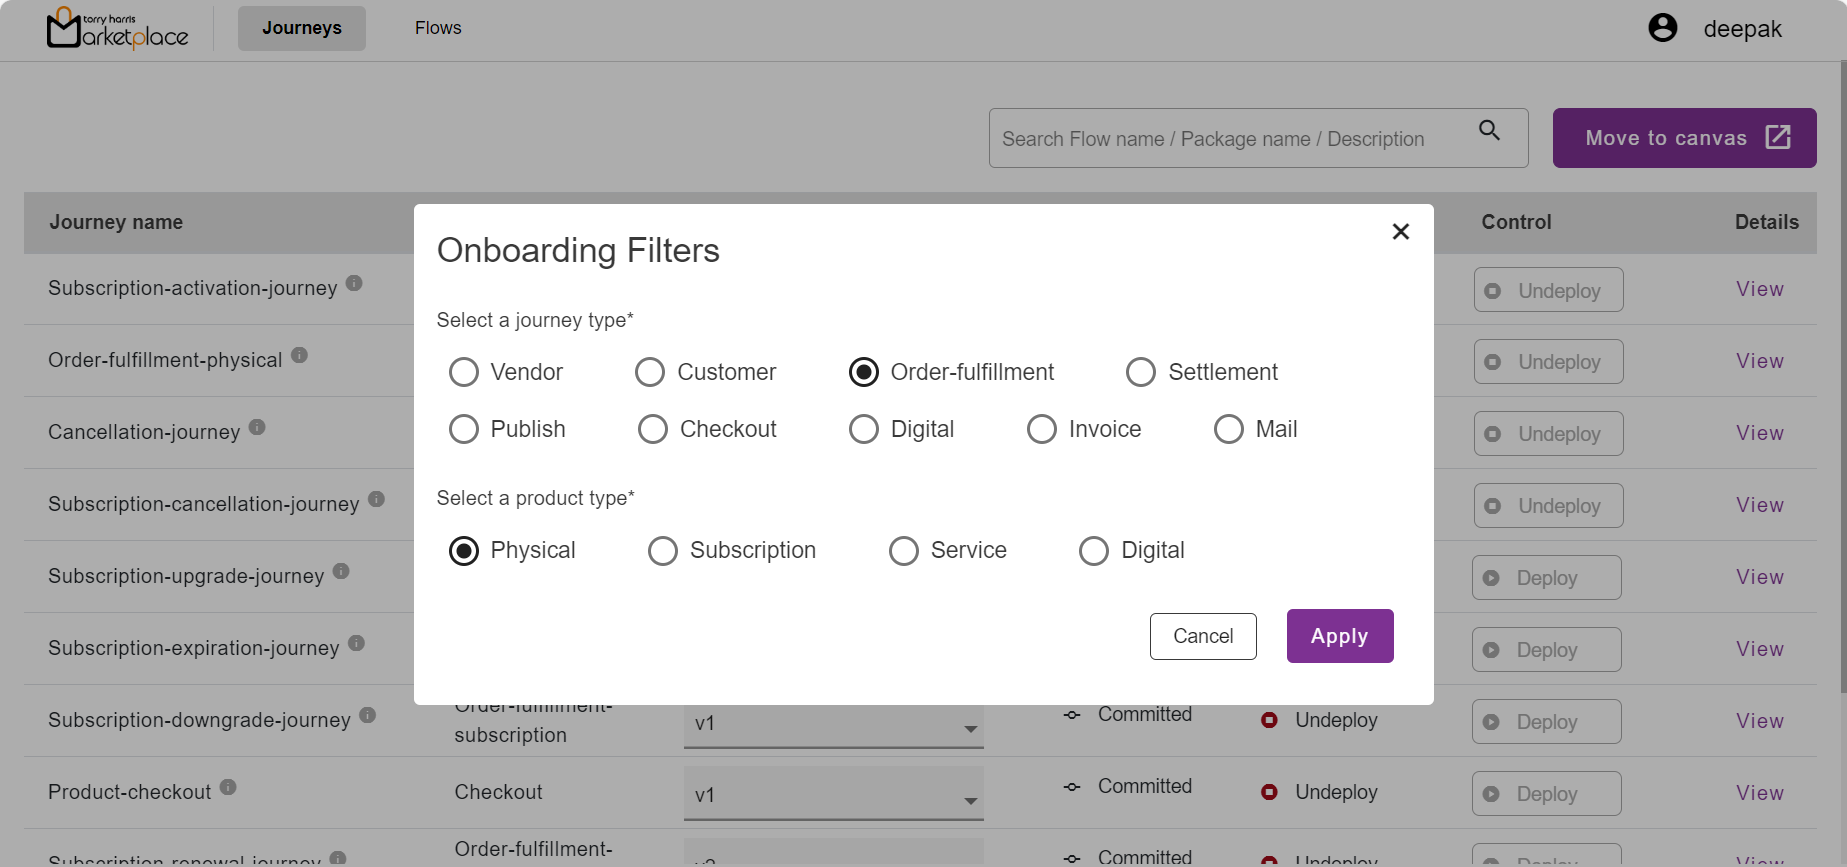
The Onboarding Filters dialogue box appears as shown below.
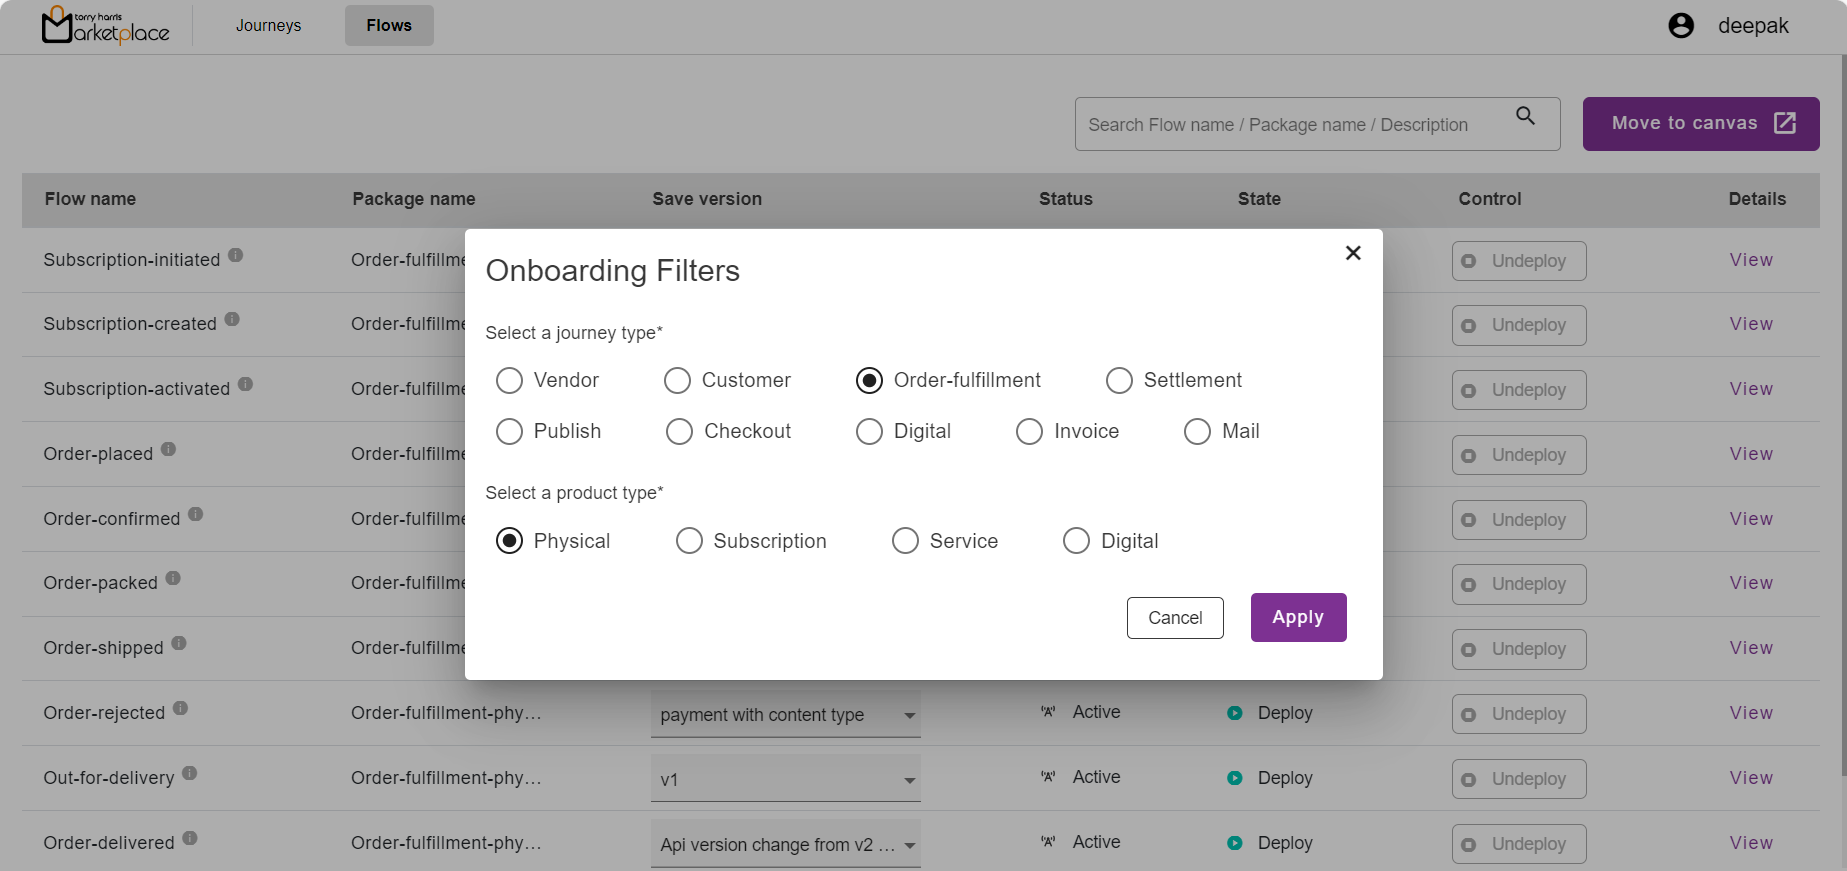
- Select the appropriate Journey Type by selecting the corresponding radio button.
The Product Type option is available when the Journey Type is Order Fulfillment.
Select the appropriate Product Type by selecting the corresponding radio button.
Click Apply.
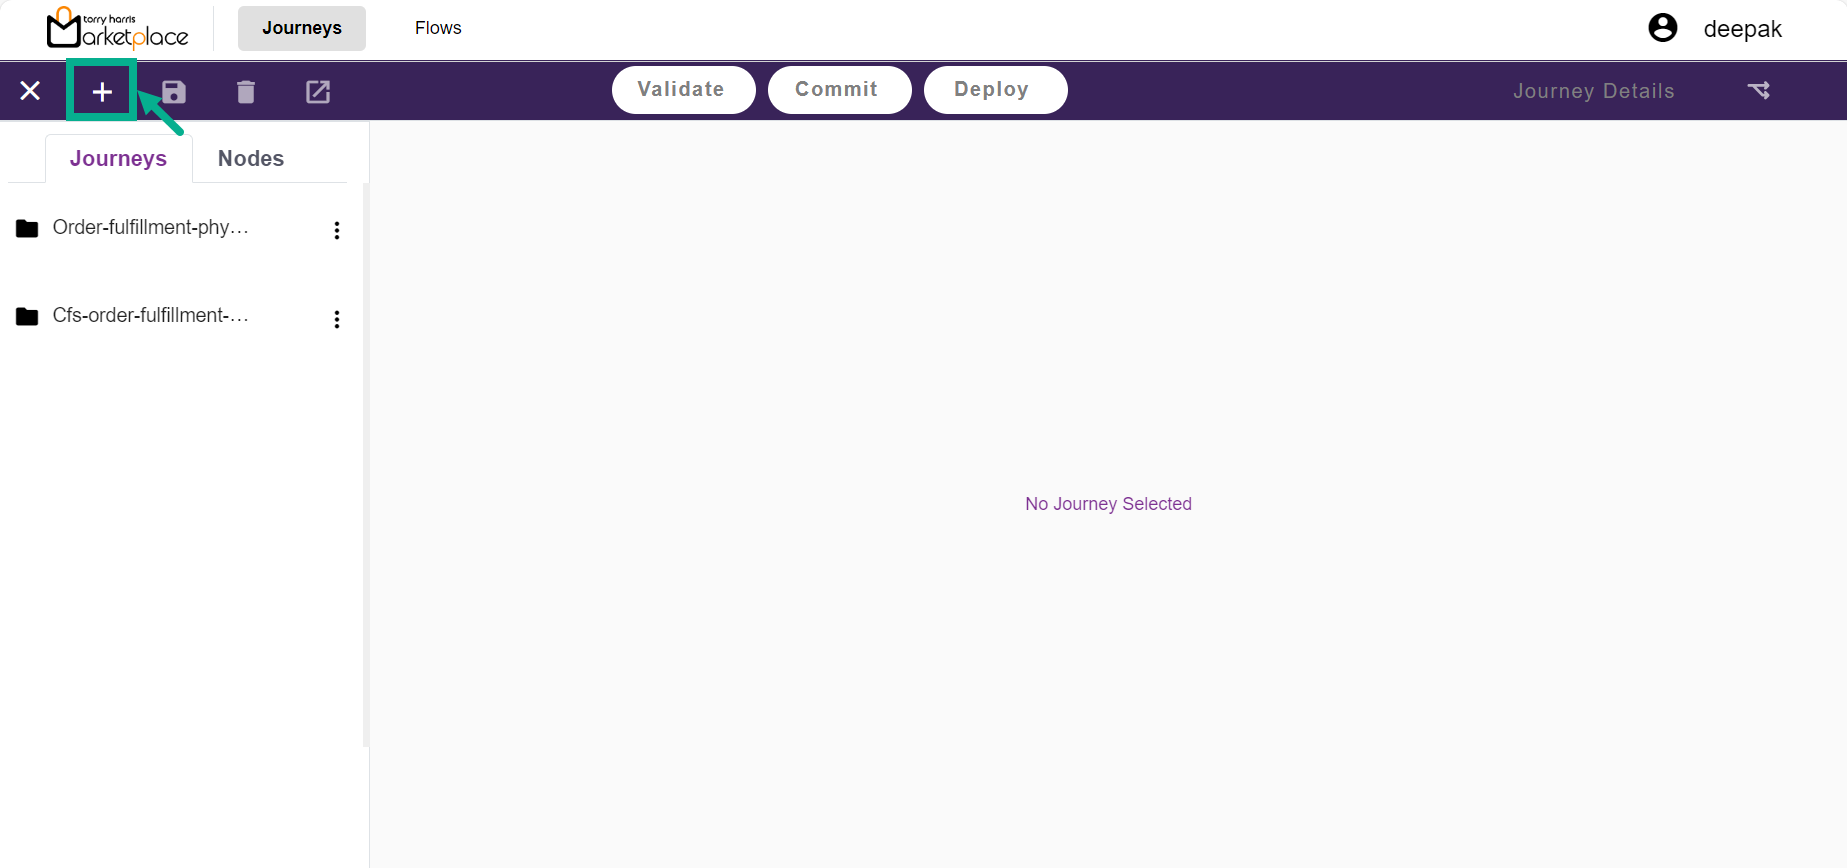
The Journey Canvas page is updated and displayed as shown below.
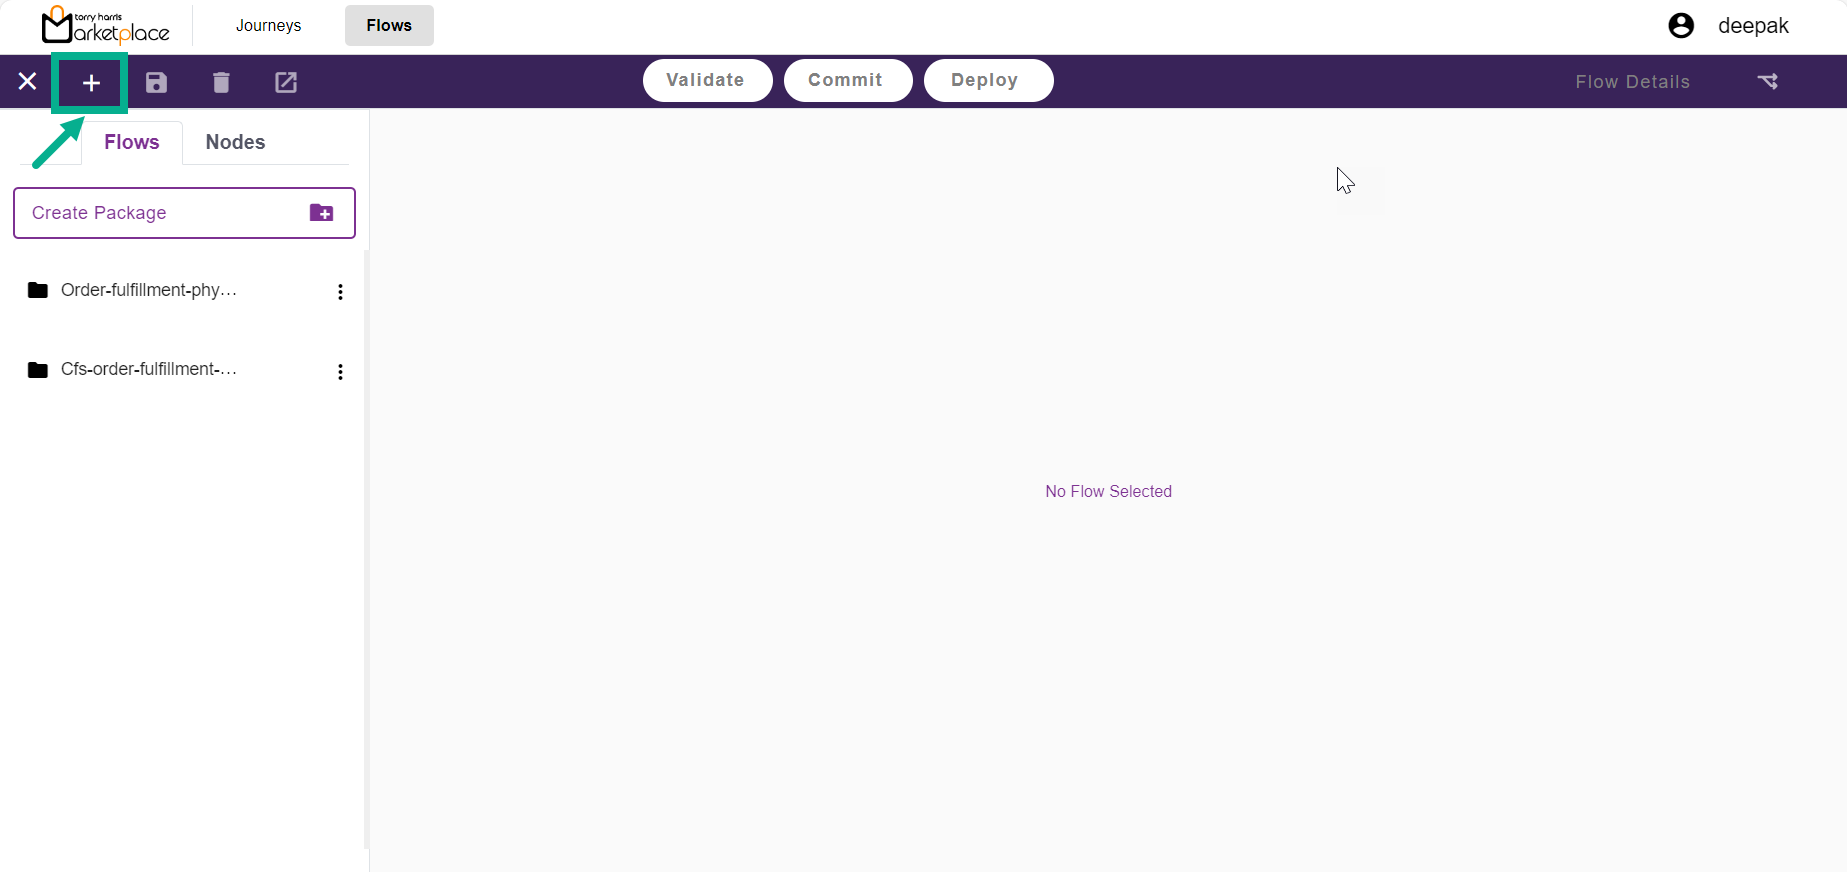
- Click the Add icon located in the upper left corner.
The drop-down displays as shown below.
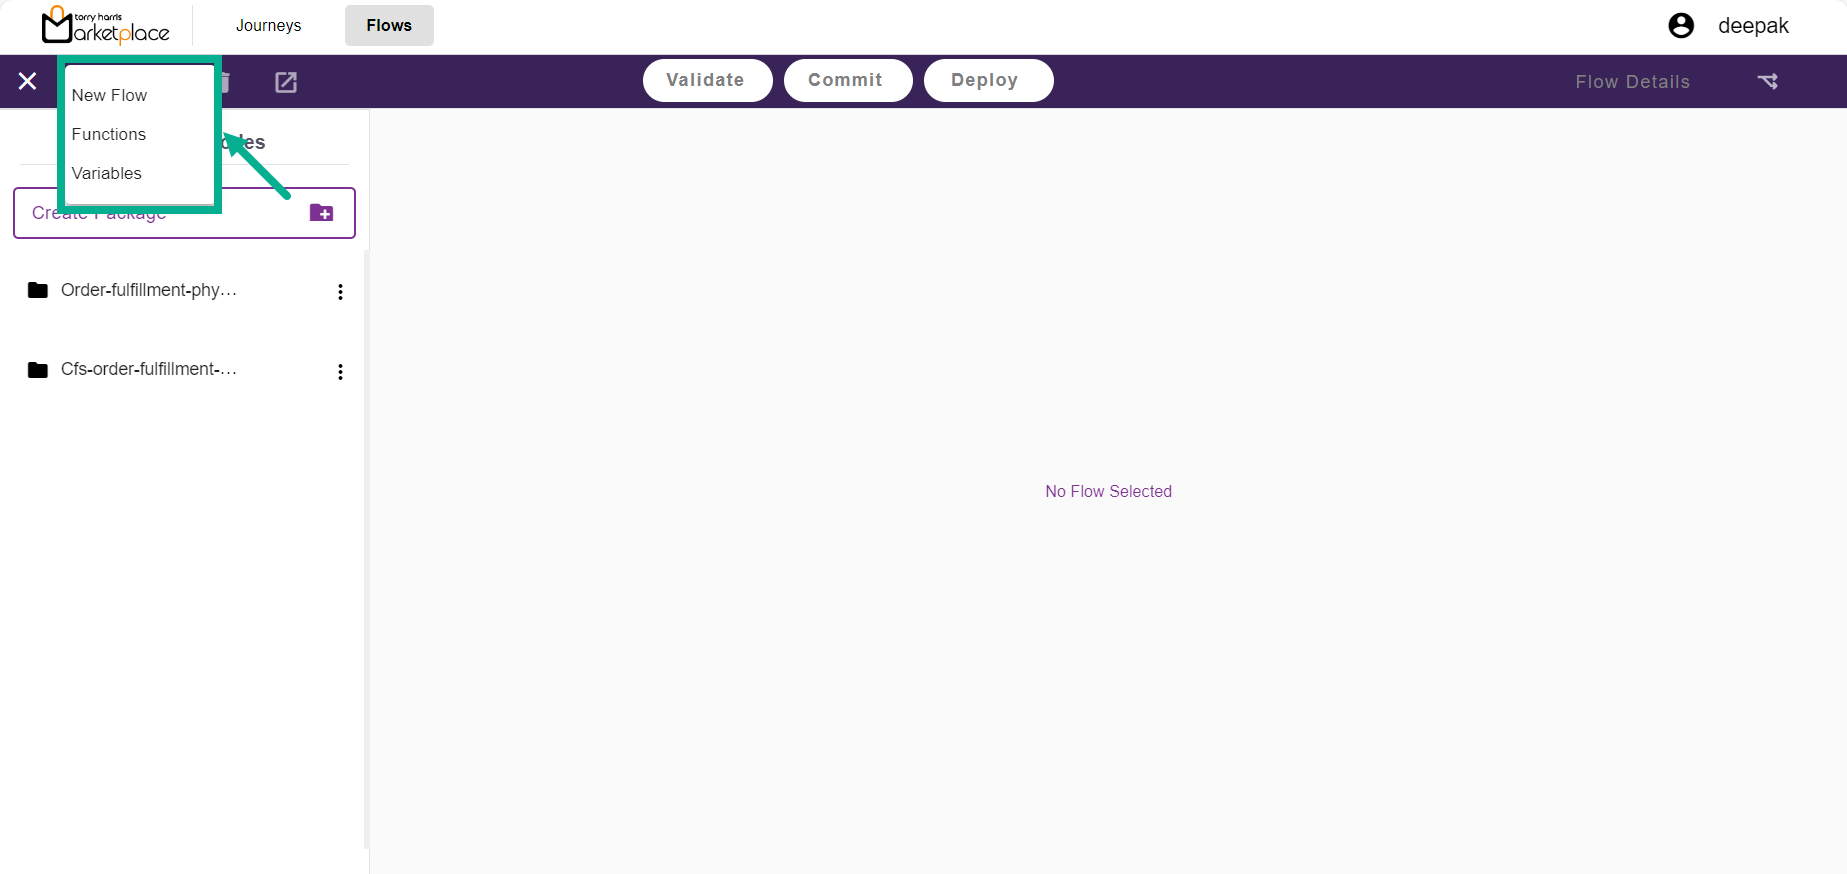
- Select New Flow.
The Create flow dialogue box appears as shown below.
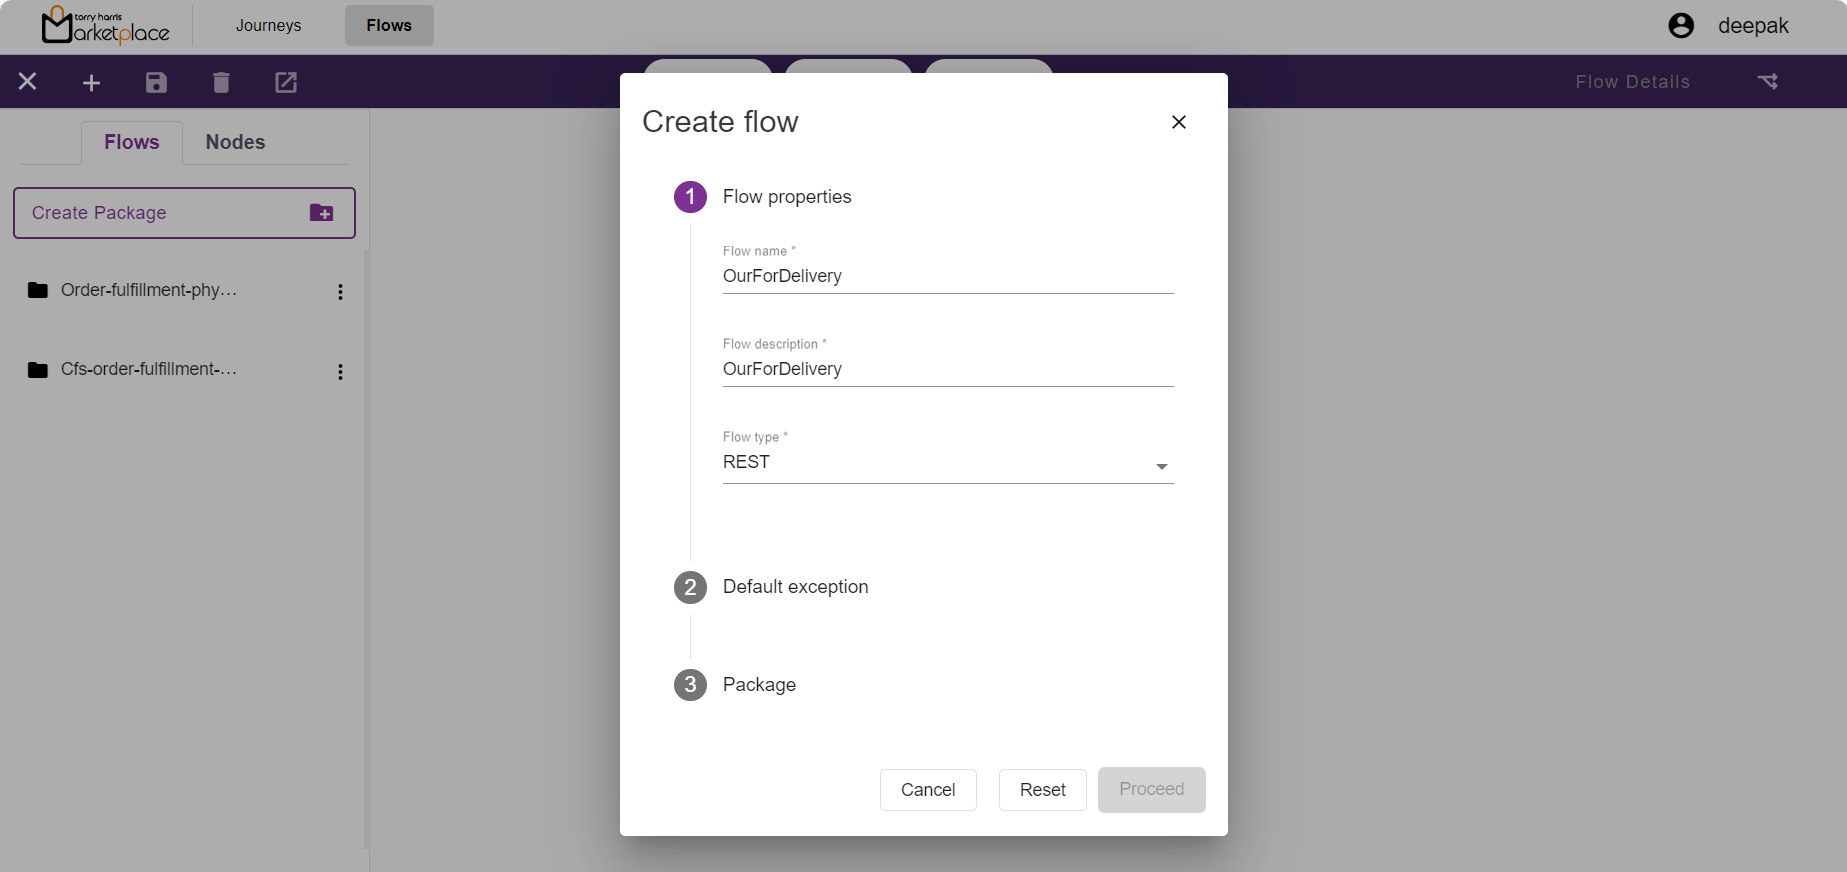
- Enter the Flow name and Flow description.
Reserved special characters or spaces are not allowed while entering the Flow name.
- From the drop-down menu, select the Flow type.
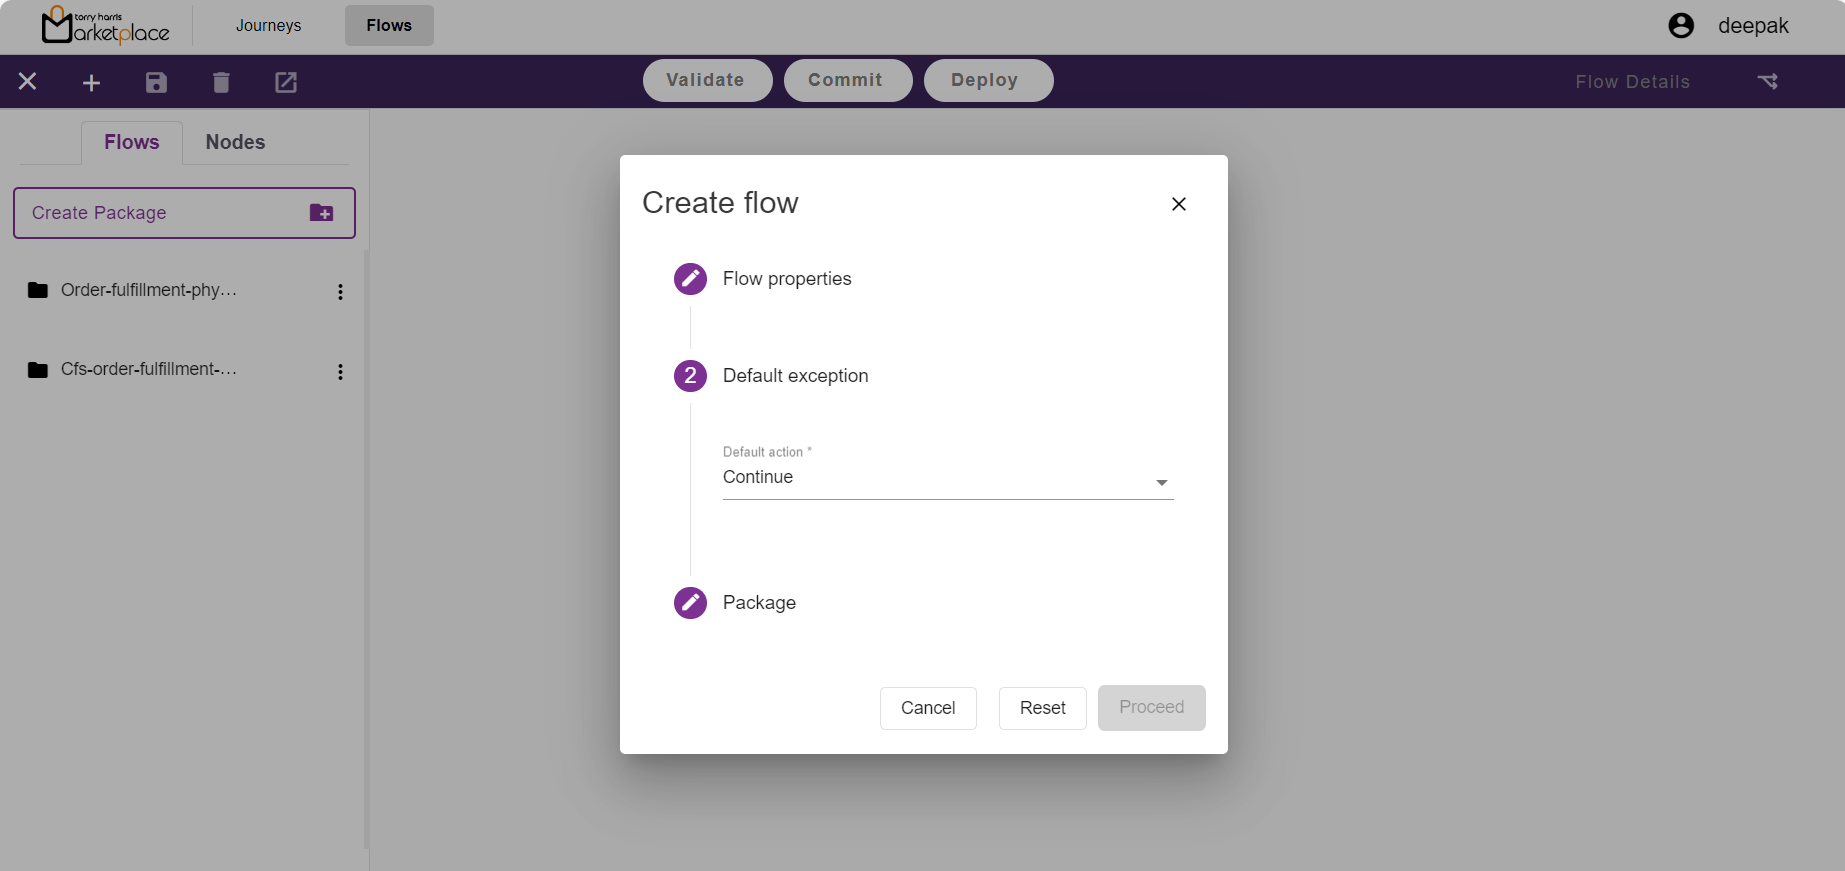
From the drop-down menu, select the Default action as either Stop or Continue.
Select the appropriate Package by selecting the corresponding checkboxes.
If the Package is selected as a New Package.
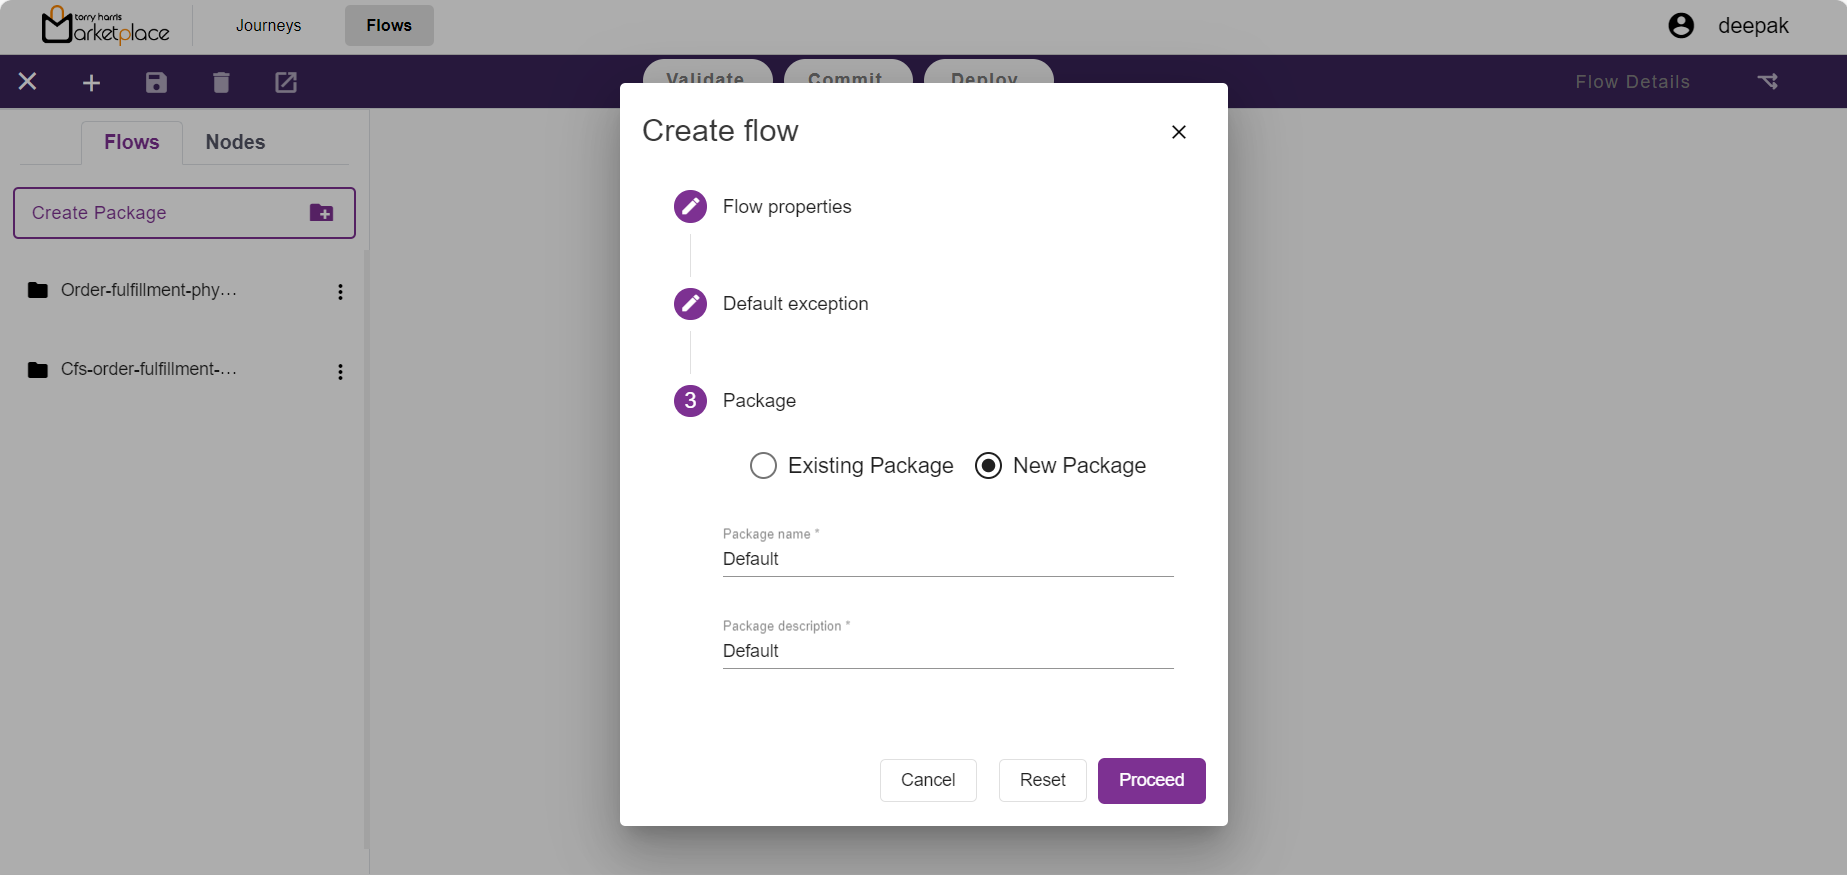
a. Enter the Package name and Package description.
b. Click Proceed to create a new package as well as flow.
Reserved special characters or spaces are not allowed while entering the Package name.
If the Package is selected as an Existing Package.

a. From the drop-down menu, Select Package.
b. Click Proceed.
The newly created Flow is displayed as shown below.
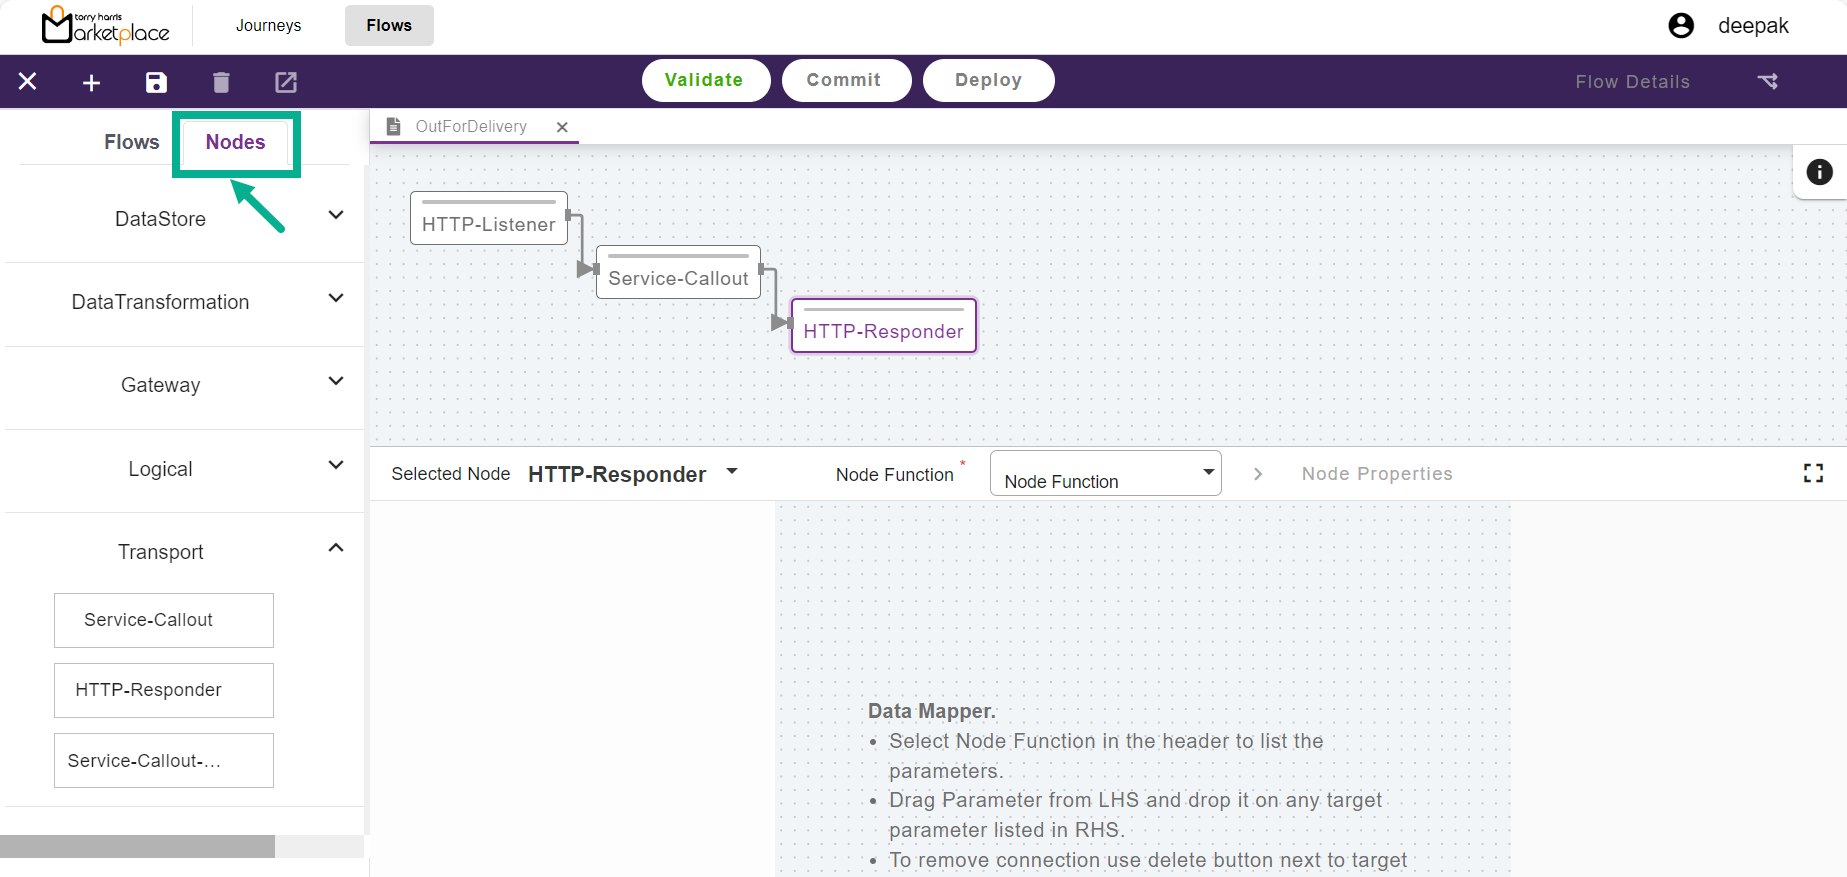
Click Nodes.
Drag and drop the required nodes into the canvas. Use the left and right endpoints to connect the nodes.
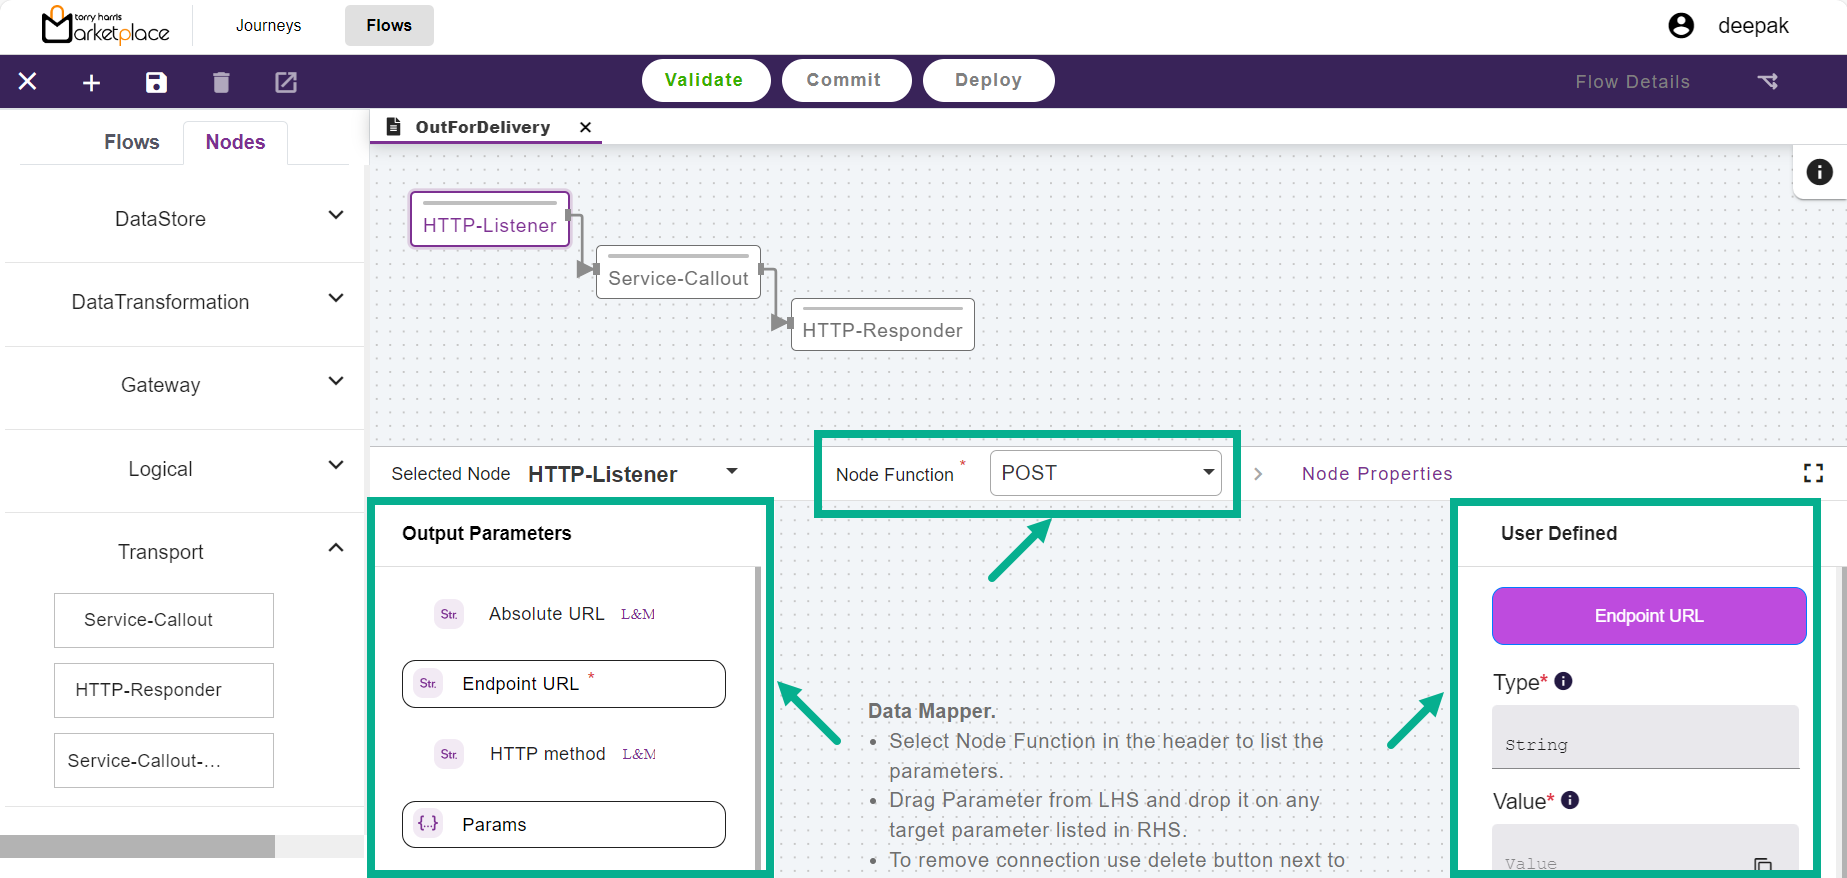
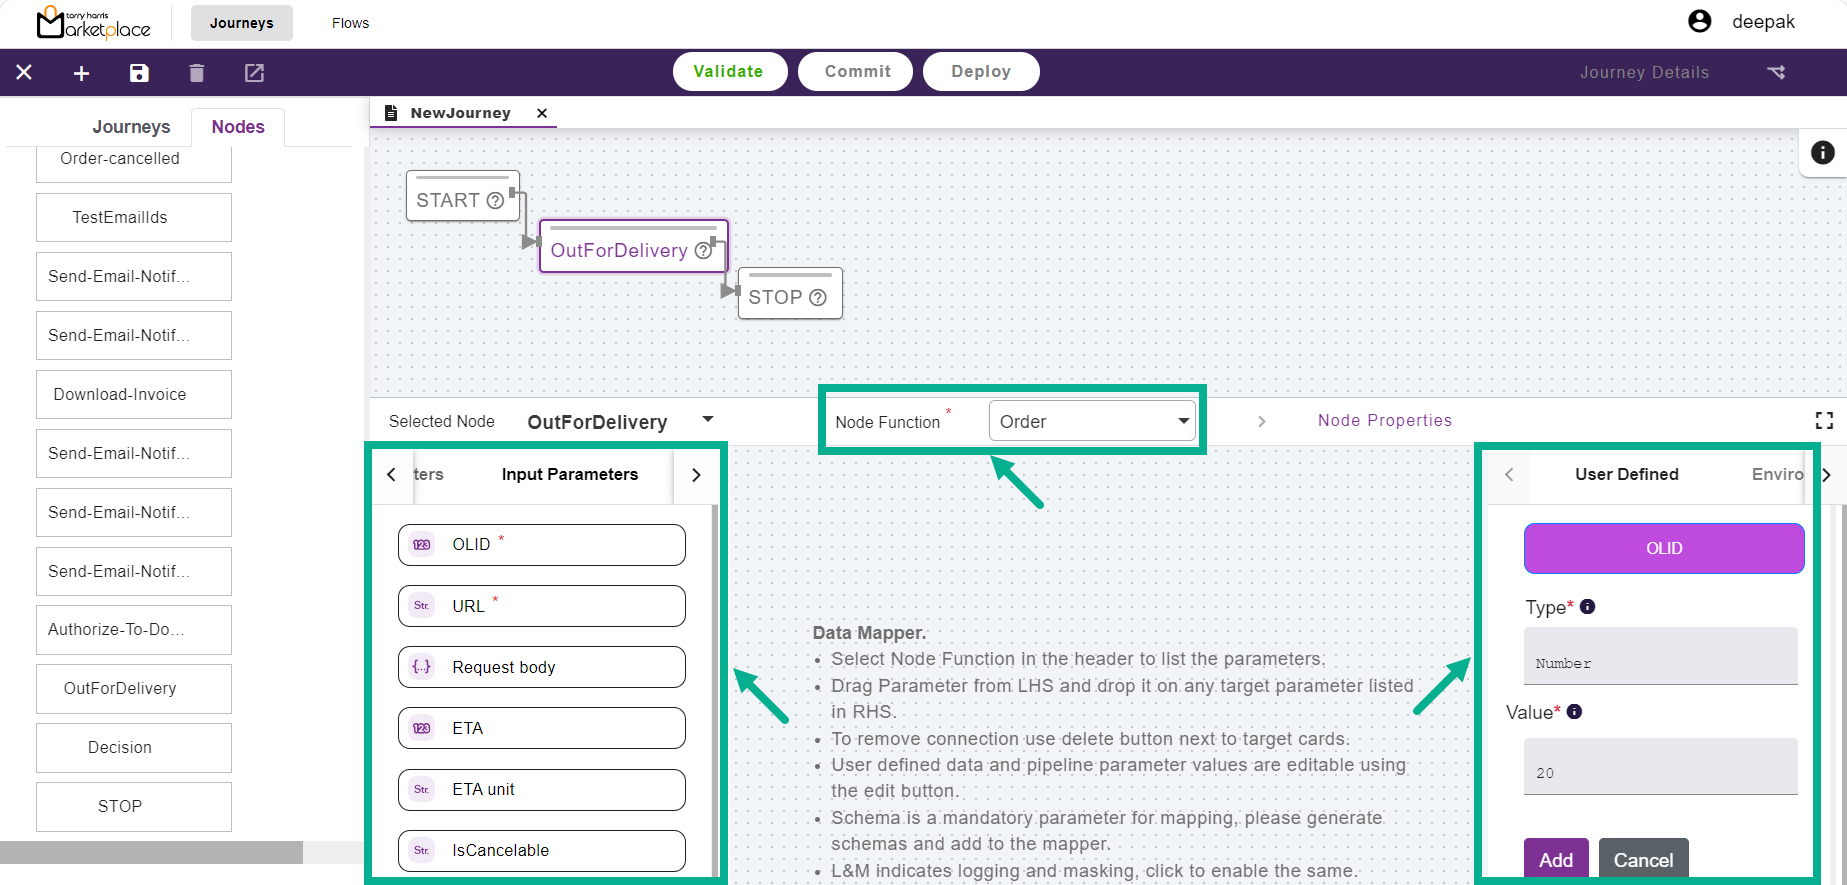
From the drop-down menu, select the Node Function.
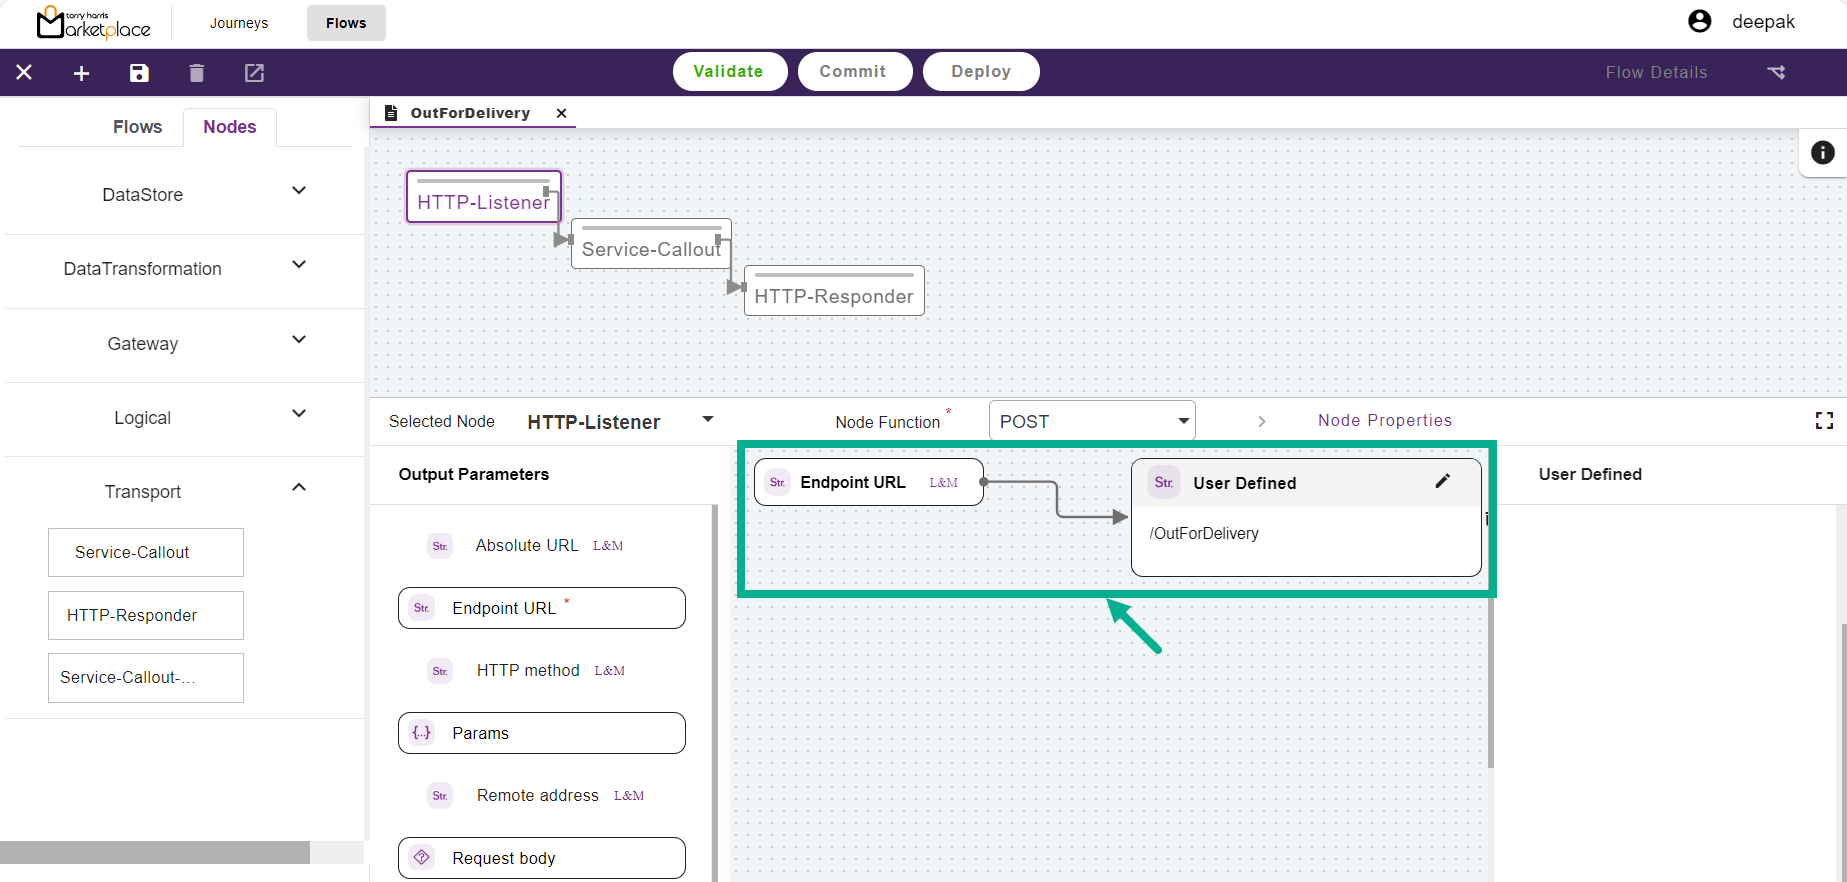
Drag and drop the preferred Output Parameters into the User Defined area.
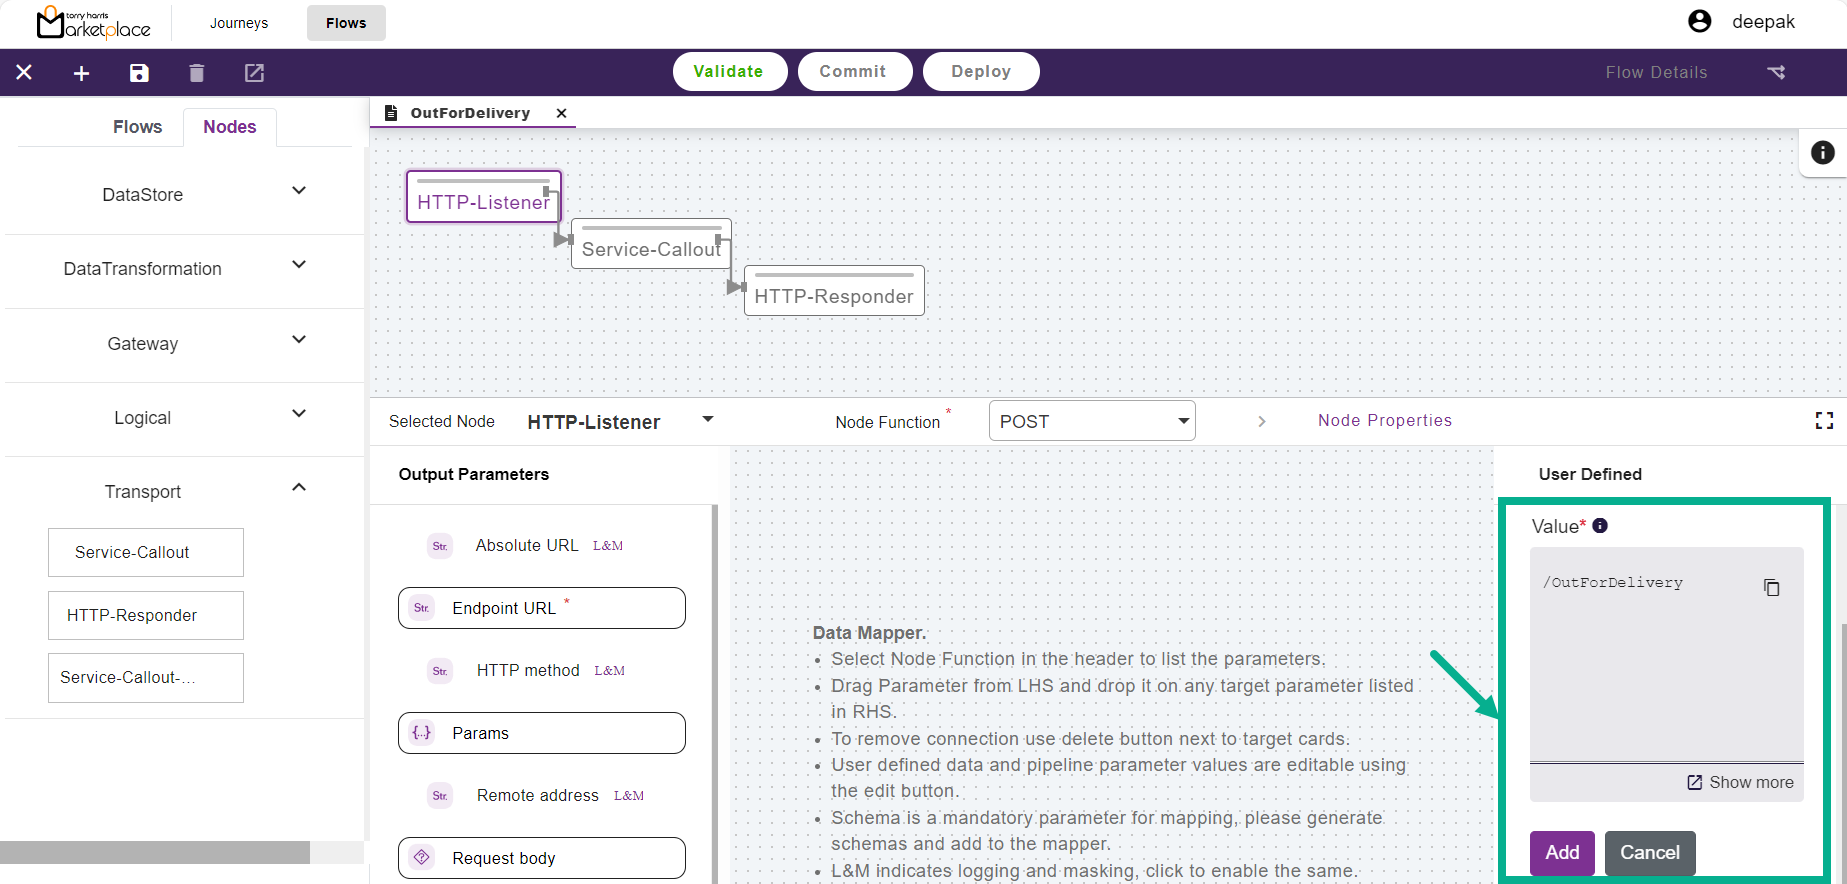
Enter the Value.
Click Add.
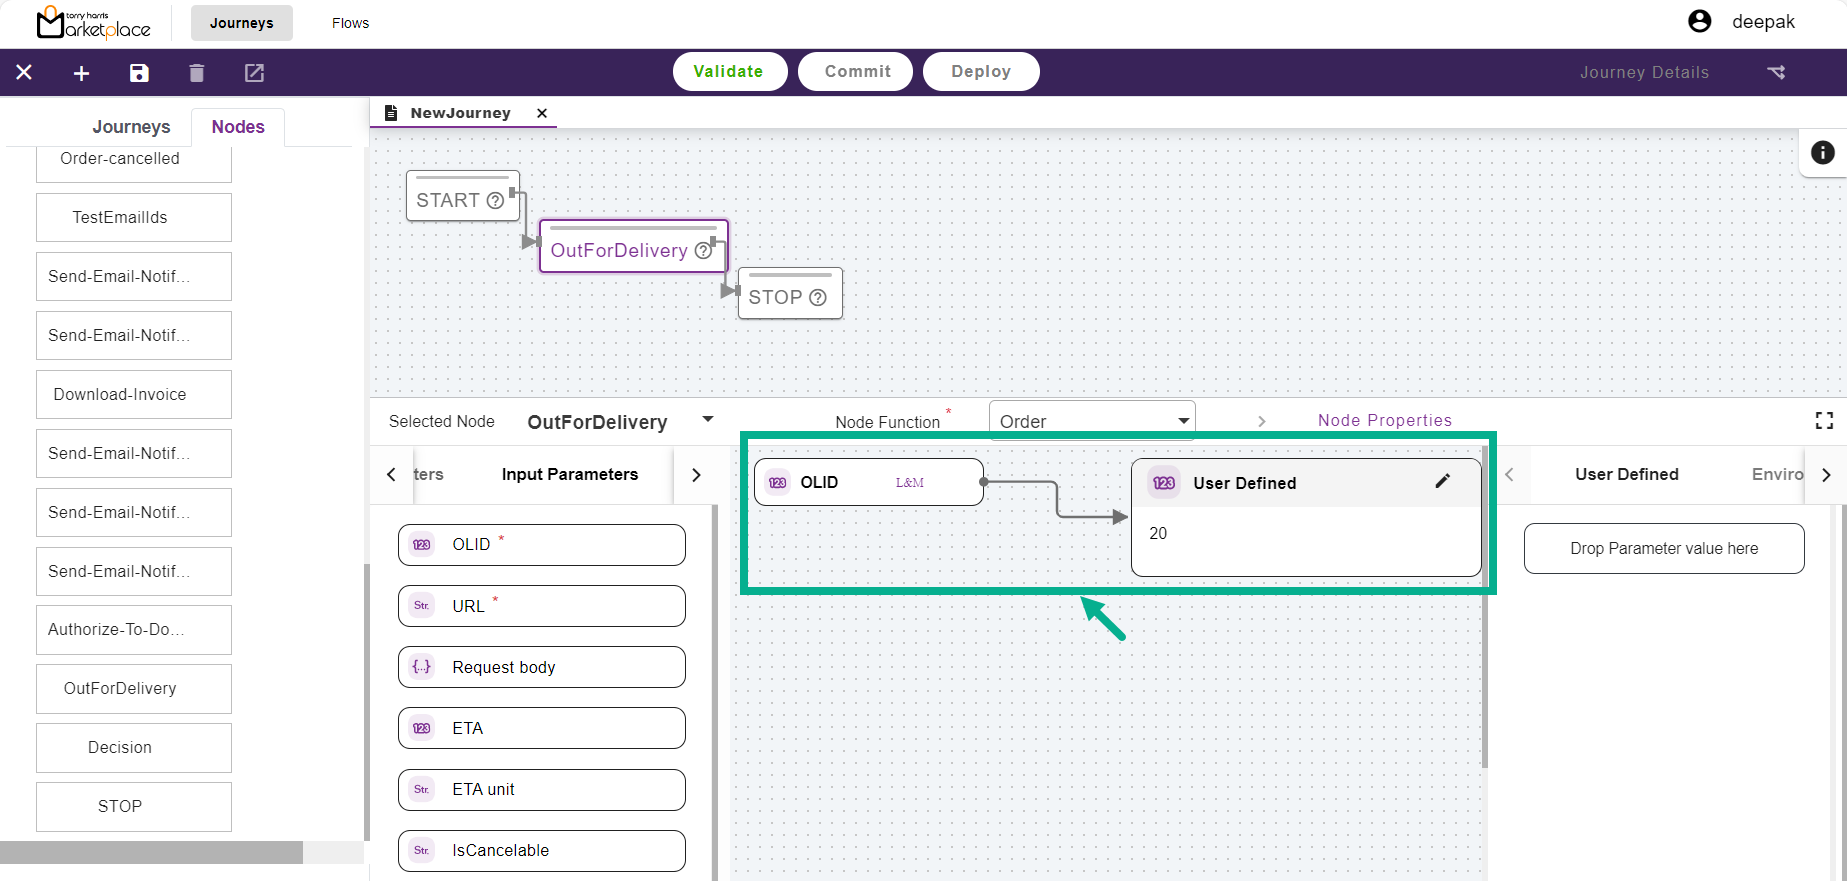
Data is mapped and displayed in the binding panel.
- Select the Next Node.
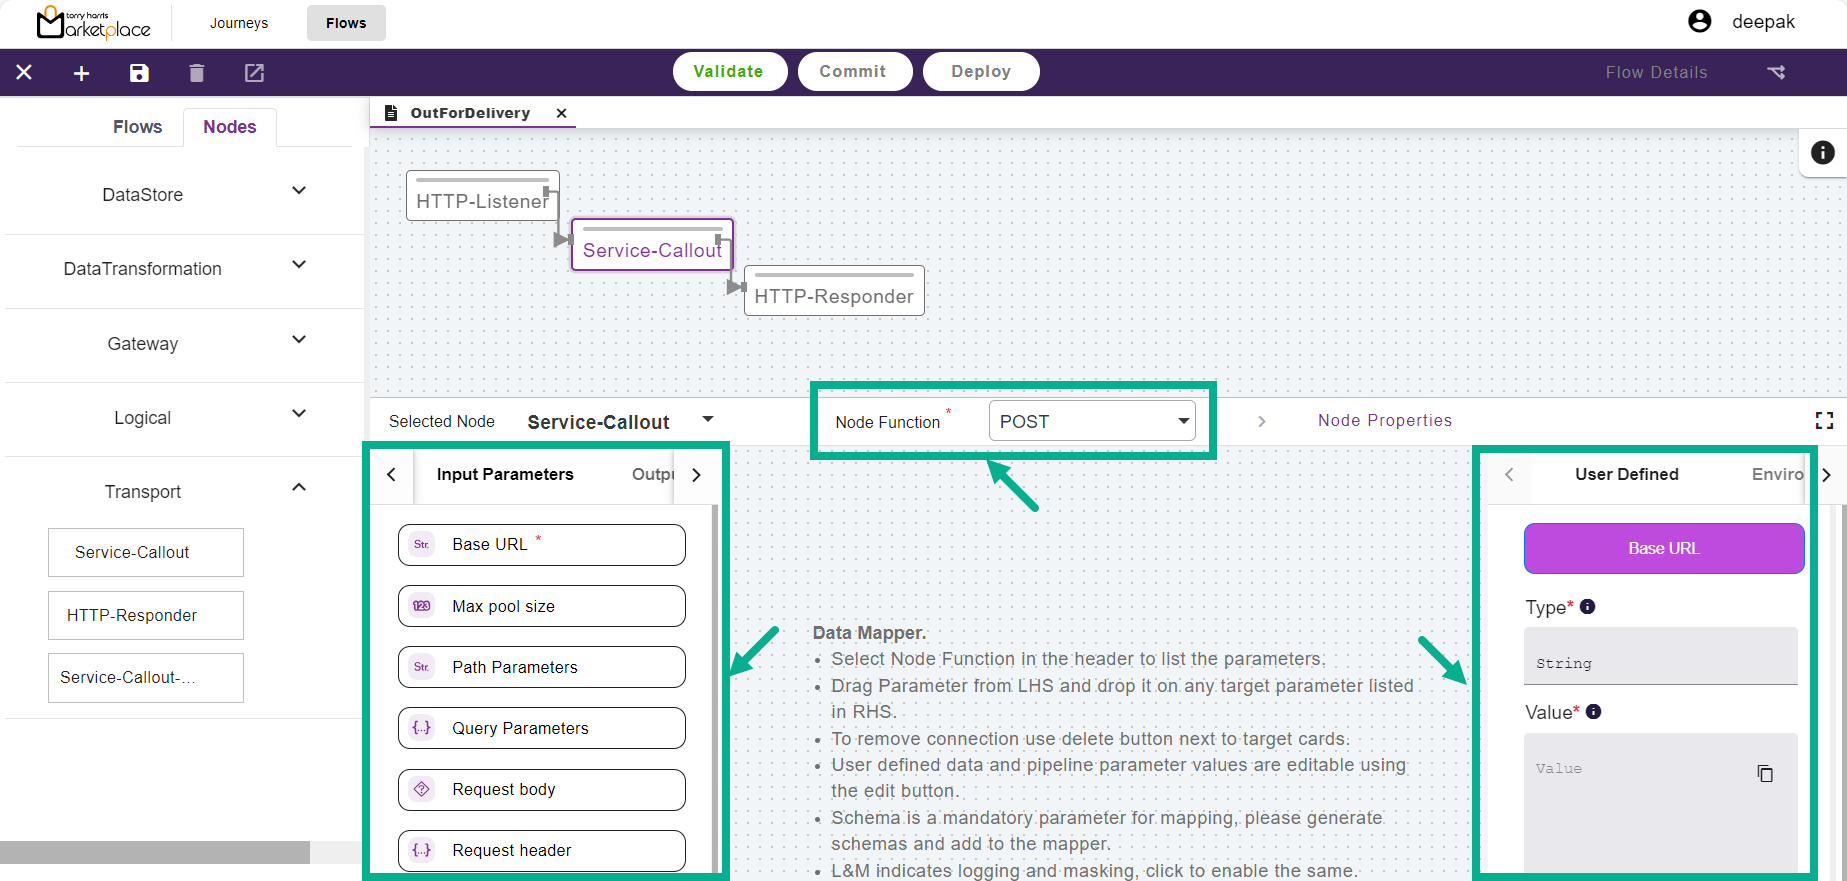
From the drop-down menu, select the Node Function.
Drag and drop the preferred Input Parameters into the User Defined area.
Enter the Value.

Click Add.
Additionally, Map all other required parameters of the node.
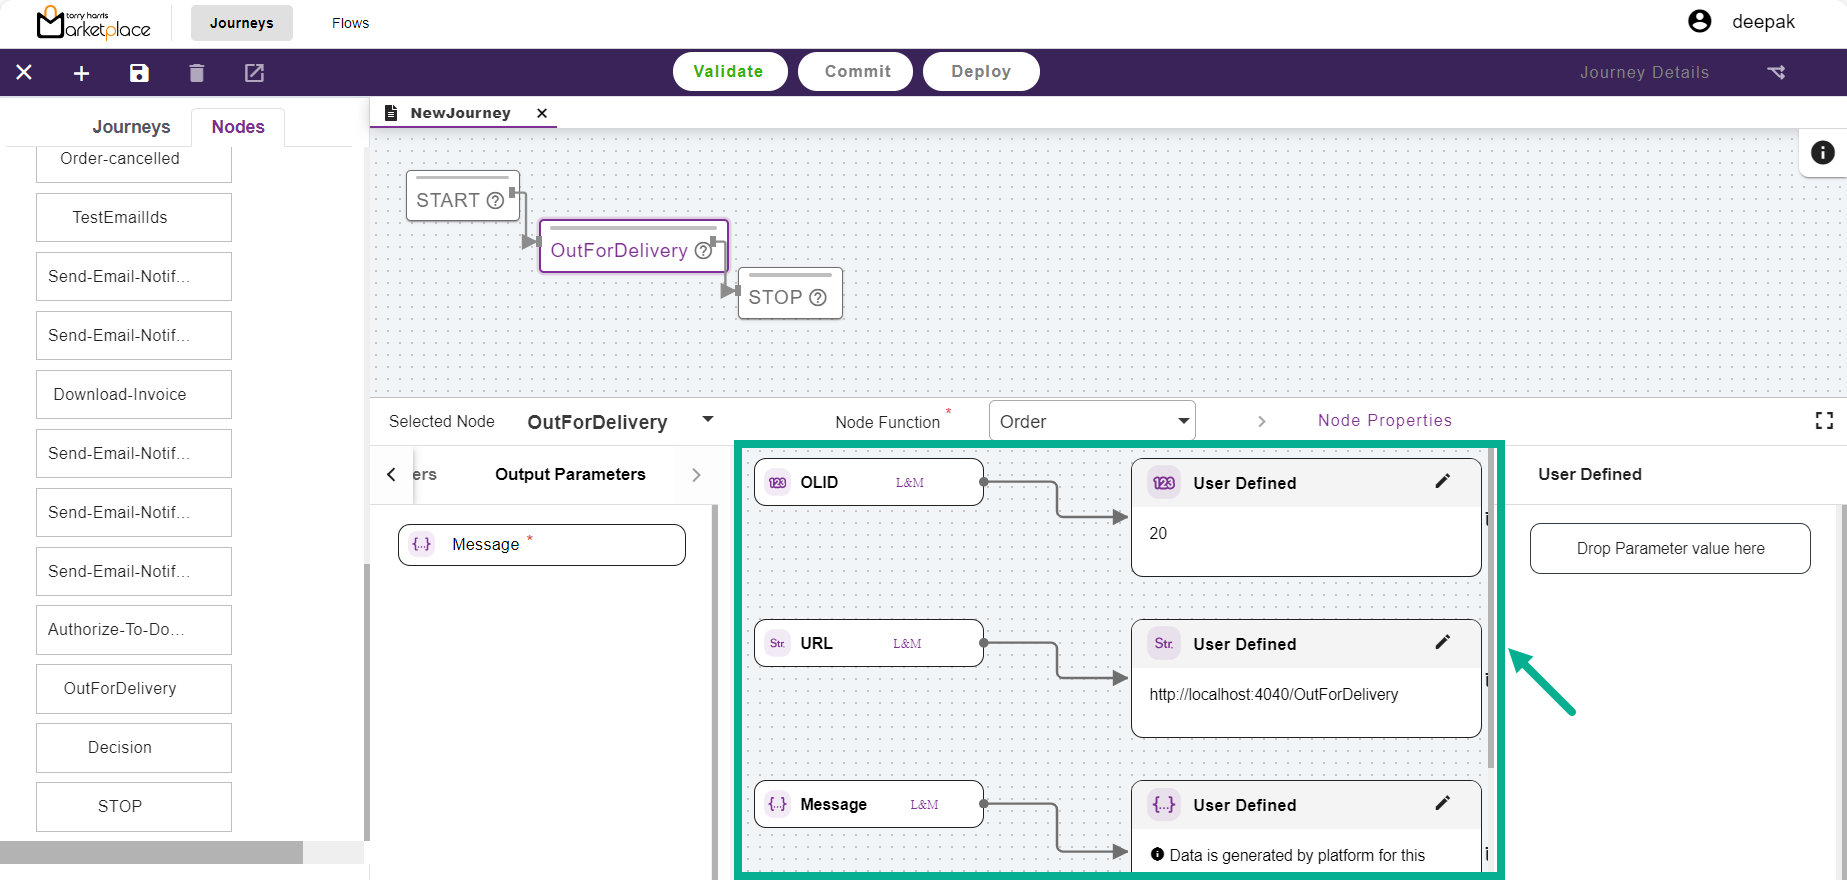
Data is mapped and displayed in the binding panel.

- Select the next node.
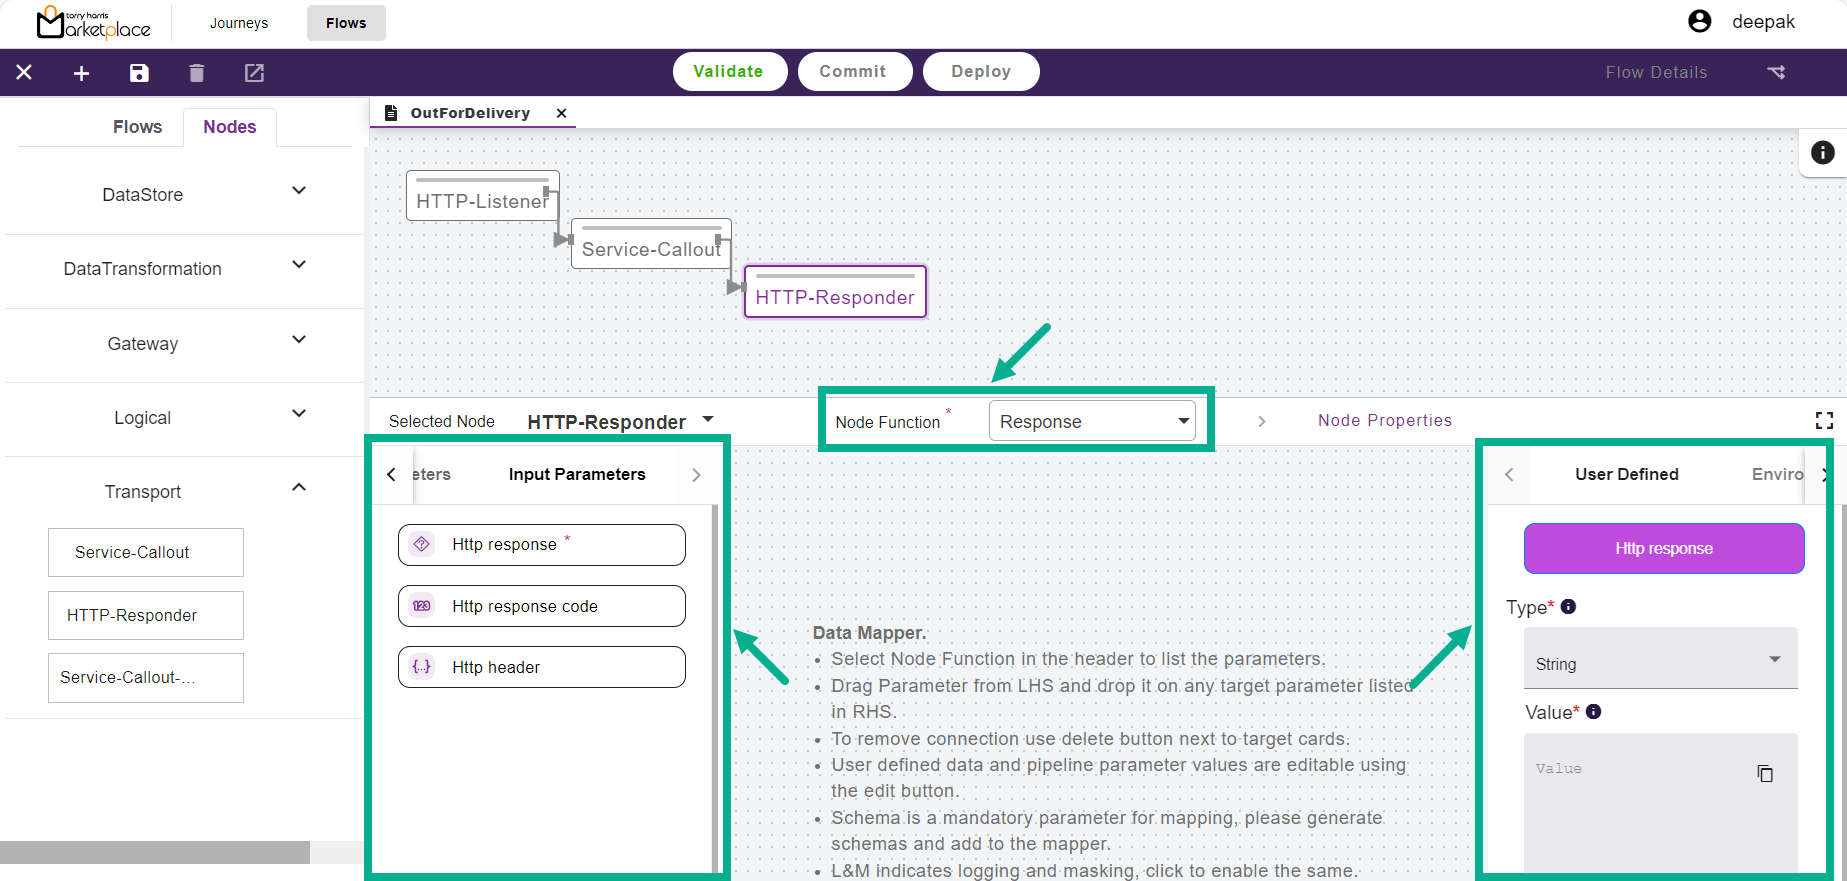
From the drop-down menu, select the Node Function.
Drag and drop the preferred Input Parameters into the User Defined area.
From the drop-down menu, select the Type.
Enter the Value.

- Click Add.
Data is mapped and displayed in the binding panel.

- Click the Save icon.
The Save Flow dialogue box appears as shown below.
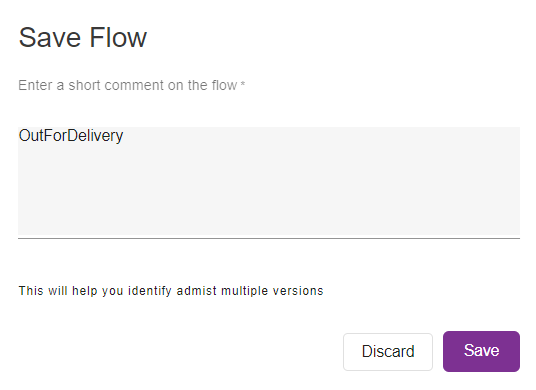
Enter the Comments.
Click Save.
On saving, the confirmation message appears as shown below.
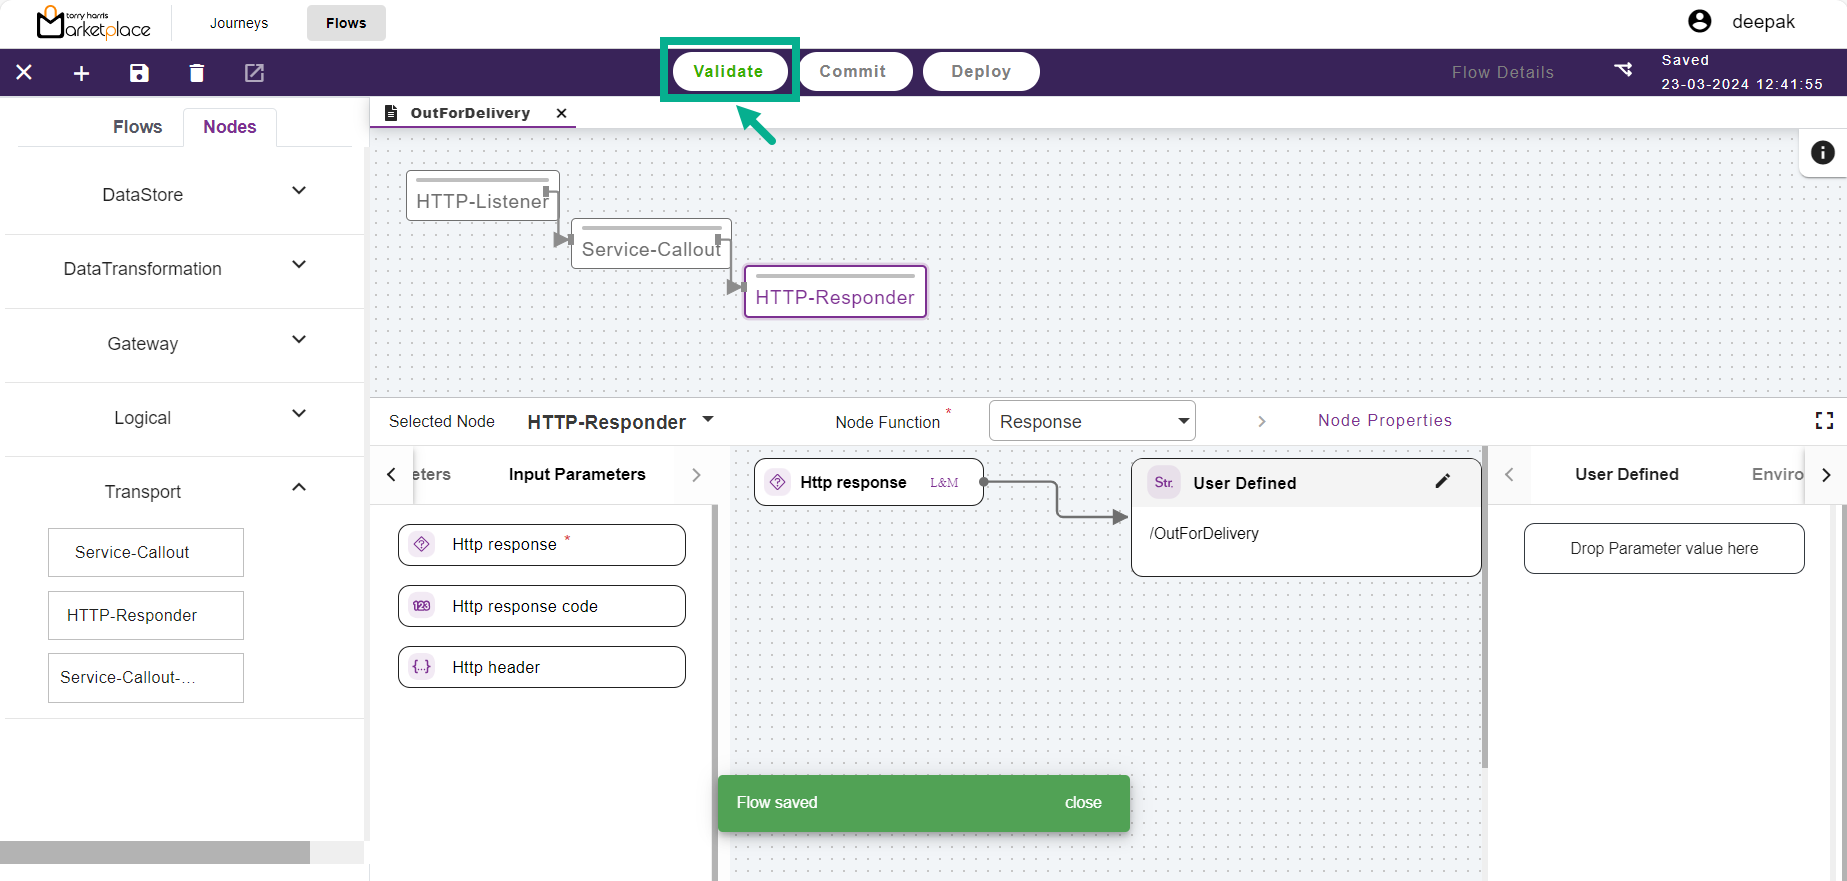
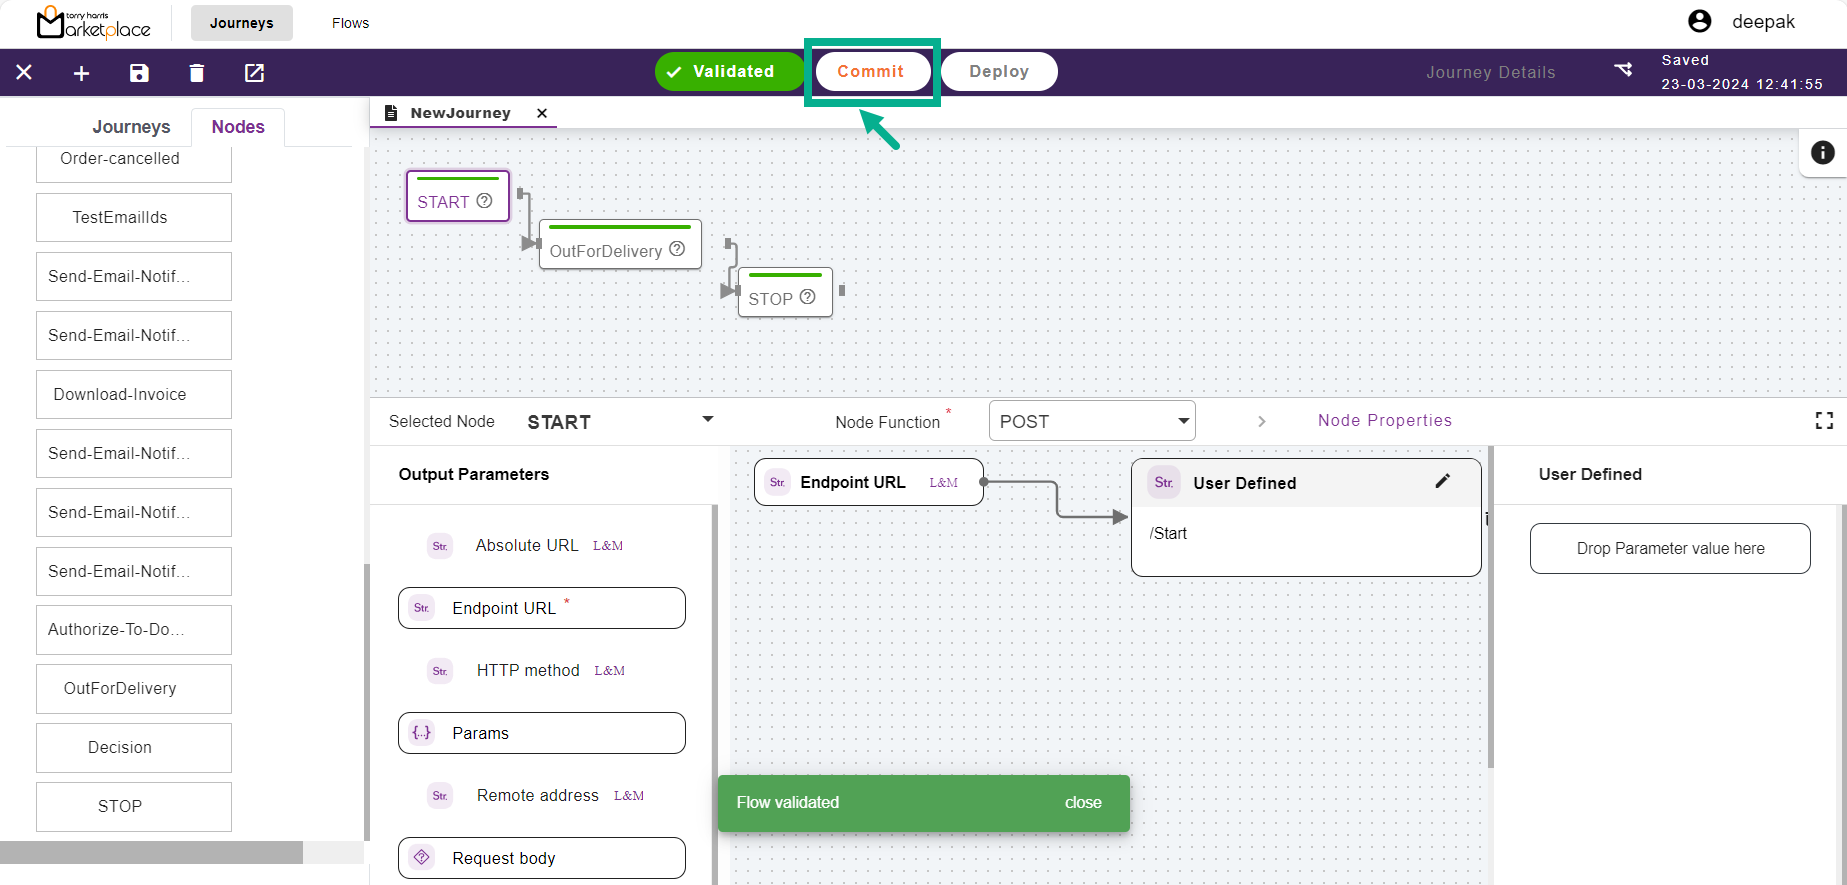
- Click Validate.
On validating, the confirmation message appears as shown below.

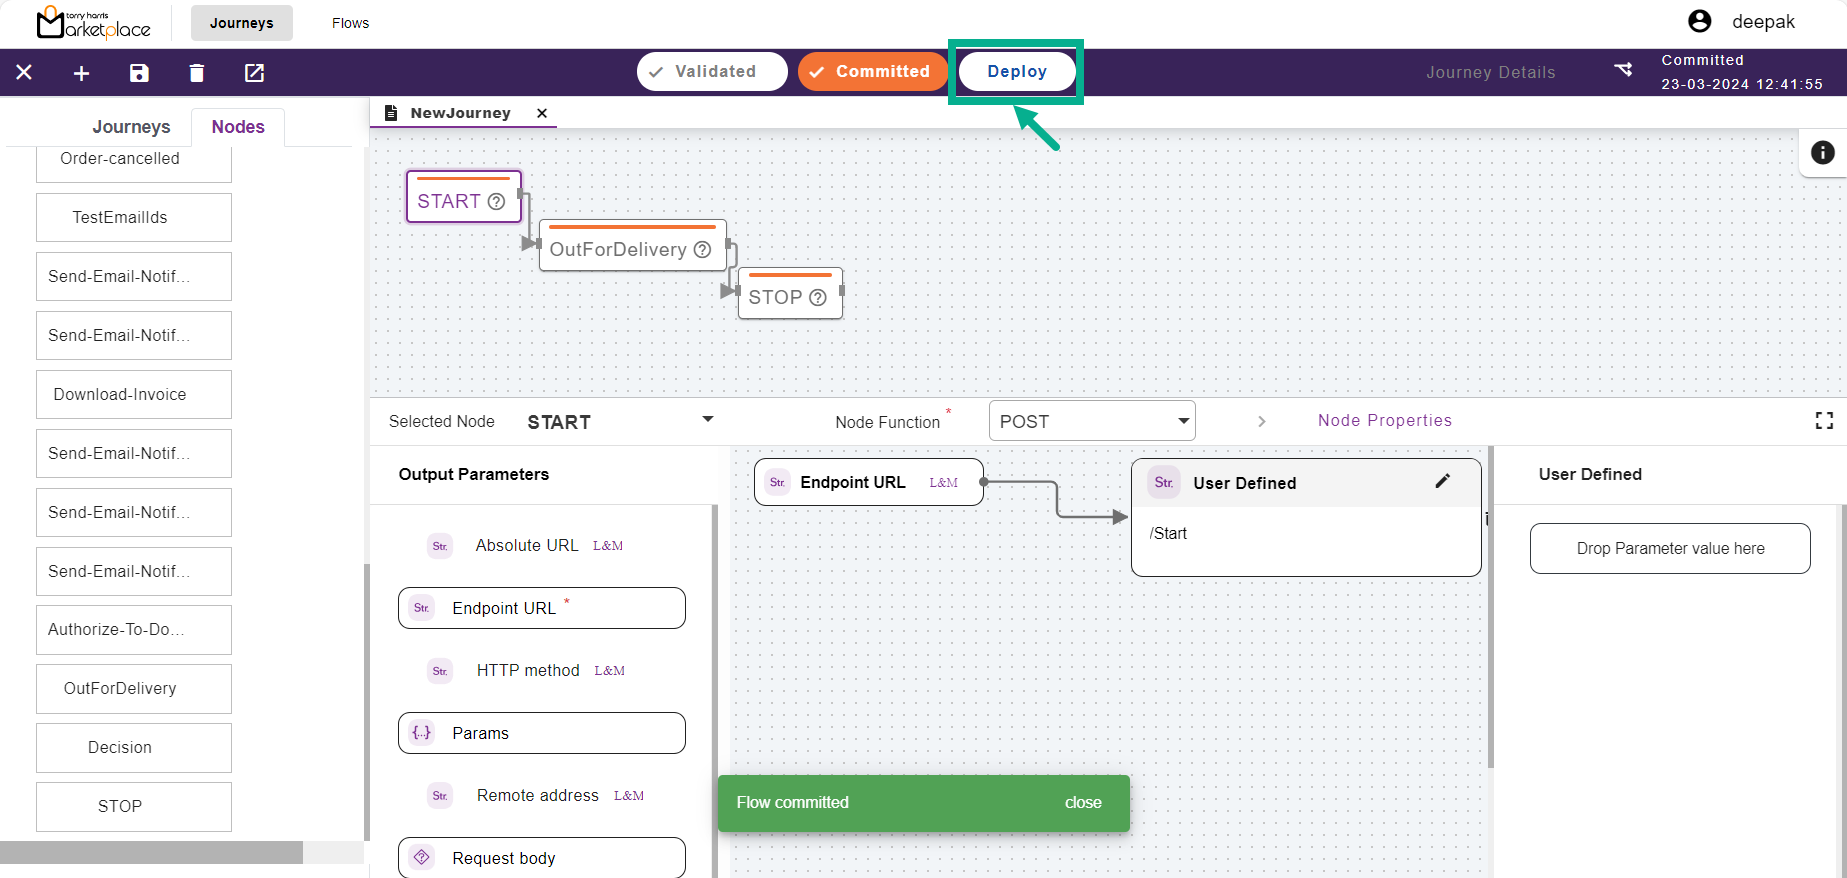
- Click Commit.
On committing, the confirmation message appears as shown below.
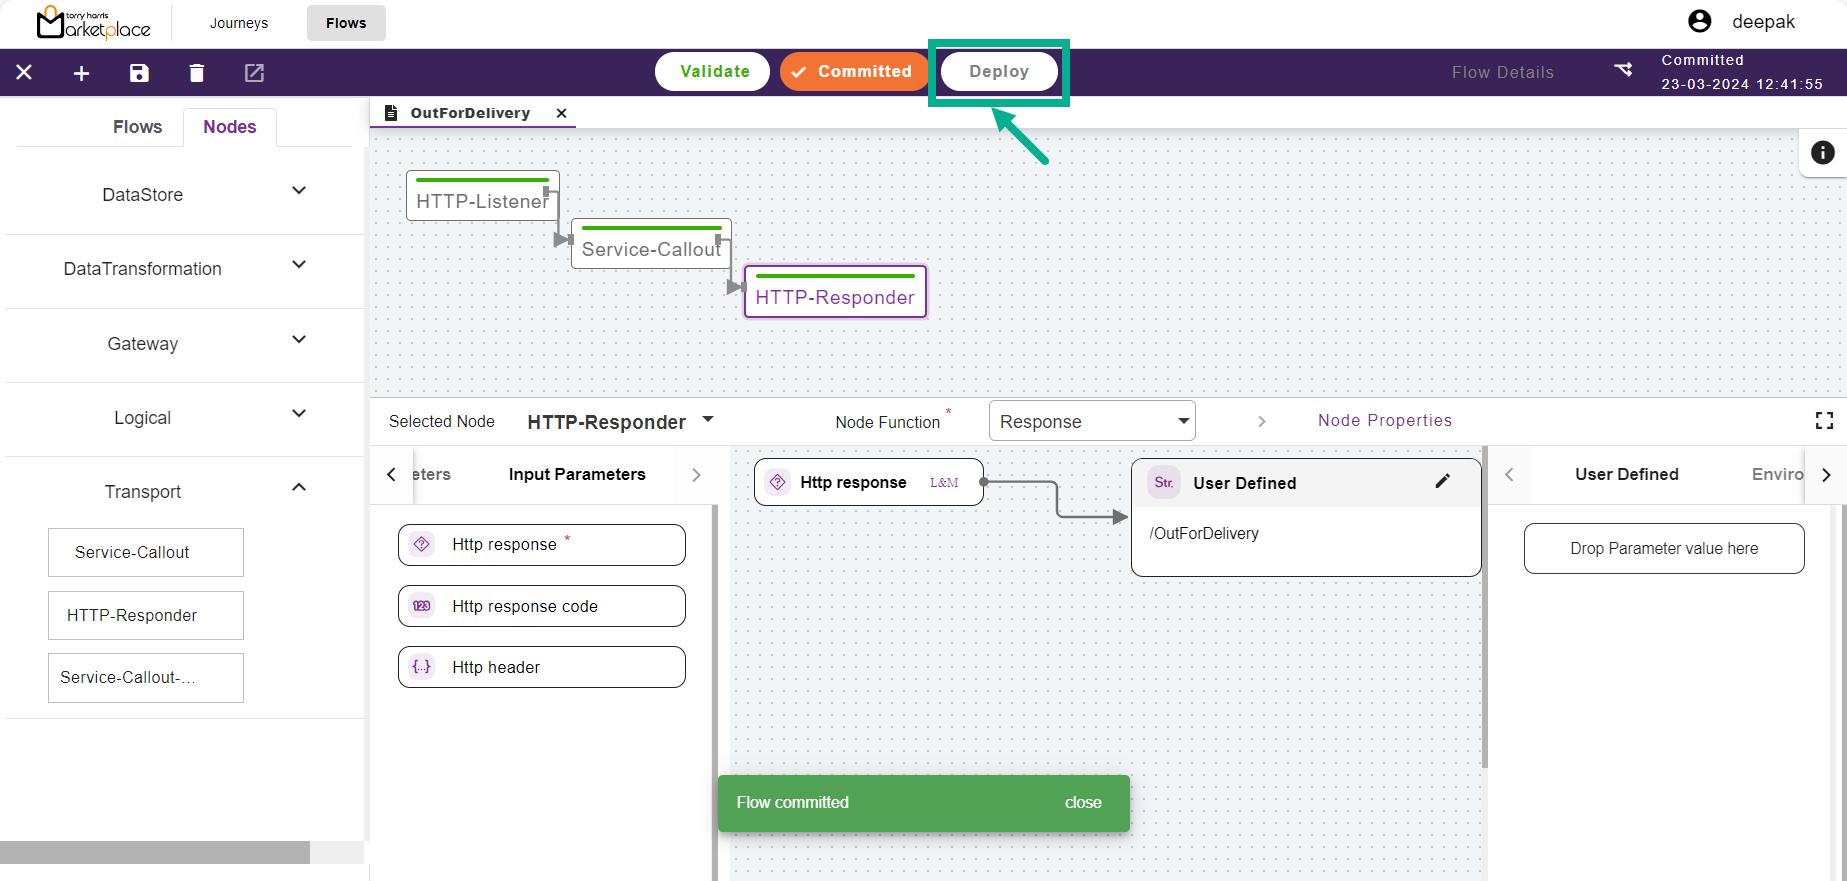
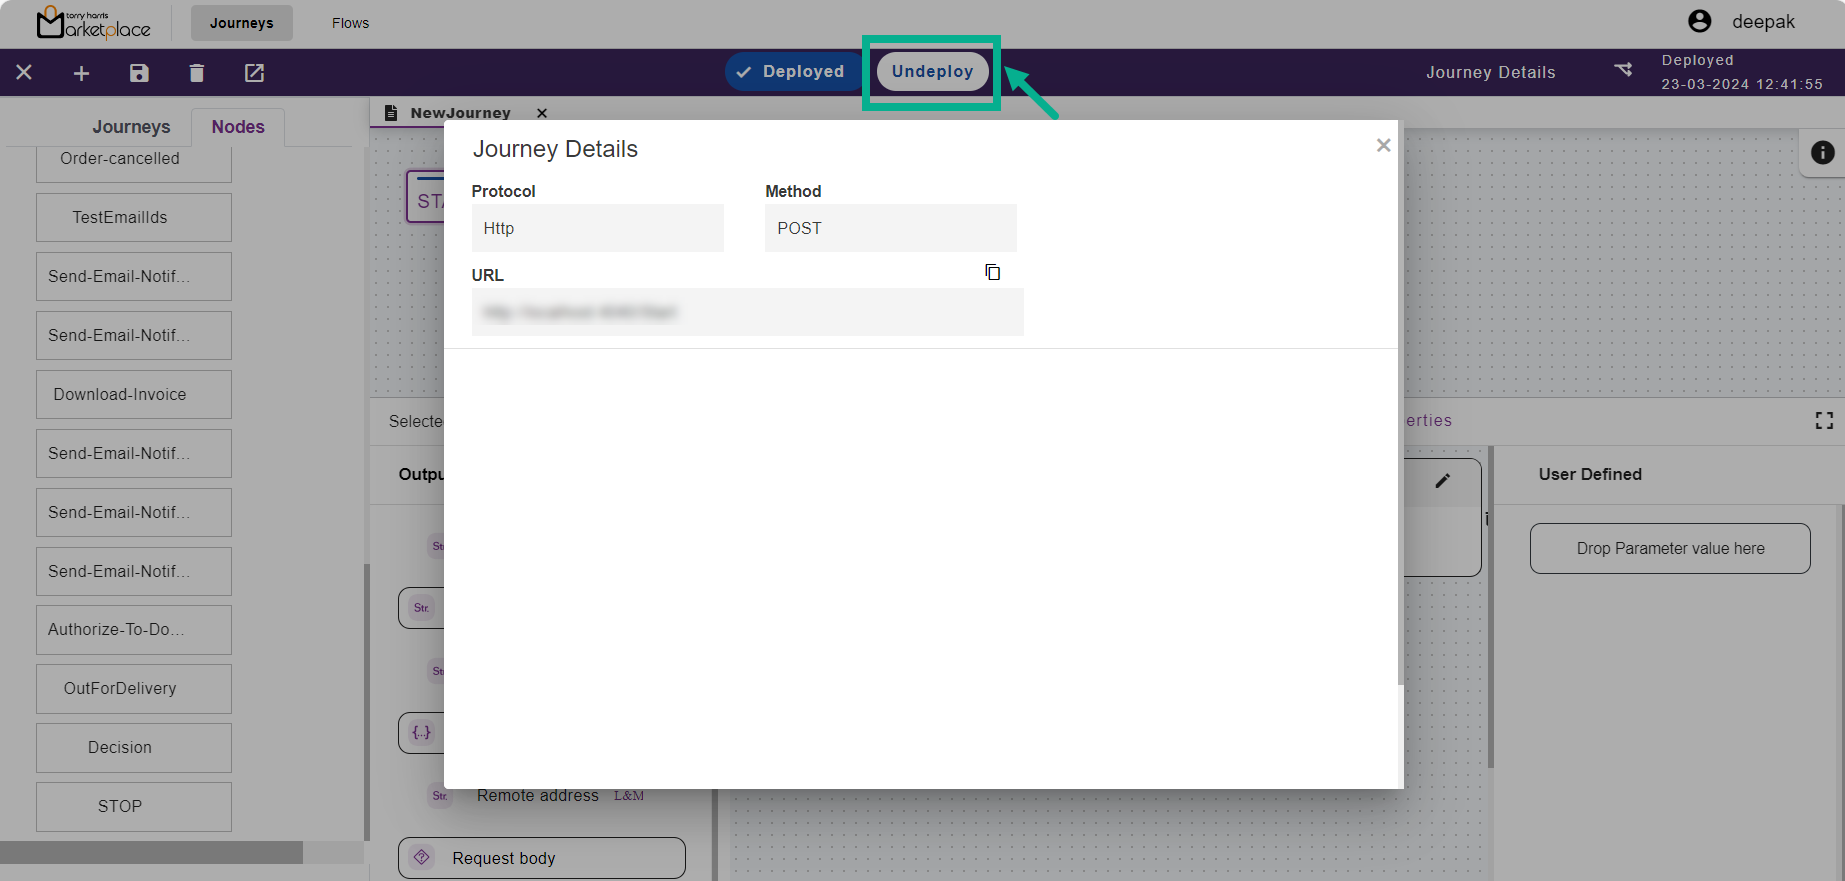
- Click Deploy.
The Flow Details dialogue box appears as shown below.
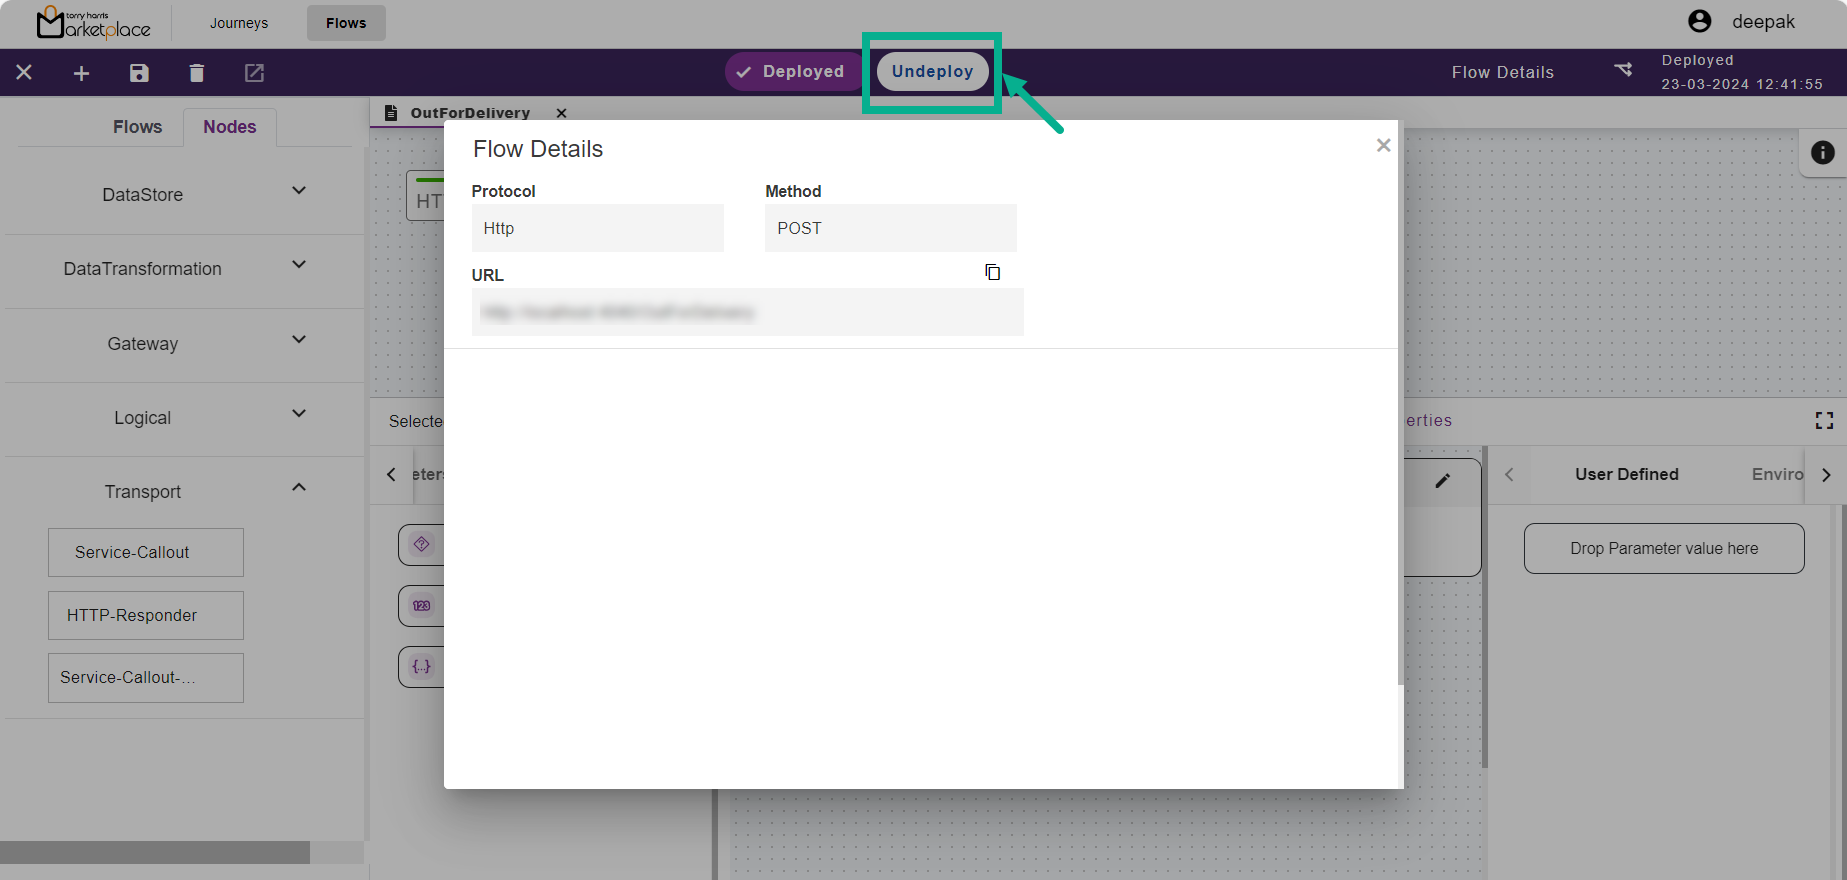
Click the Undeploy button to undeploy the flow.
Creating a New Journey
- Click the Journey tab.
The Journeys screen displays as shown below.
- Click Move to Canvas.
The Onboarding Filters dialogue box appears as shown below.
- Select the appropriate Journey Type by selecting the corresponding radio button.
The Product Type option is available when the Journey Type is Order Fulfillment.
Select the appropriate Product Type by selecting the corresponding radio button.
Click Apply.
The Journey canvas page is updated and displayed as shown below.
- Click the Add icon located in the upper left corner.
The drop-down displays as shown below.

- From the drop-down menu, select New Journey.
The Create Journey dialogue box appears as shown below.

Enter the Journey name and Journey description.
From the drop-down menu, select the Journey type.
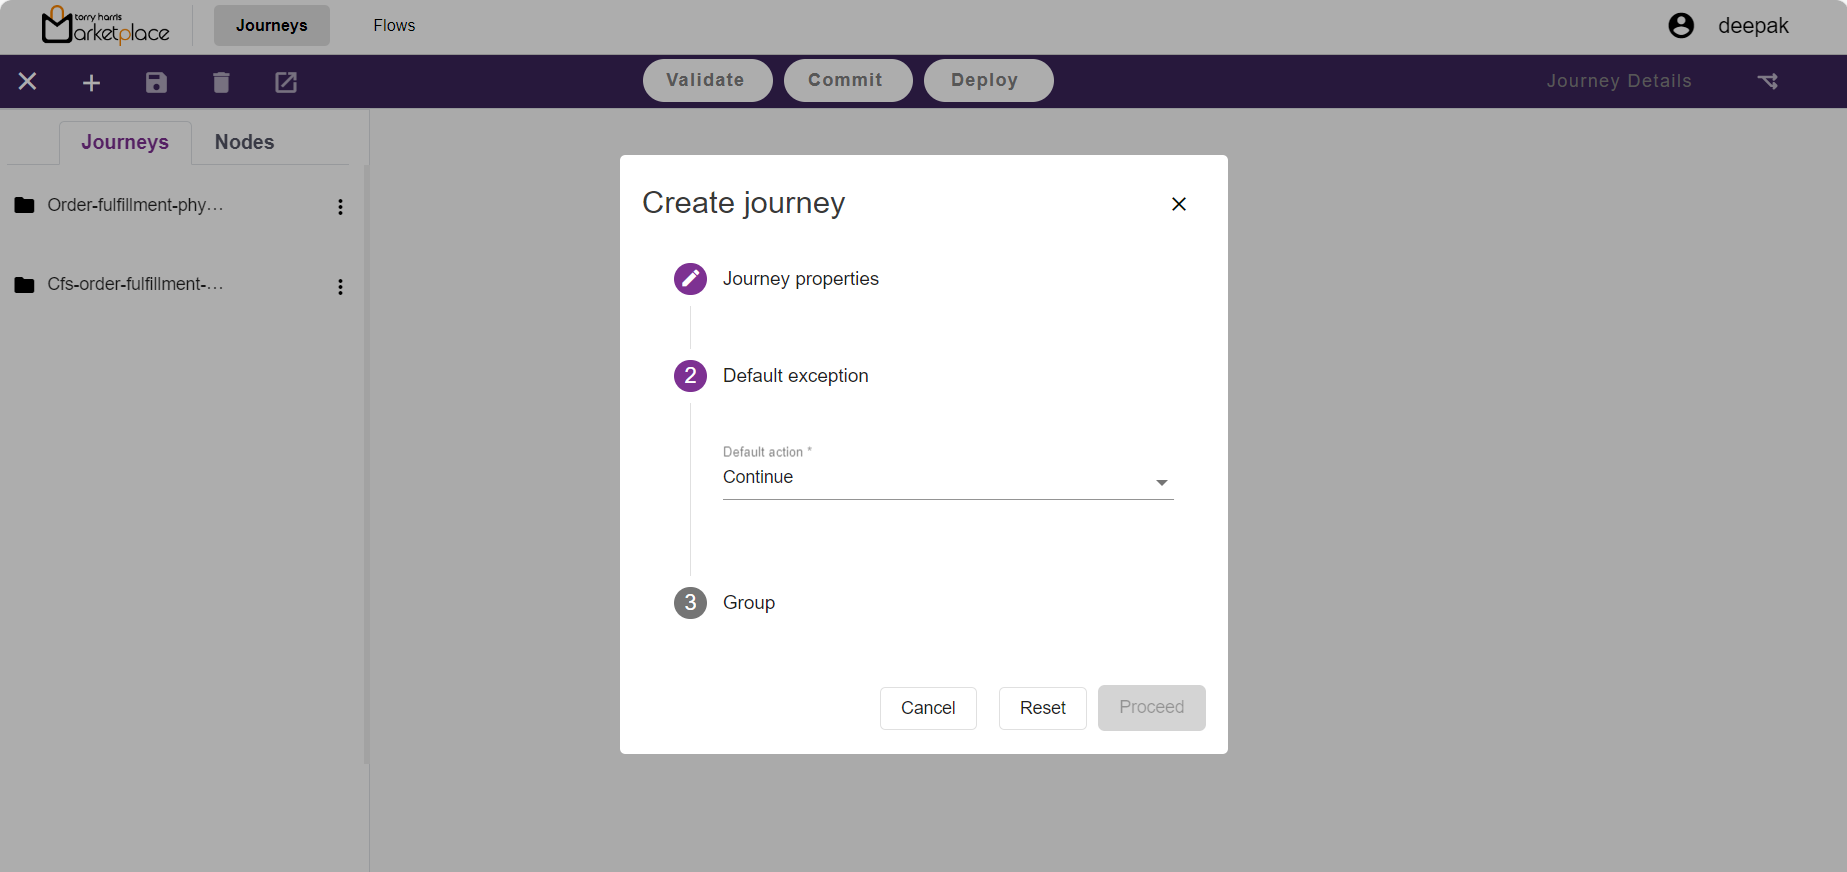
- From the drop-down menu, select the Default action as either Stop or Continue.
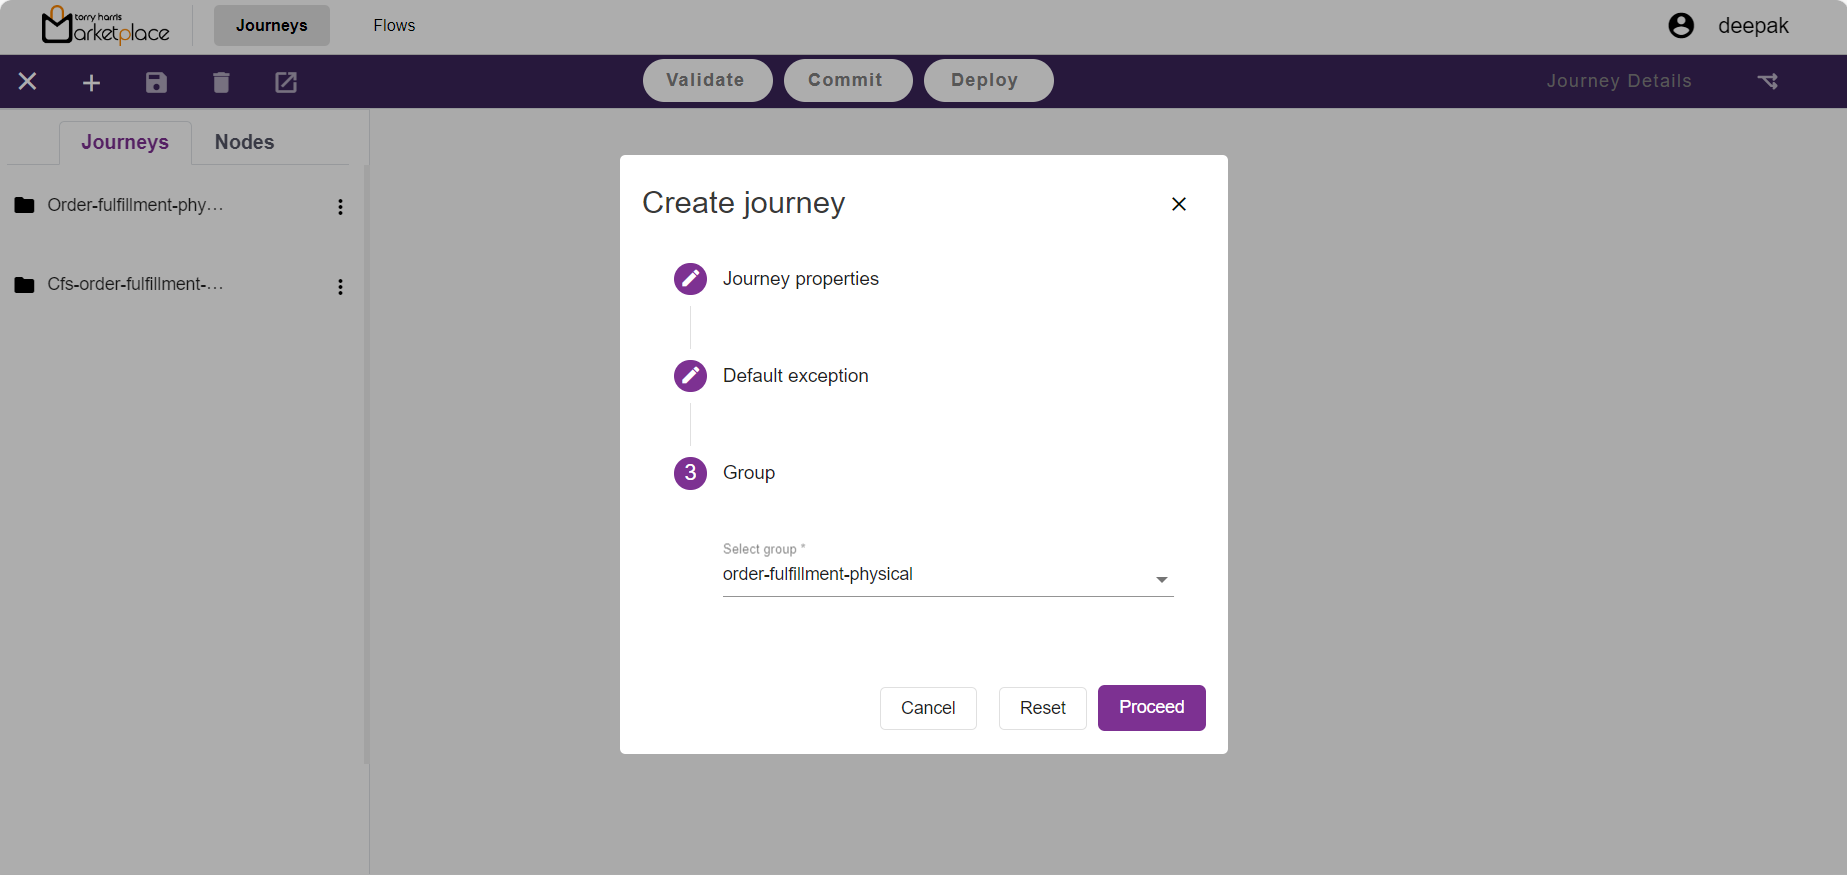
- From the drop-down menu, Select Group.
A new journey can only be created for the Selected group.
- Click Proceed.
The newly created Journey is displayed as shown below.

Click Nodes.
Drag and drop the required nodes into the canvas. Use the left and right endpoints to connect the nodes.

From the drop-down menu, select the Node Function.
Drag and drop the preferred Output Parameters into the User Defined area.
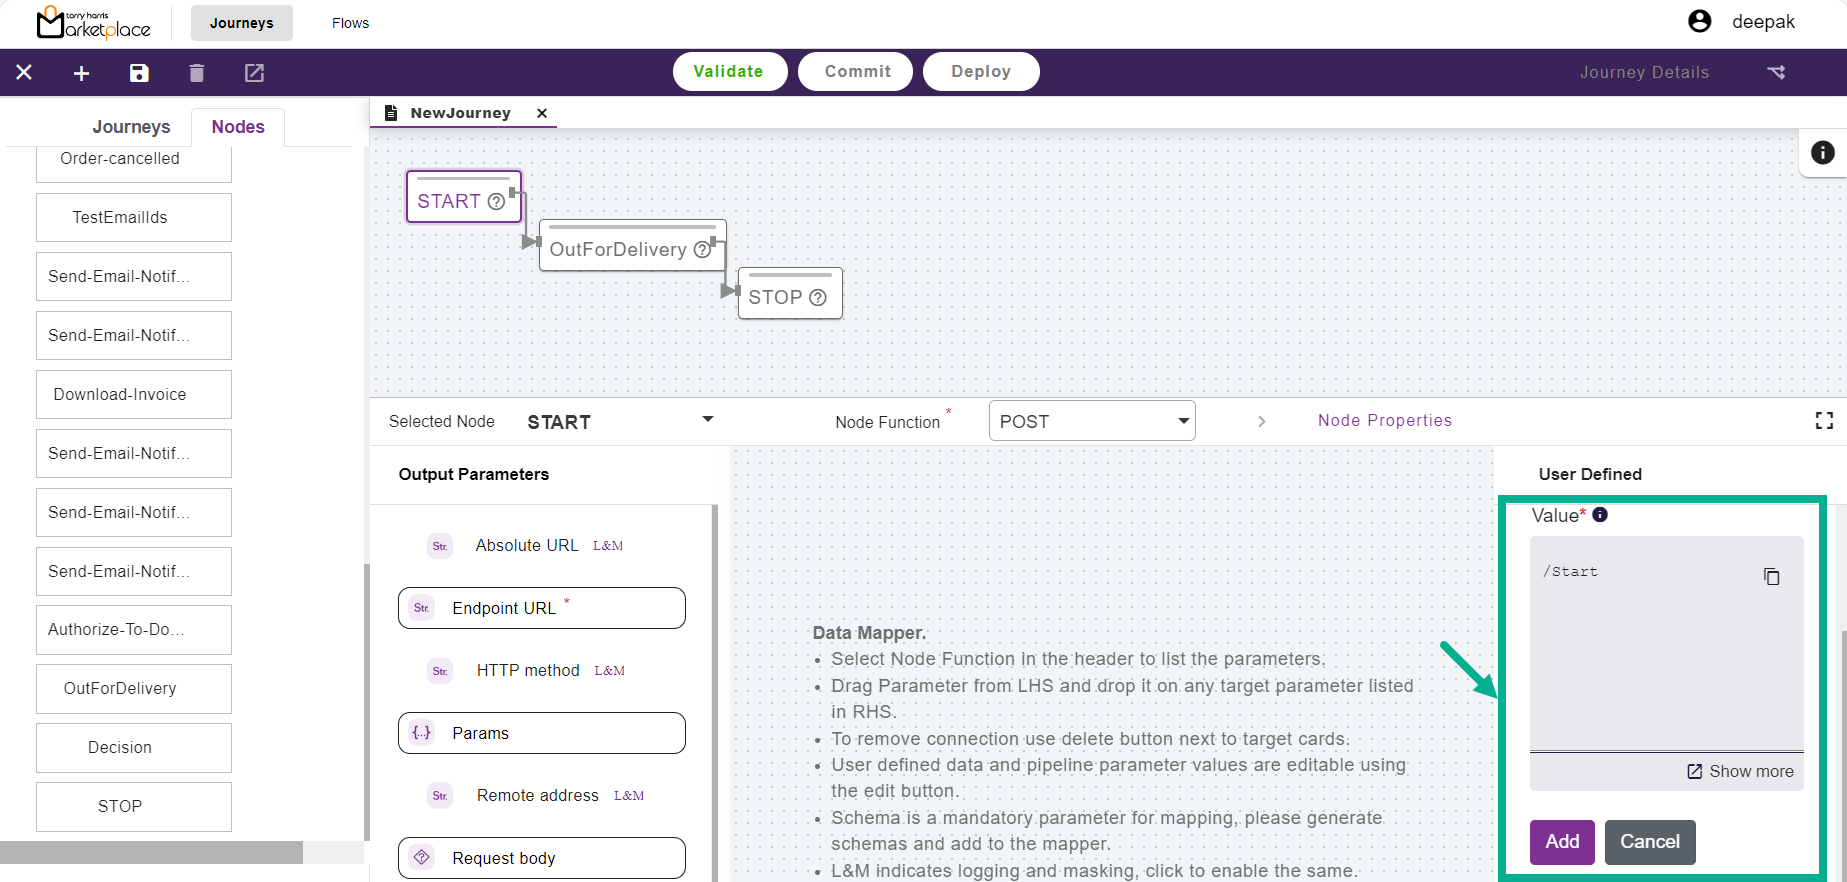
Enter the Value.
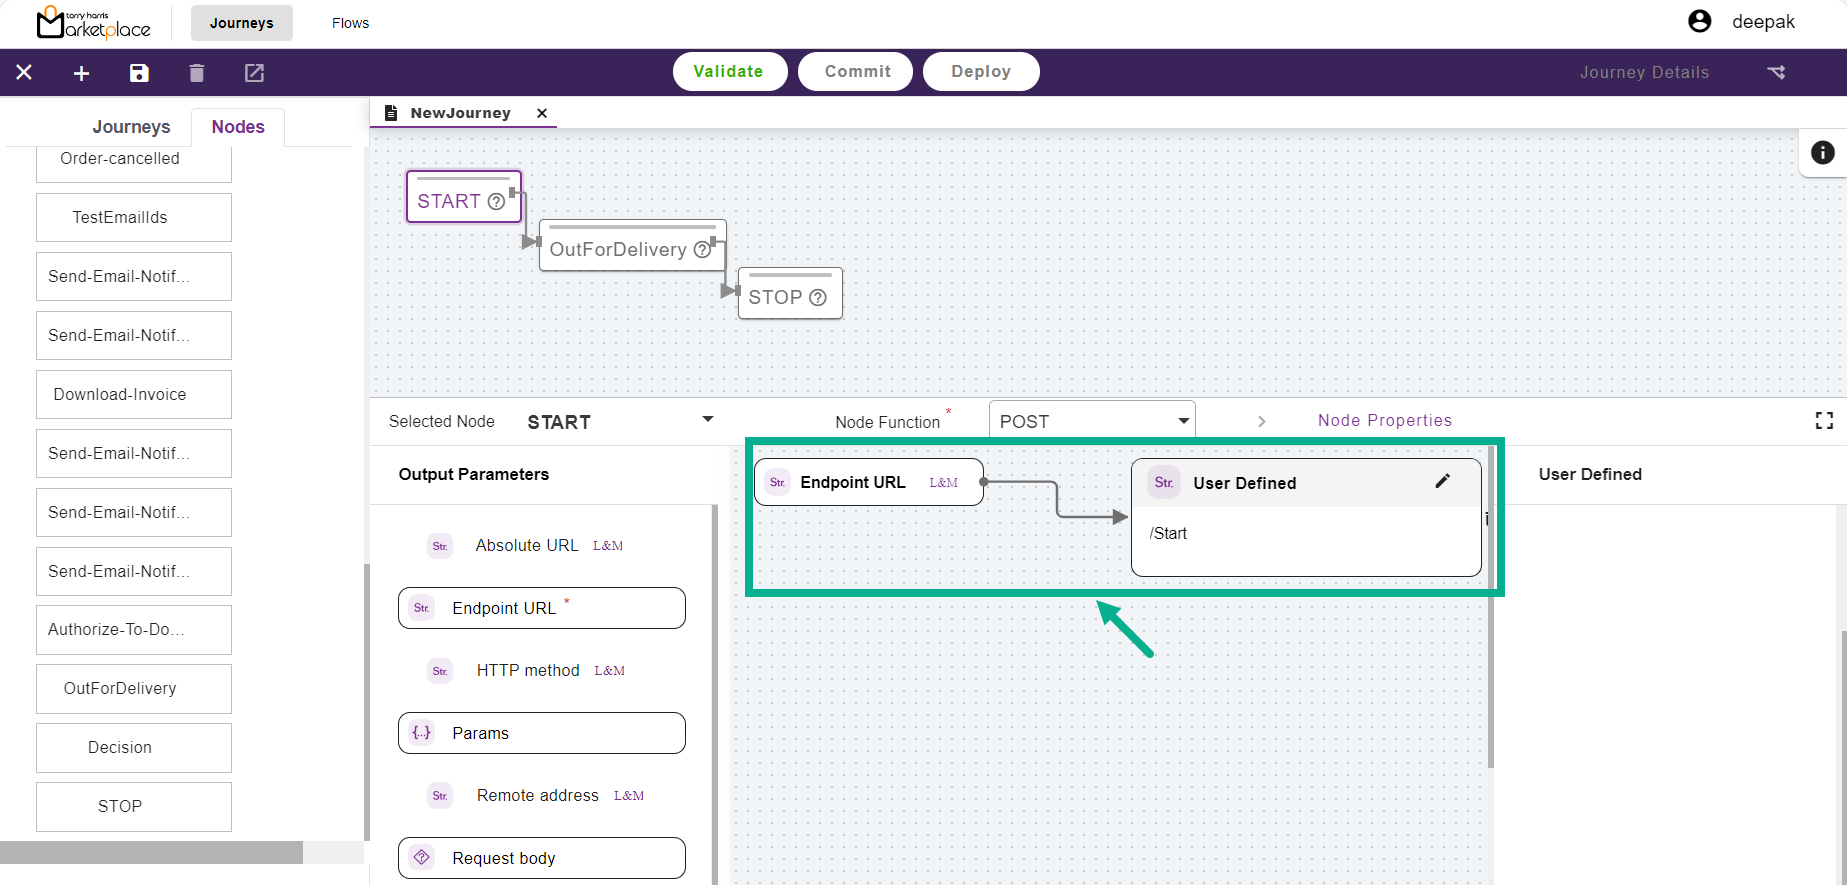
Click Add.
Data is mapped and displayed in the binding panel.
- Select the next node (Out-for-Delivered12).
From the drop-down menu, select the Node Function.
Drag and drop the preferred Input Parameters into the User Defined area.
Enter the Value.
Click Add.
Data is mapped and displayed in the binding panel.
- Additionally, fill in the Input and Output Parameters with all required values.
- Select the next node (Stop).
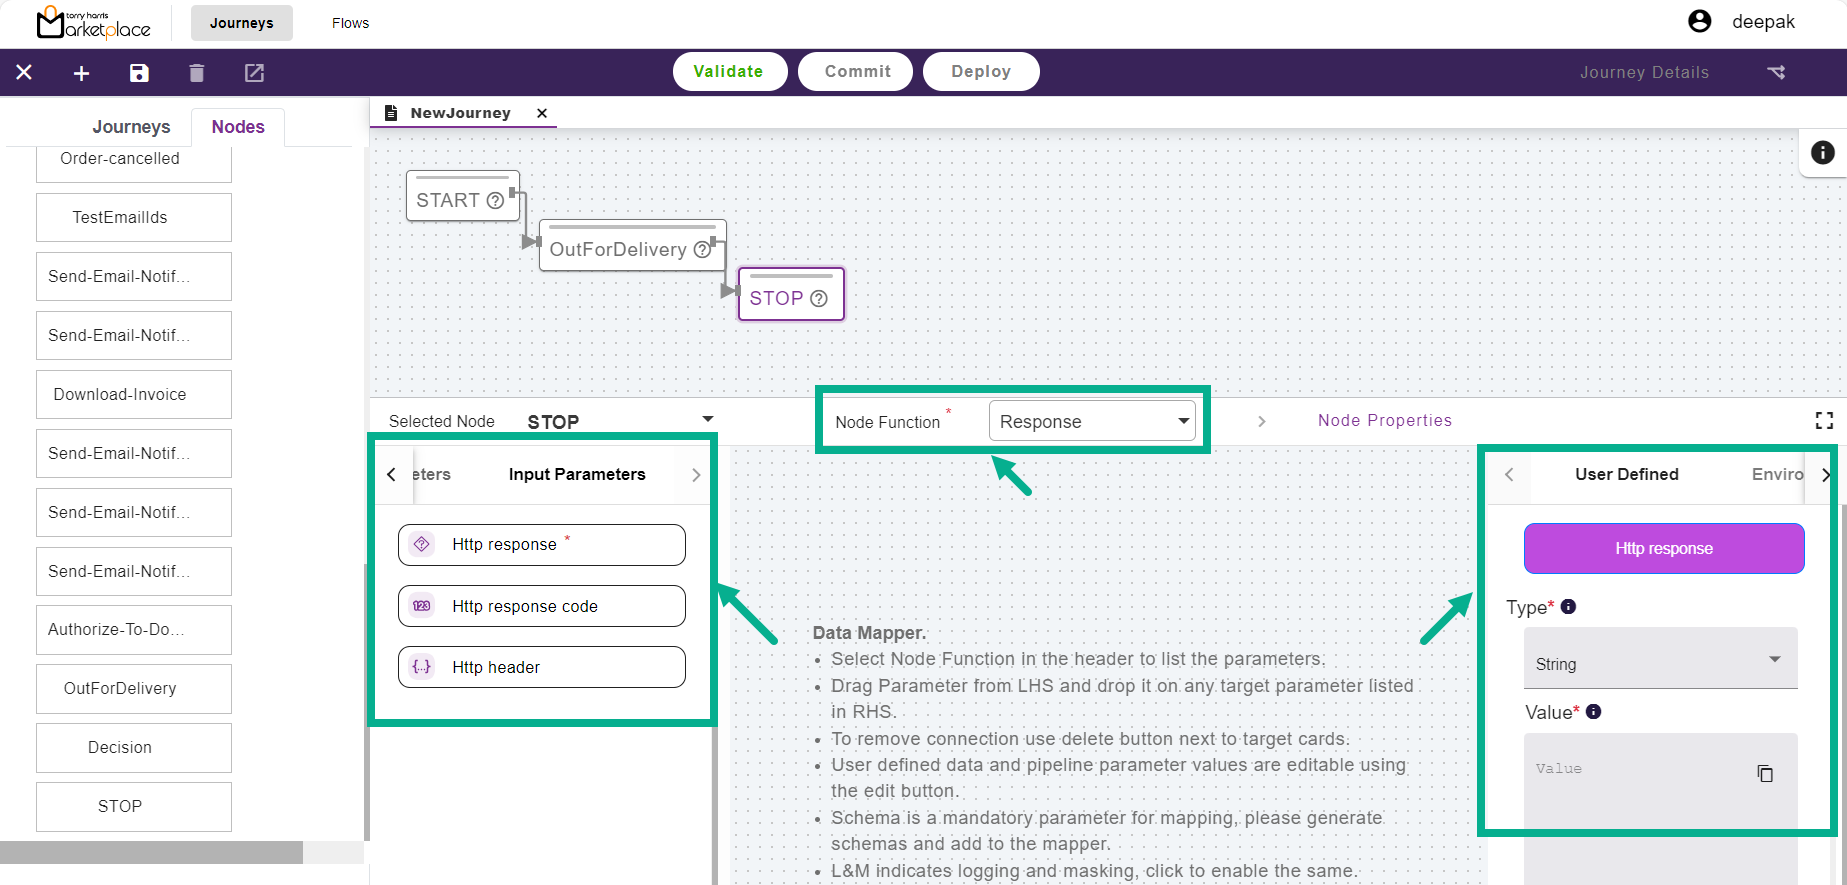
From the drop-down menu, select the Node Function.
Drag and drop the preferred Input Parameters into the User Defined area.
From the drop-down menu, select Type.
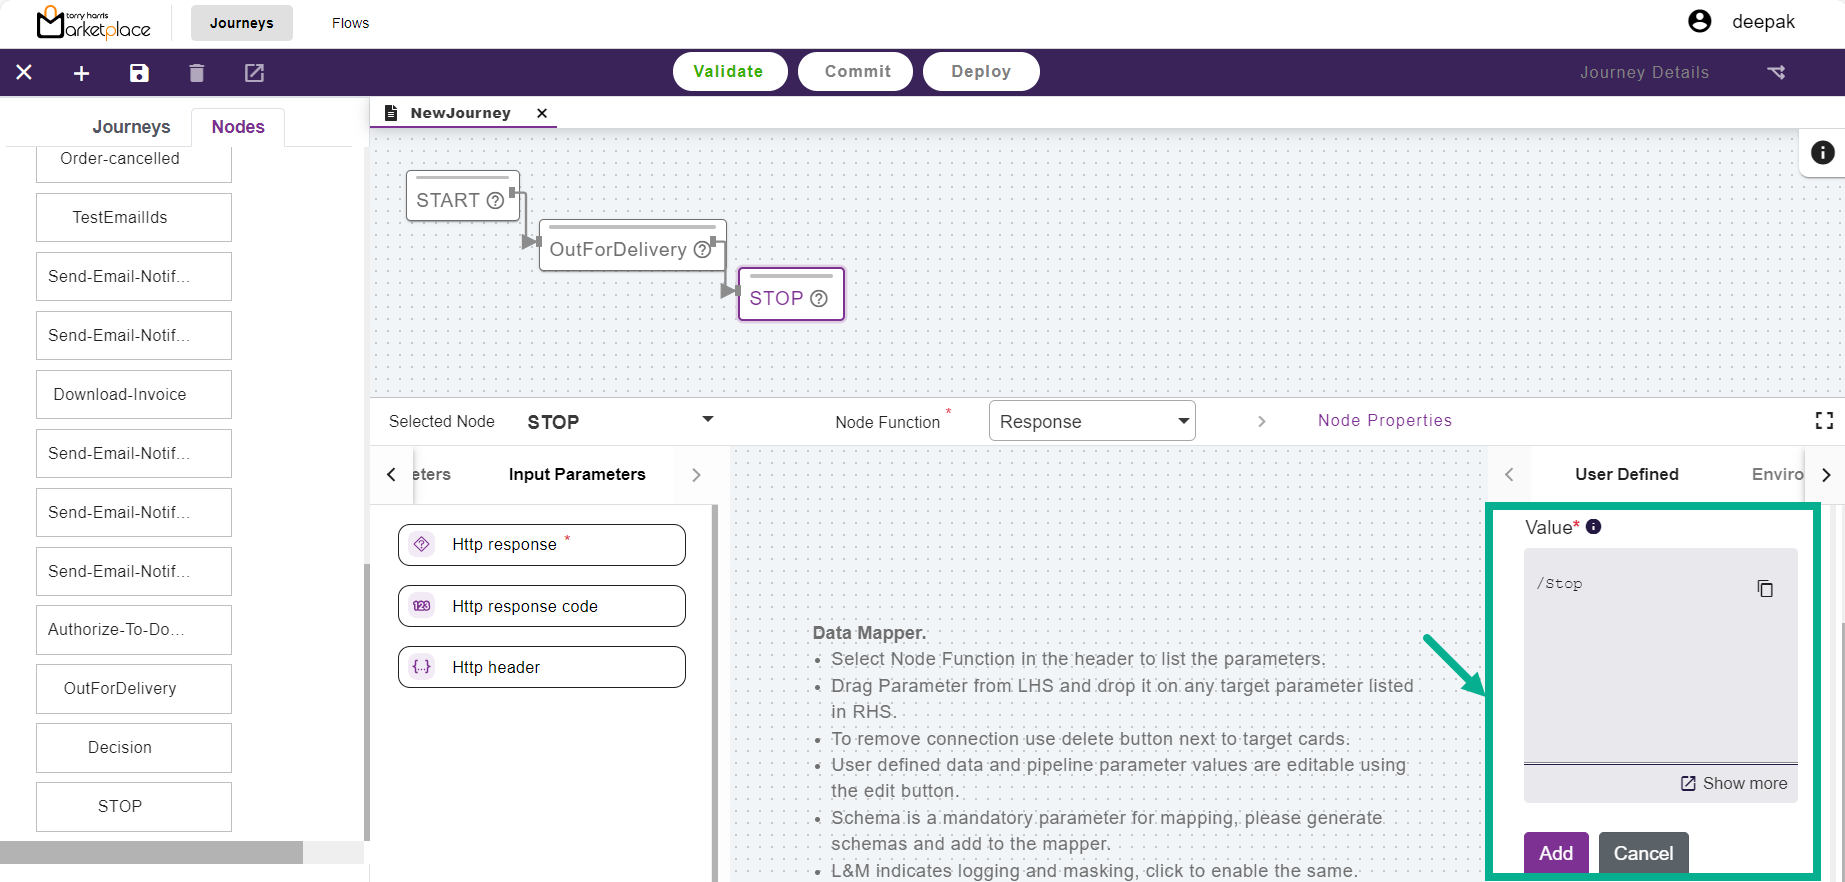
Enter the Value.
Click Add.
Data is mapped and displayed in the binding panel.
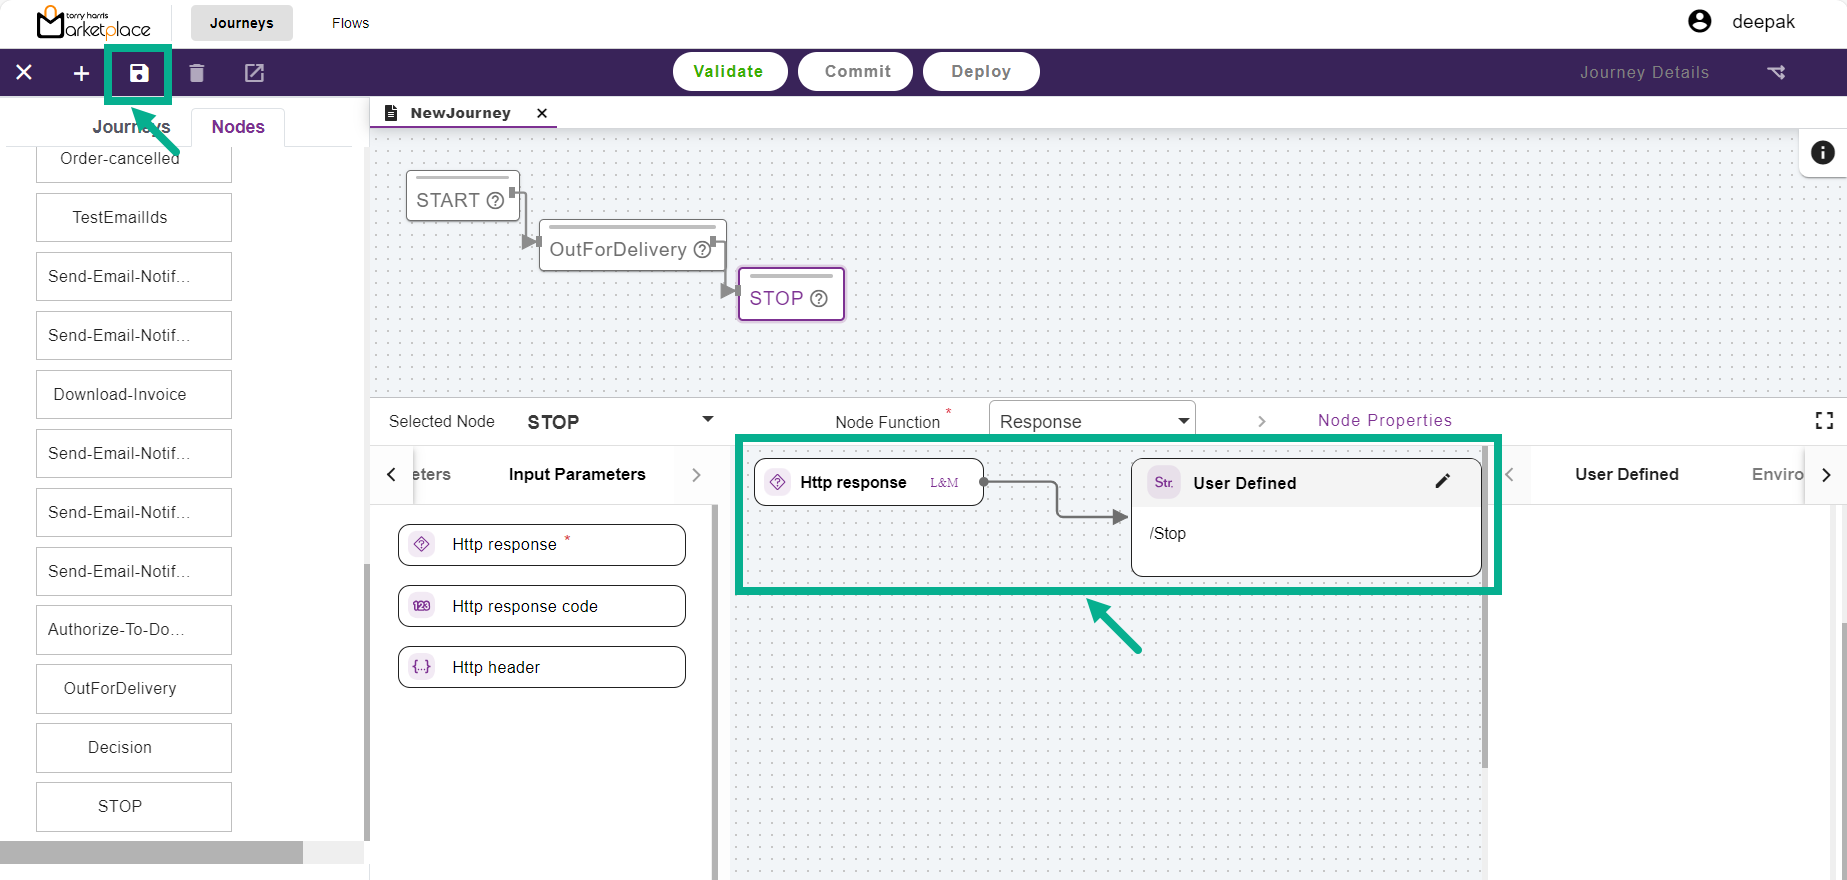
- Click the Save icon.
The Save Flow dialogue box appears as shown below.
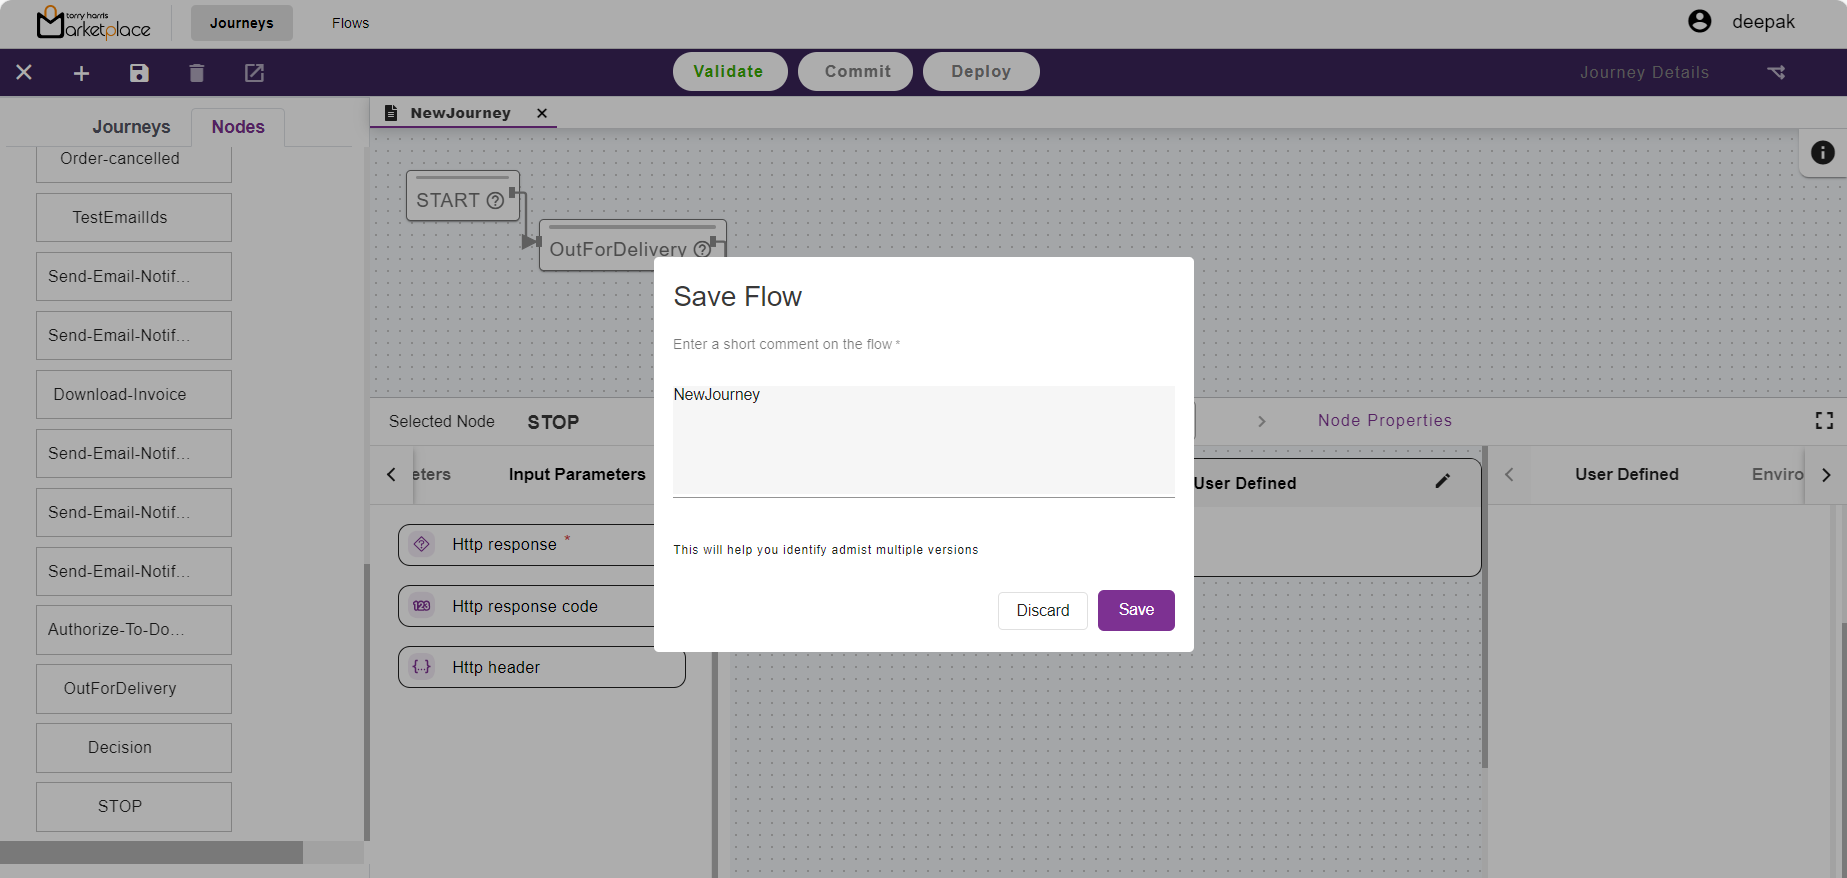
Enter the Comments.
Click Save.
On saving, the confirmation message appears as shown below.
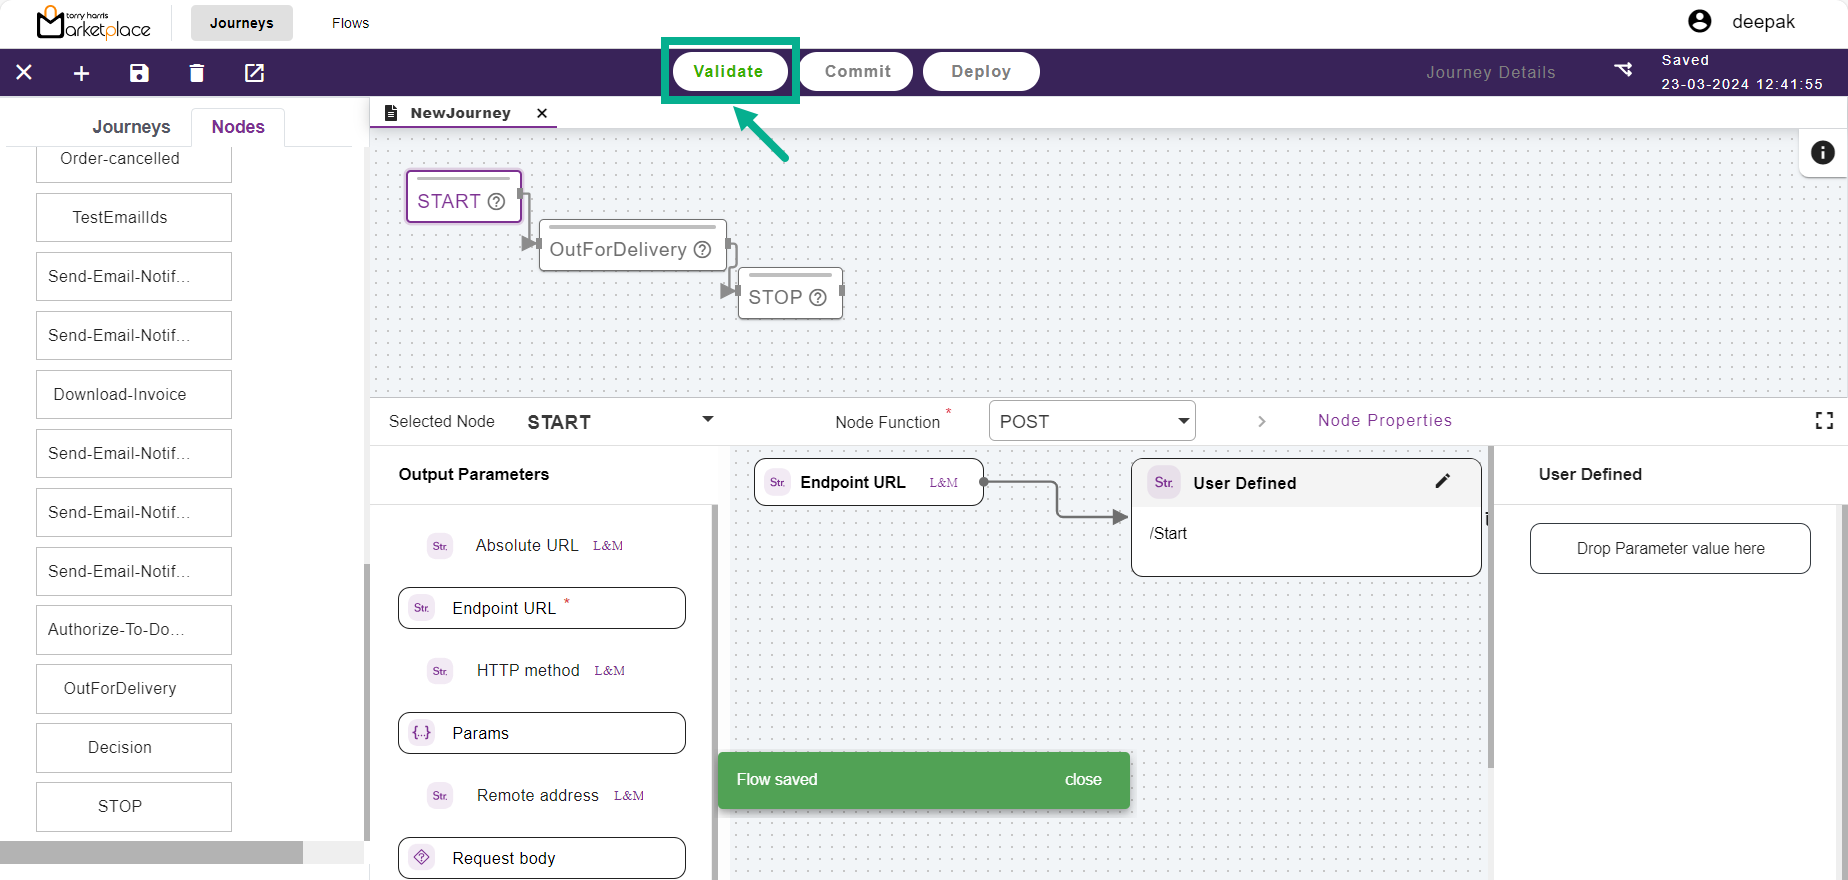
- Click Validate.
On validating, the confirmation message appears as shown below.
- Click Commit.
On committing, the confirmation message appears as shown below.
- Click Deploy.
The Journey Details dialogue box appears as shown below.
Click the Undeploy button to undeploy the journey.
Configuring the Service product template slot details
- To configuring the Service product template slot details, click it.
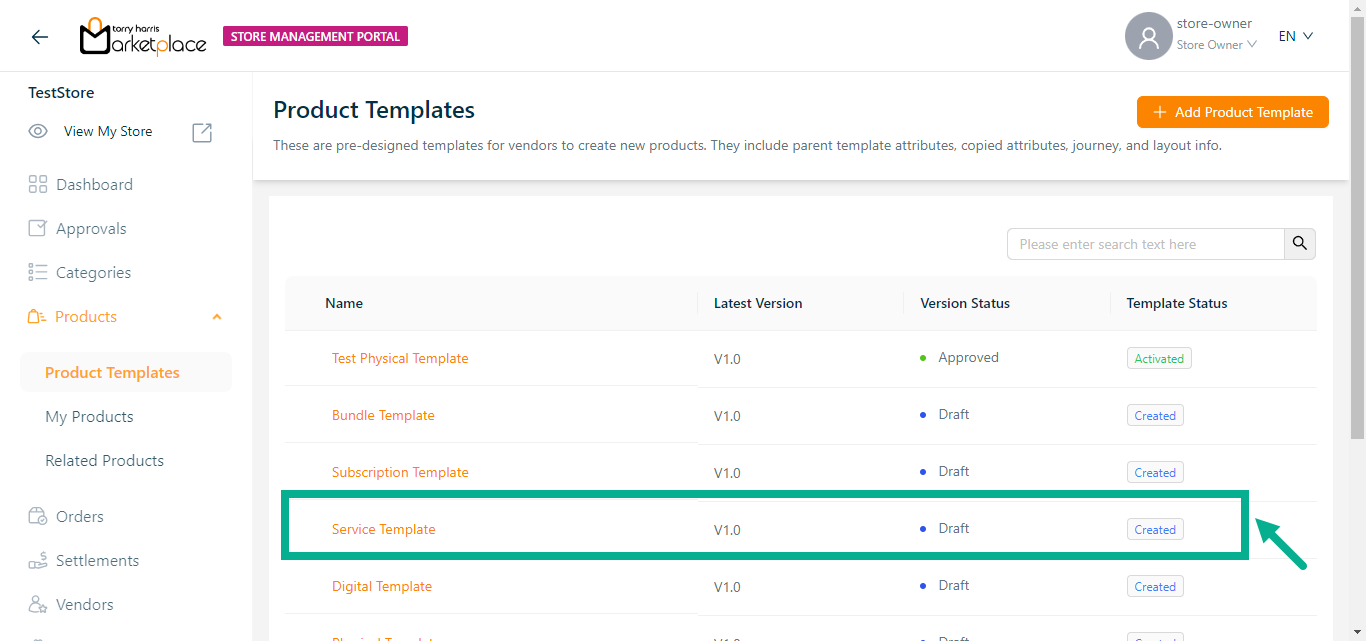
The respective product template appears as shown below.
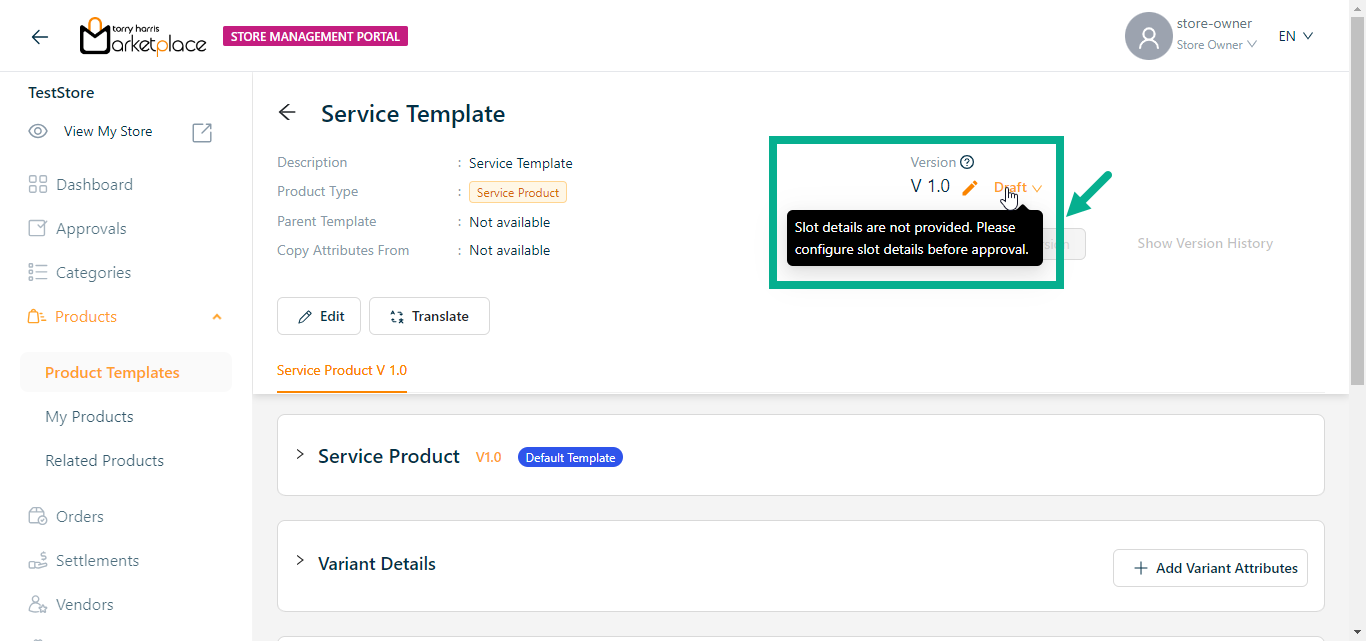
Configure the Service product template slot details before submitting the product template for approval.
- Click the Cog Wheel icon after you've navigated to the Product Template Slot Mapping section.
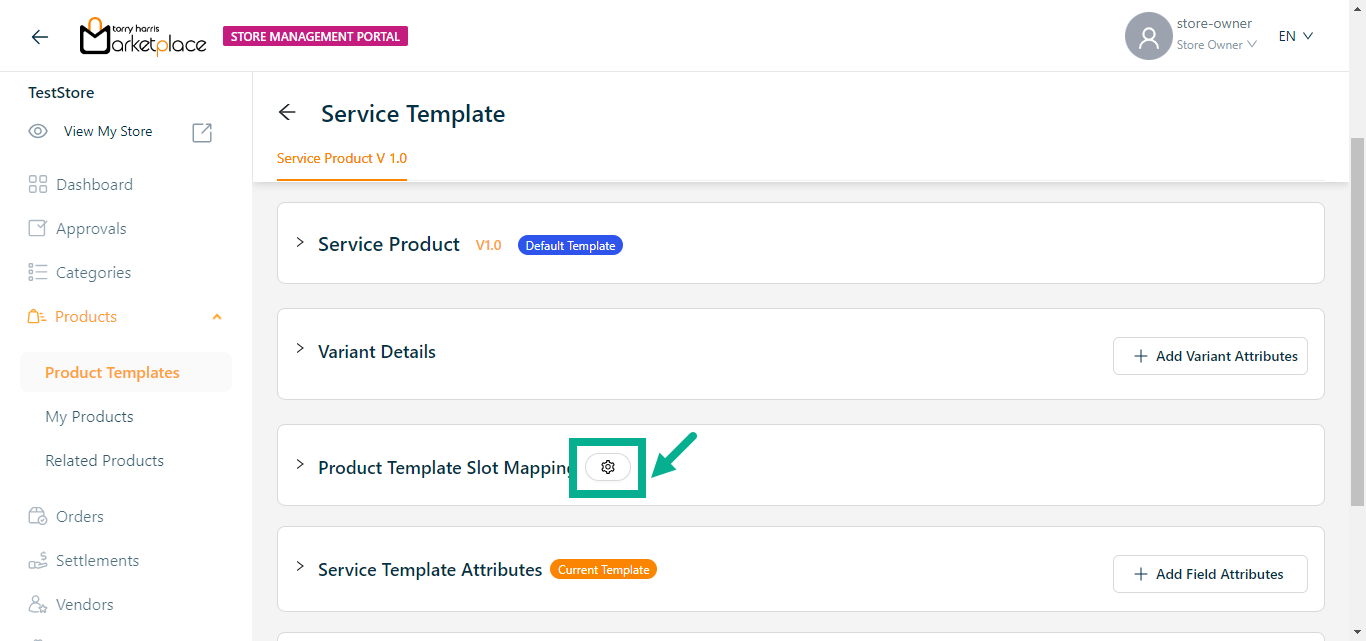
Slot Group Attributes dialogue box appears as shown below.
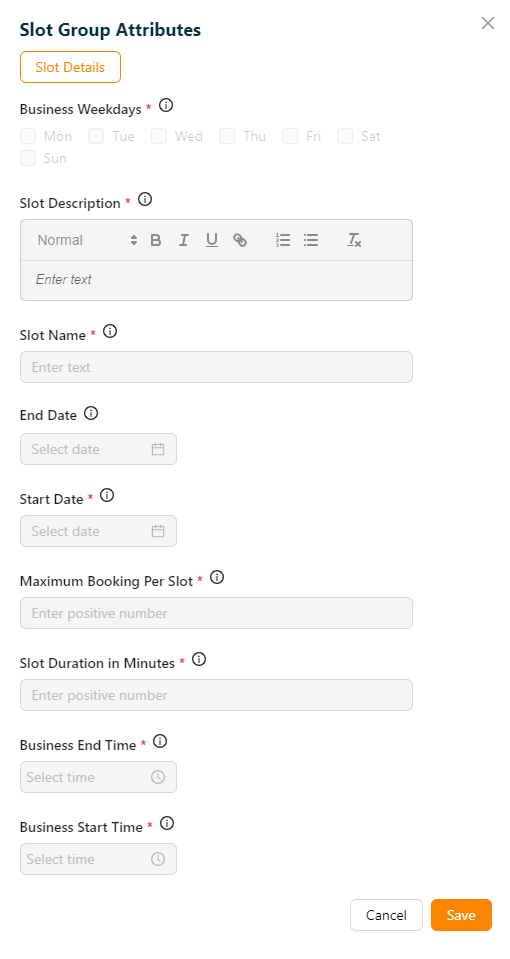
- Click Save.
On saving, the confirmation message appears as shown below.

Approving a Product Template
- To approve the particular product template, click it.
The respective product template appears as shown below.
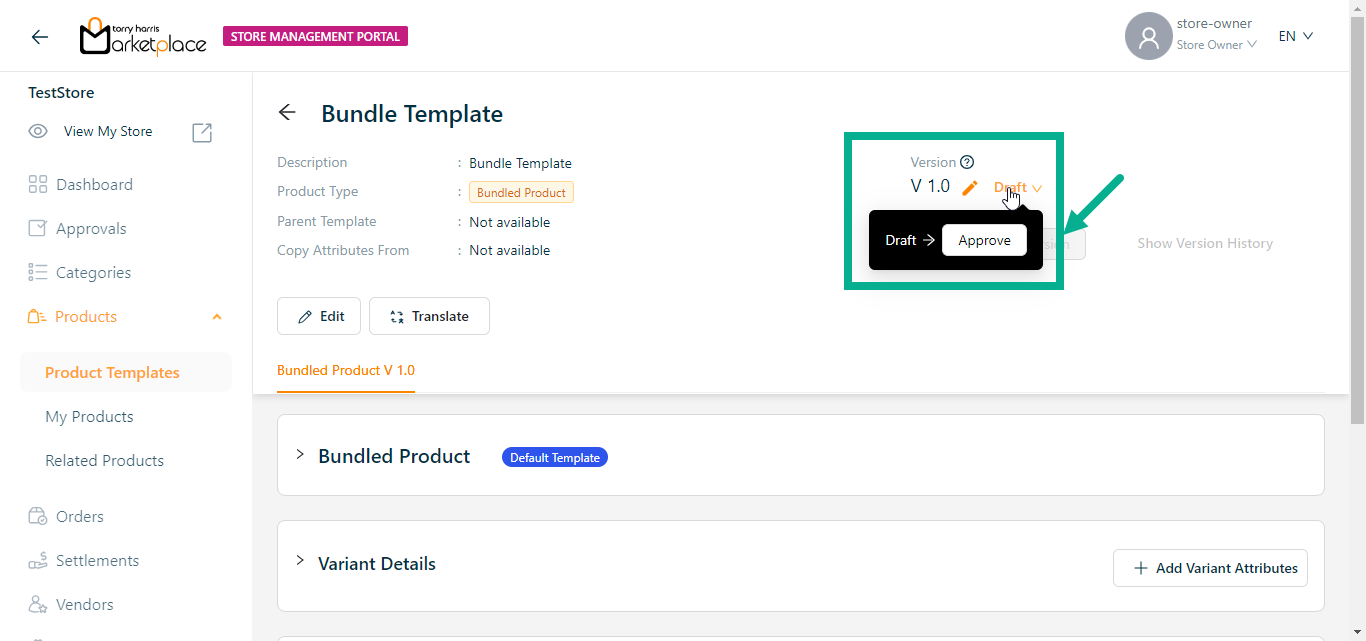
- Click Approve from the drop-down.
The confirmation dialogue box appears as shown below.
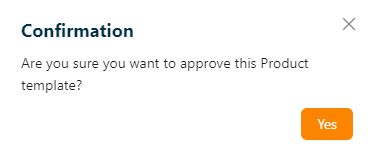
- Click Ok.
On approving, the confirmation message appears as shown below.
Deprecate a Product Template
- To deprecate a particular product template, click the approved product template.

The respective product template appears as shown below.
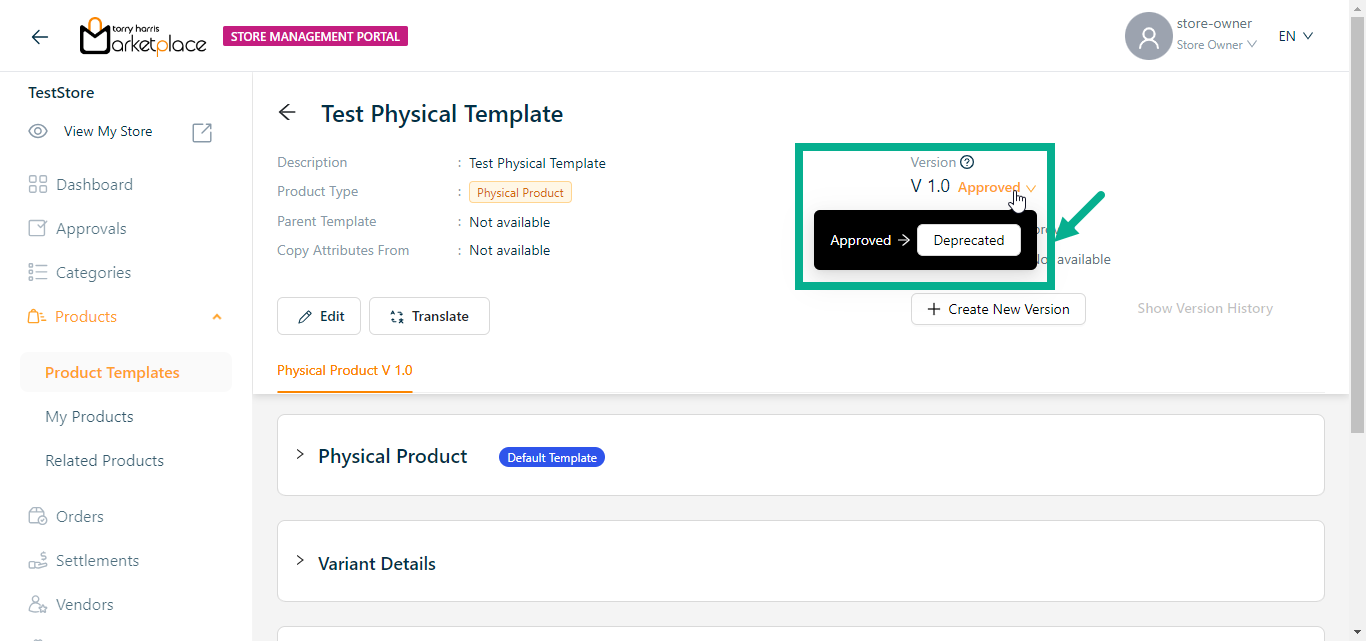
- Click Deprecated from the drop-down.
The confirmation dialogue box appears as shown below.
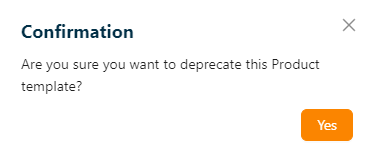
- Click Ok.
On deprecating, the confirmation message appears as shown below.
Retiring a Product Template
- Click Retired from the drop-down.

The confirmation dialogue box appears as shown below.
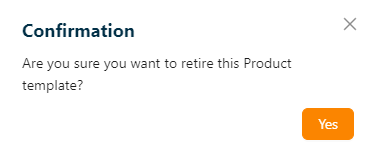
- Click Ok.
On retiring, the confirmation message appears as shown below.

Creating a new version
The user can not create a new version when the product template is in draft status.
- To create a new version of a particular product template, click it.
The respective product template appears as shown below.
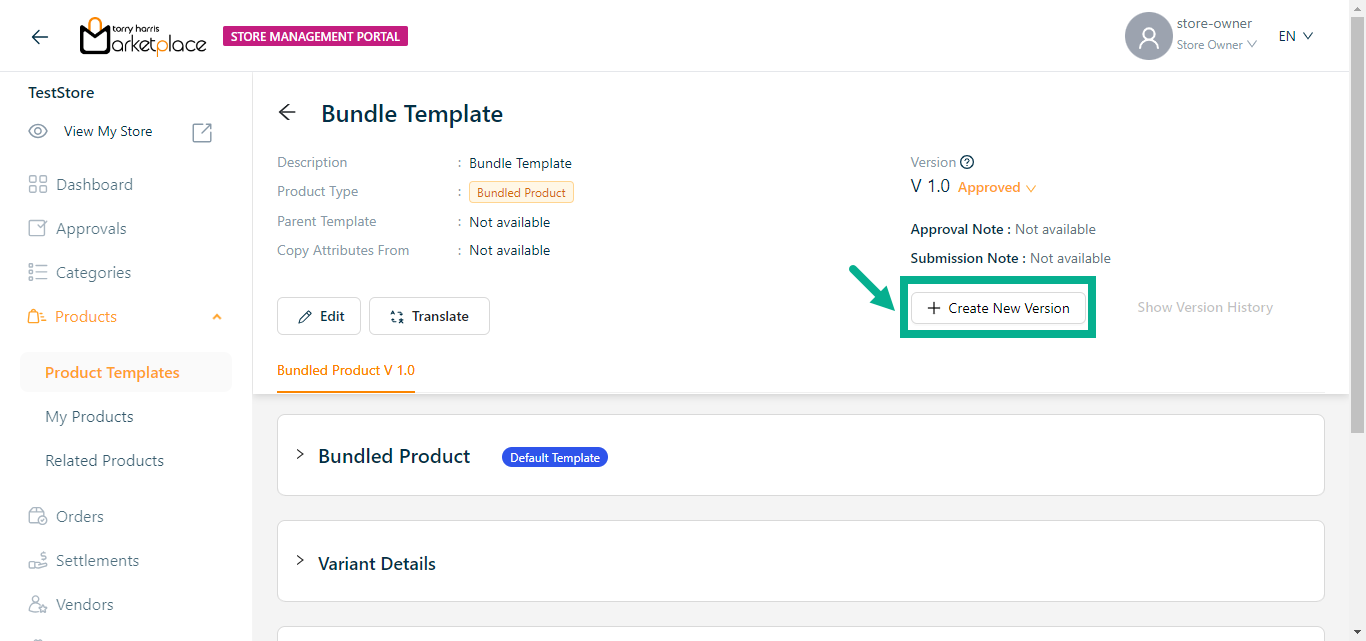
- Click Create New Version.
The Create Product Version dialogue box appears as shown below.
The procedure for creating a new version differs based on which Version Type is selected.
The steps to create a new version are provided below if Version Type is selected as Create Version.
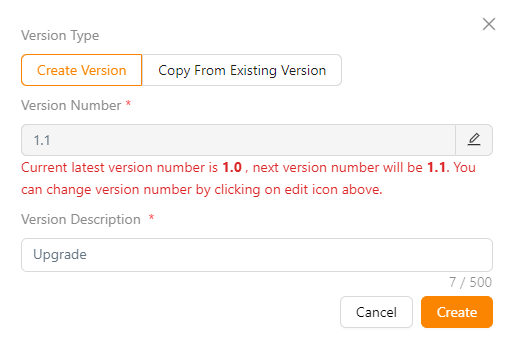
a. Select the Version Type as Create Version.
b. Click the Edit icon to edit the version number.
In the case when the most recent version number is 1, the amended version number should be 1.1 or higher.
The new version of the product template is created with any of the available product types.
c. Enter the Version Description.
d. Click Create.
On creating, the confirmation message appears as shown below.
The steps to create a new version are provided below if Version Type is selected as Copy From Existing Version.
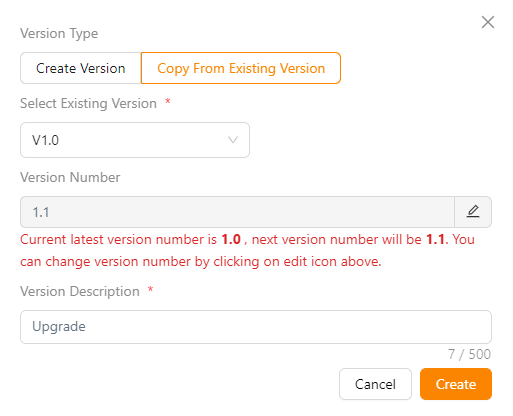
a. Select the Version Type as Copy From Existing Version.
b. Select Existing Version from the dropdown.
c. Click the Edit icon to edit the version number.
In the case when the most recent version number is 1, the amended version number should be 1.1 or higher.
The new version of the product template is created with any of the available product types.
d. Enter the Version Description.
e. Click Create.
On creating, the confirmation message appears as shown below.
View the Version History
- To view the version history of a particular product template, click it.
The respective product template appears as shown below.
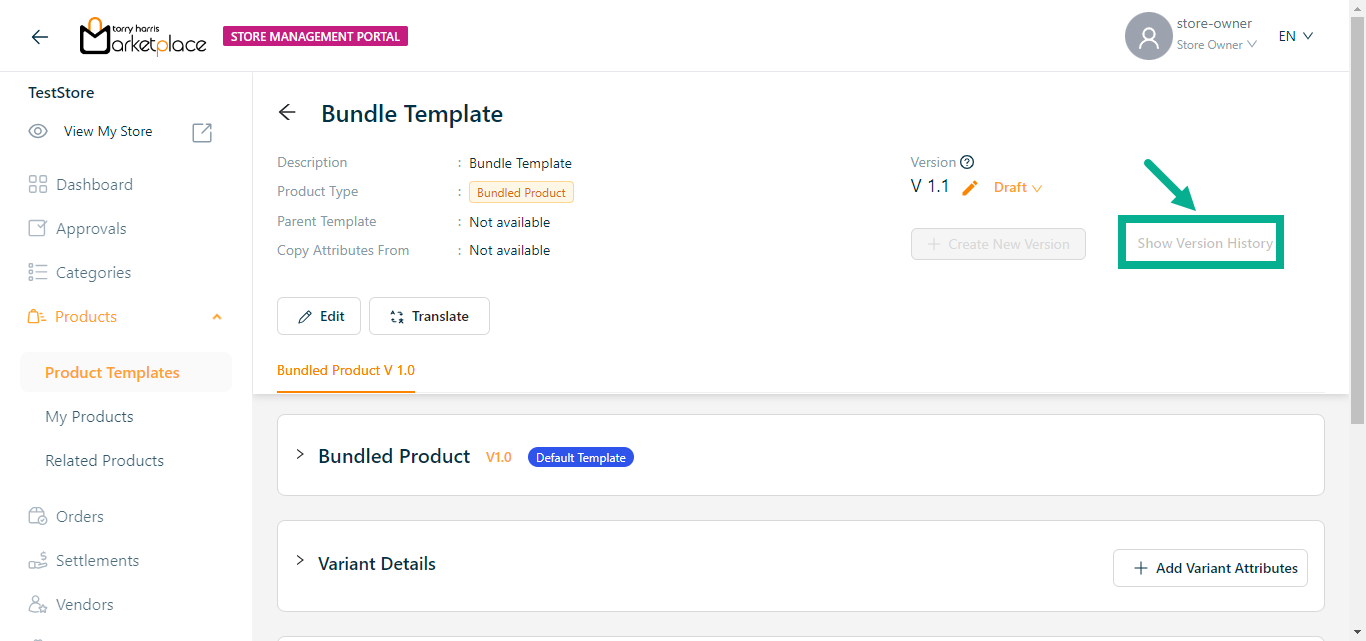
- Click Show Version History.
The Version History dialogue box appears as shown below.

By clicking the relevant version in the version history, user can move between versions of the product template.